1. Overview
To use Batch Entry requires the following steps
- Create a new Batch Entry Header. Ensure you enter the total expected amount
- Add the Batch Line Items.
- Process the Batch. Note, processing can only occur if the sum of the line items (in step 2) add up to the expected Batch Amount (from step 1)
2. Creating a Batch Entry Header

From the Batch Entries Tab (1), Press the New Button (2)
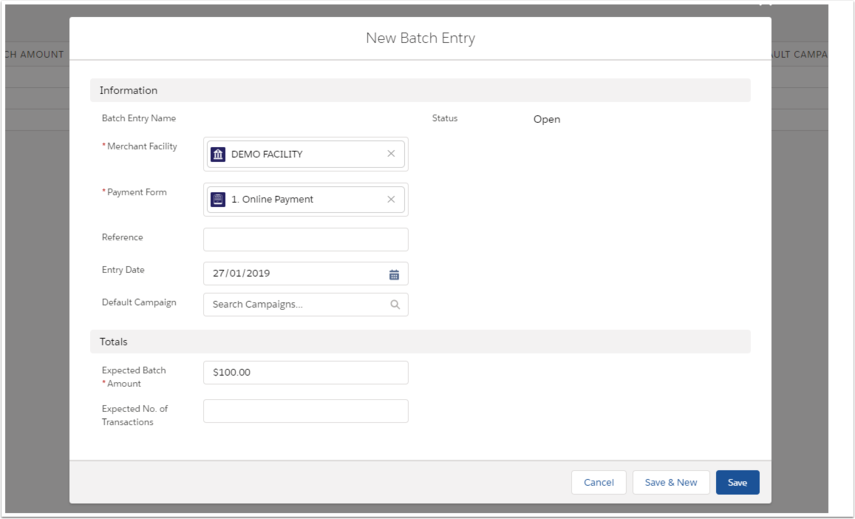
Enter details for the Batch Entry.
Default Campaign: If the line items are mostly going to be for the same campaign, then select a campaign here to save entering each time
Expected Batch Amount: This is the sum of all payments/donations that will be associated with this Batch.
3. Adding Batch Line Items

Enter the Batch Line Item Details
- Enter details for the payment
- Press Save & New to enter the transaction.
- After saving the Batch Line Item will refresh. This related list shows all line items related to the Batch
- The progress bar indicates how much of the batch has been entered so far
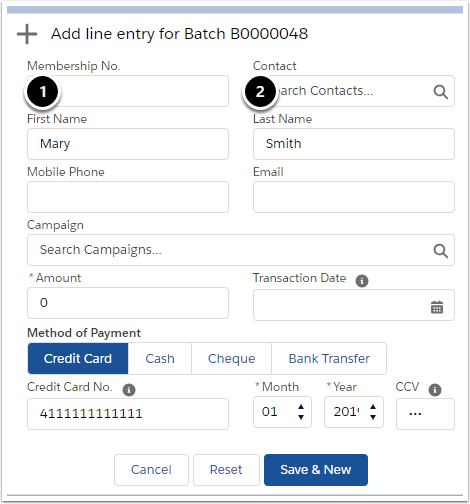
(1) Membership No. Search
The Membership Number (or sometimes renamed to Supporter No.) allows for the quick location a contact.
On the Contact record, there is a "Membership No" field. When entering batch line items, if this membership number is entered and then the user tabs out of this field, the system will locate the contact based on this number and will populate other contact details such as Contact - First name, last name email, phone etc.
(2) Membership No. Search with Campaign
On the Campaign Object, there is a field call Campaign Code. If this is combined with the membership number with a "-" separator, then the membership number will be search and the campaign will be assigned to.
So, if you had a membership number of "88" and a campaign code of "X2018", then if you enter "88-X2018" in the membership number field and tab off, the system will locate the contact based on membership No. 88 and will locate Campaign based on campaign code "X2018".
This feature is designed to work with bar code scanners where the bar code stores this information.
This can be used manually as well and has been explained further in This Article.
(3) Customer Search
As you start typing the contacts name, a list of contacts is shown. Select the correct one. This will then populate fields such as first name/last name etc.
Tips for getting started with bar code scanners
- You can use a true type font, such as Code 3 of 9 - Try: https://www.barcodesinc.com/free-barcode-font/
- If using Code 3 of 9, you'll need to put and * before and after. For example *88-X2018*
- If using Code 3 of 9, make sure you are using the extended version so that the "-" will get regonised
- Set your scanner to do a tab after reading the barcode
- MS Word will often try and proportionally space the text. Use WordPad instead so that you get a better quality barcode.
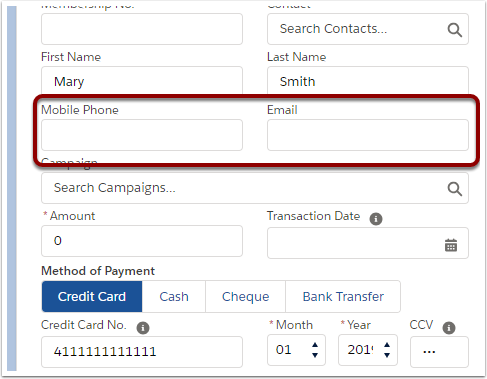
The fields shown in the highlighted section can be changed to meet your needs. You system administrator can add/remove selected fields form the fieldset on the Payment Txn Object called "batchEntryLine".
From Version 9.9 and onwards, custom fields can be added in the the Batch Entry Line view. Refer to Batch Entry - Custom Field for details.
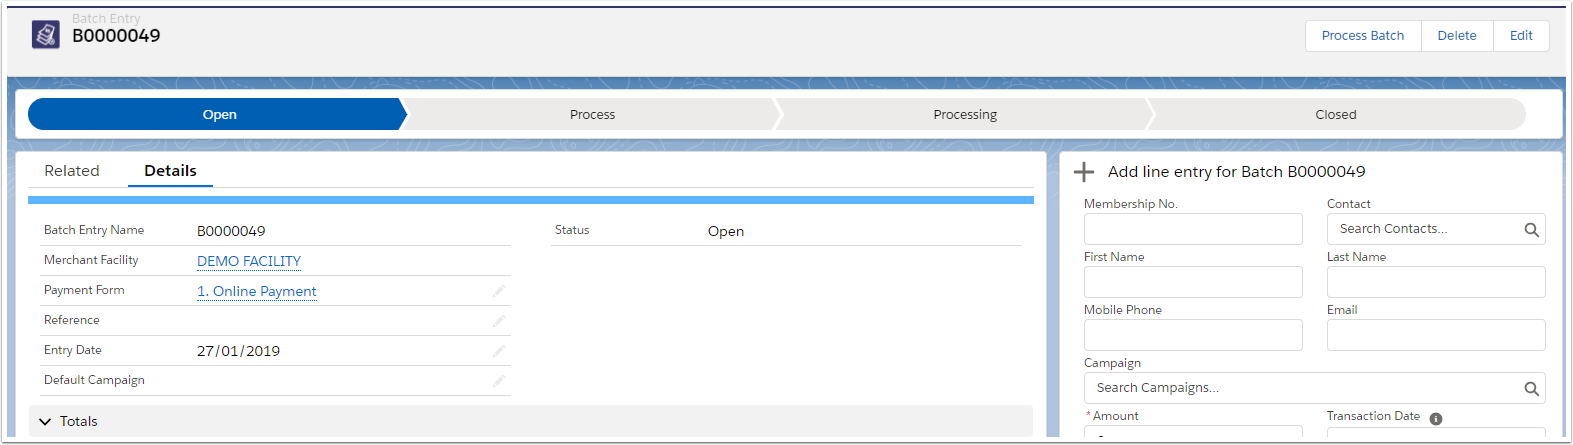
4. Processing the Batch
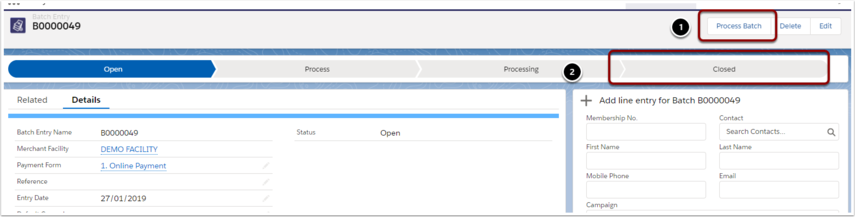
After all lines have been entered and the expected amount matches the actual amount, press the "Process Batch" (1) button.
This will submit a background job that will then charge all cards that need charging and generate receipts as required.
The status of the batch will changed to Closed (2) after the process is complete.
Changes cannot be made to the batch once it has been submitted for processing.