You may link Payments2Us to almost any object in salesforce.com, including Custom Objects.
- Create a lookup from Payment Txn’s Object to your destination Object.
- Create a Custom Button(s)
- Add these to the page layout.
Note: if you wanted to allow for payments with leads, then a new field of type lookup, would be added to the Payment Txn’s (AAkPay__Payment_Txn__c) Object.
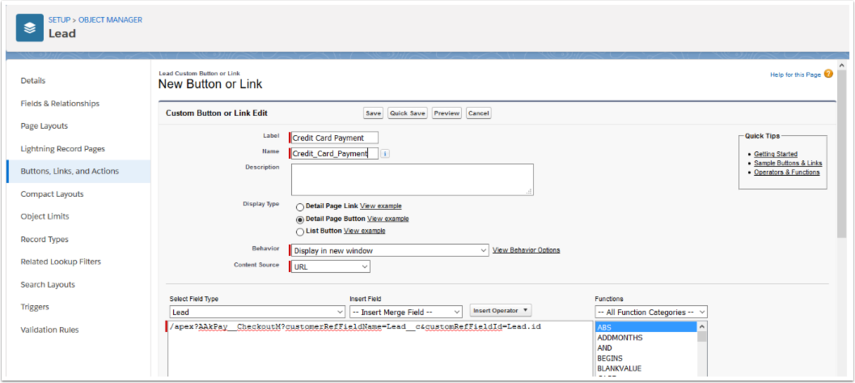
The button must be created on the destination object. In the above example, the button would be created on the leads Object.
Use the following URL's
- For Credit Card Payments, “/apex/AAkPay__CheckoutM?customRefFieldName={xxxxx}&customRefFieldId ={yyyyy}"
- For Manual Payments “/apex/AAkPay__manualPaymentL?customRefFieldName={xxxxx}&customRefFieldId ={yyyyy}"
Where {xxxxx} is the internal fieldname that was created on Payment_Txn__c object, for example lead__c
Where {yyyyy} is a record id of the object that is being linked to. In the lead example, this would be the button merge field of {!Lead.Id}
Note: If this needs to be available externally make sure the field is made public using the following steps: How to make a custom field visible on public web forms
For more information on URL Parameters go to: How to use URL Parameters
Please also make sure the Force.com Sites Profile has at least Read access to the target (lookup object). Review example objects used in standard Payments2Us setup.
AND Make sure there is Criteria Based Sharing setup so the Force.com sites users has access to the records in the object. Review examples of rules setup in standard Payments2Us setup.