1. Import Fundraisers
Many third part fundraising platforms will have the ability to track Fundraisers. This is particularly true for Peer-to-Peer fundraising platforms where the Fundraiser might organise an event, but may/may not provide an actual donation.
When using Payments2Us with the Nonprofit Success Pack, the fundraiser will get the Soft Credit for all donations that were linked with them. For example, if a fundraiser did a cycling event around the country and organised for a number of people to sponsor them, then they would get a Soft Credit for all of the donations raised, but the individual donors would get hard credited for their own individual donations
In order to soft credit donations to a Fundraiser, the Fundraiser must first exist in the system. Use this process to import the fundraisers (without any donations), then use a second import to import the donations and link those donations with the fundraiser.
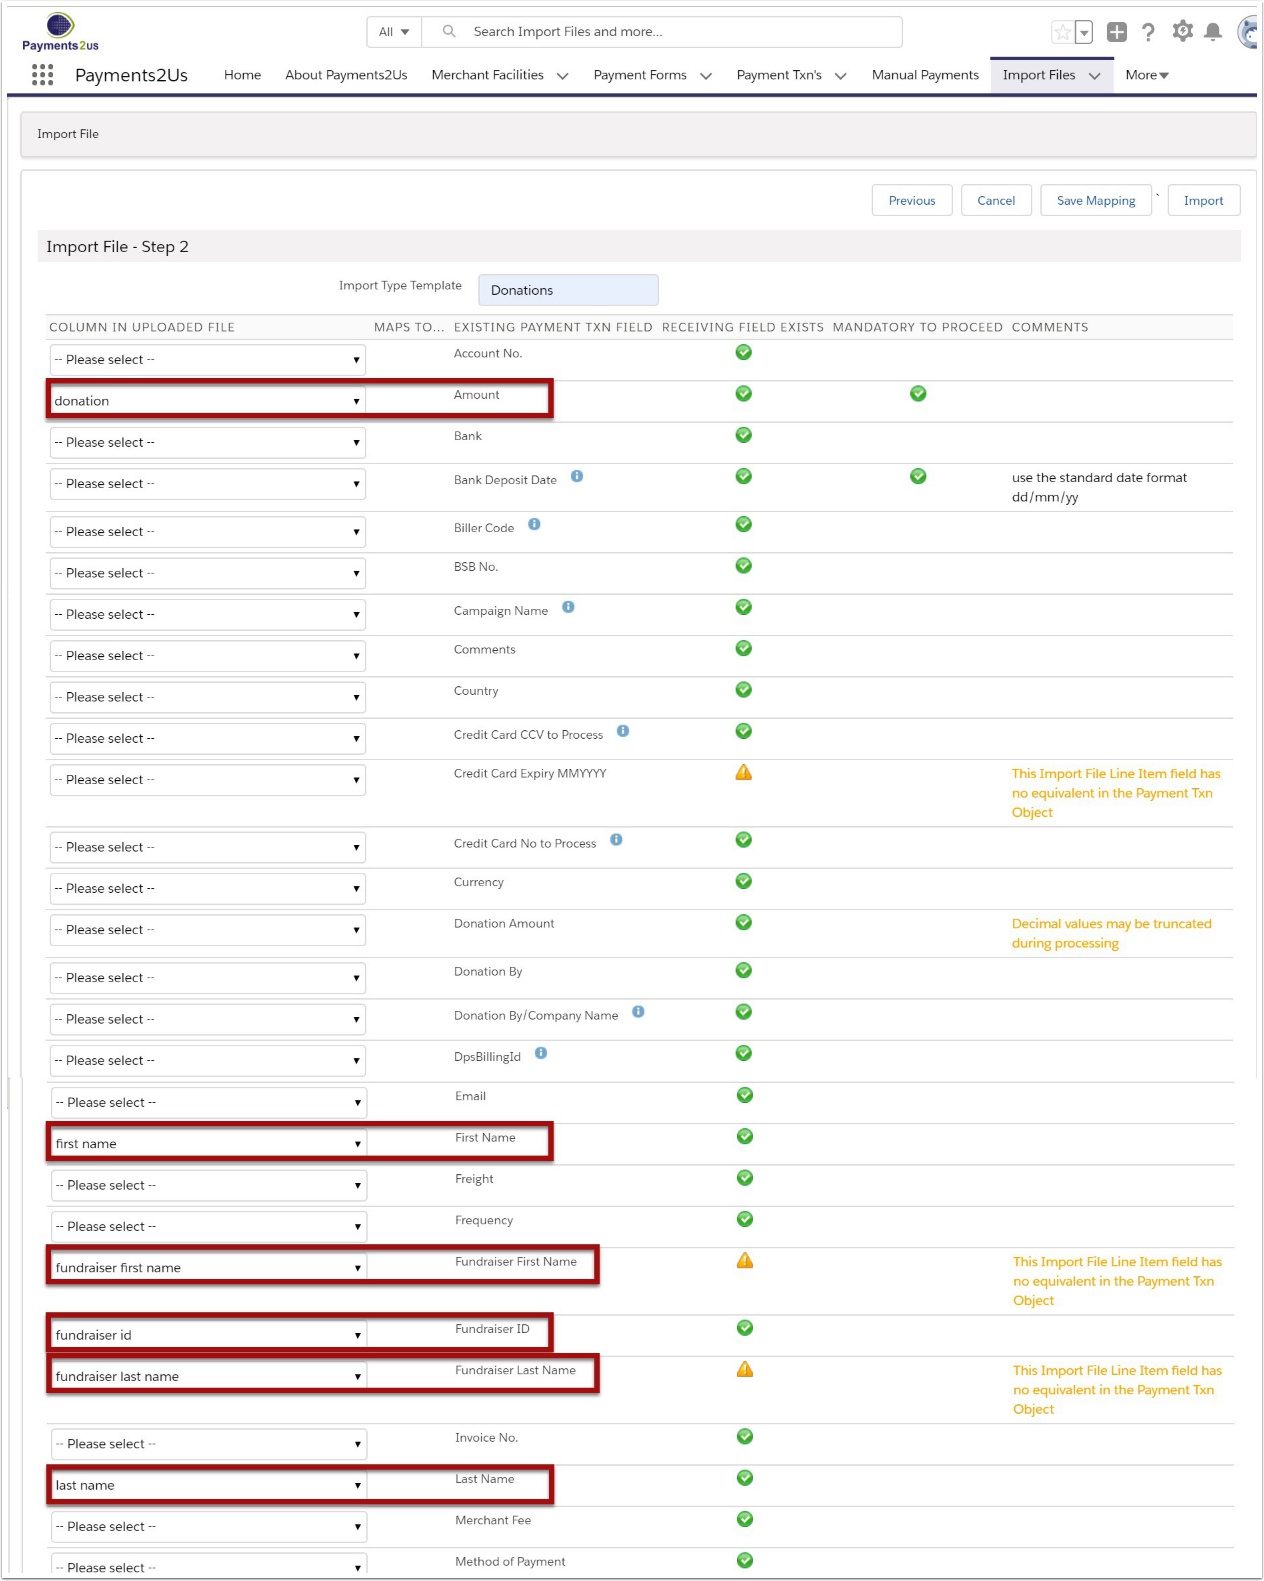
1.2. Match Columns
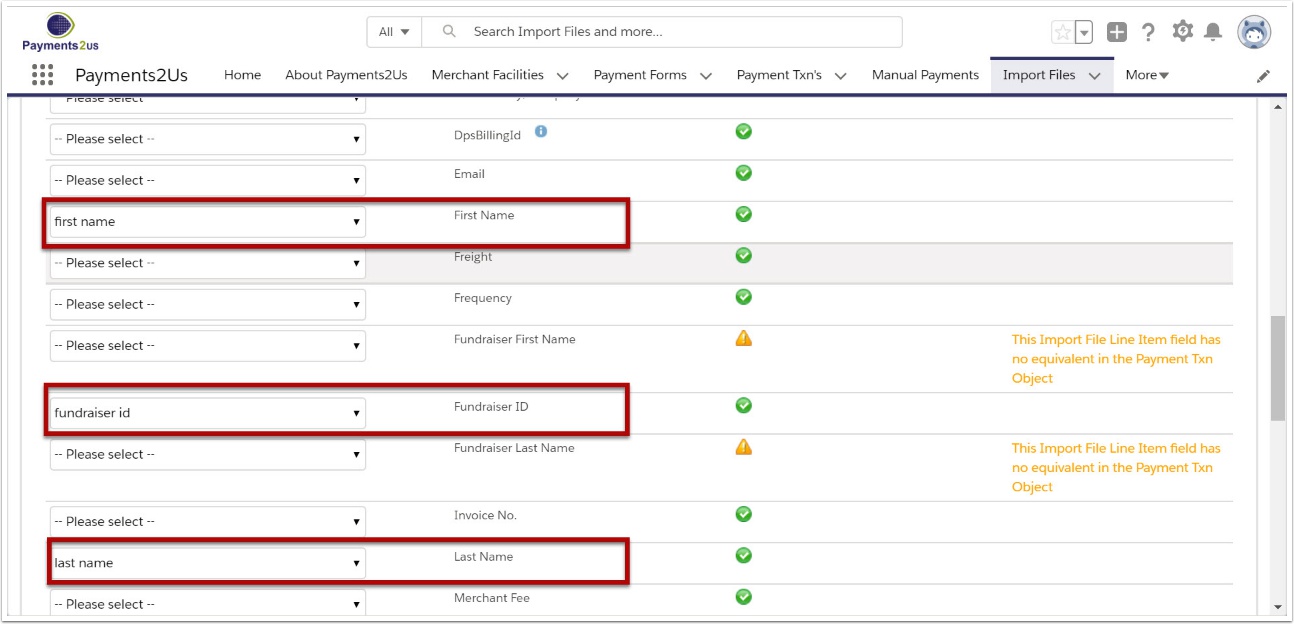
Match the columns in your CSV file with the data in Salesforce.
As a minimum, match first name, last name and Fundraiser Id
For the import of the fundraiser, do NOT match Fundraiser First Name, Fundraiser Last Name. These are used for uploading of donations (hard credit) and linking the donation to Fundraisers (soft credit).
1.3. Save Mappings for future loads
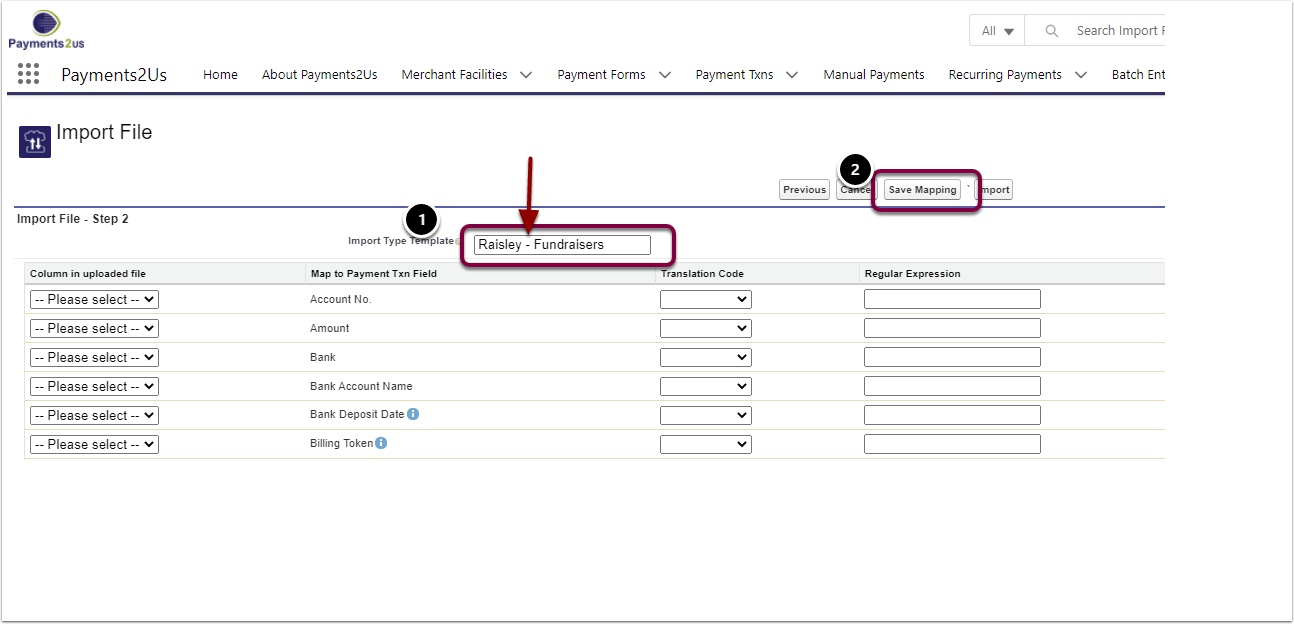
Enter a name for the Saved Mapping (1) and then press the Save Mapping button
Note, Saved mappings will now appear under the Import Type picklist on the first step of the Import Files wizard
The name before the " - " will be used as the Fundraiser Source. The Fundraiser Source is then stored on the the Contact "Fundraiser ID Source" and related list to the Contacts "Fundraiser IDs".
In the example below, the Fundraiser Source will be "Raisley"
If you are trying to upload Fundraiser Source and the fundraising No. to populate the Contact - related list "Fundraiser IDs", then please pay particularly close attention to the details in this procedure:
- Contact Upload Only checkbox on the first step is selected
- The template name used has {fundraising source} - {description}. There is a space before and after the hyphen " - ".
1.4. Submit for importing.
When finished mapping all fields, press the "Import" button.
After the import has finished press close
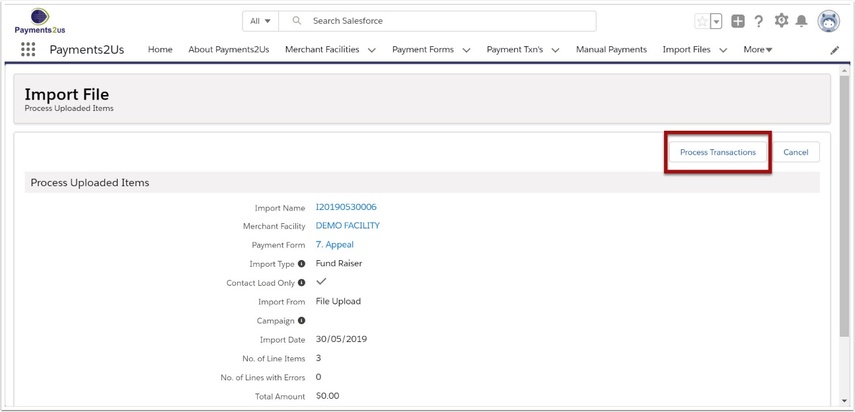
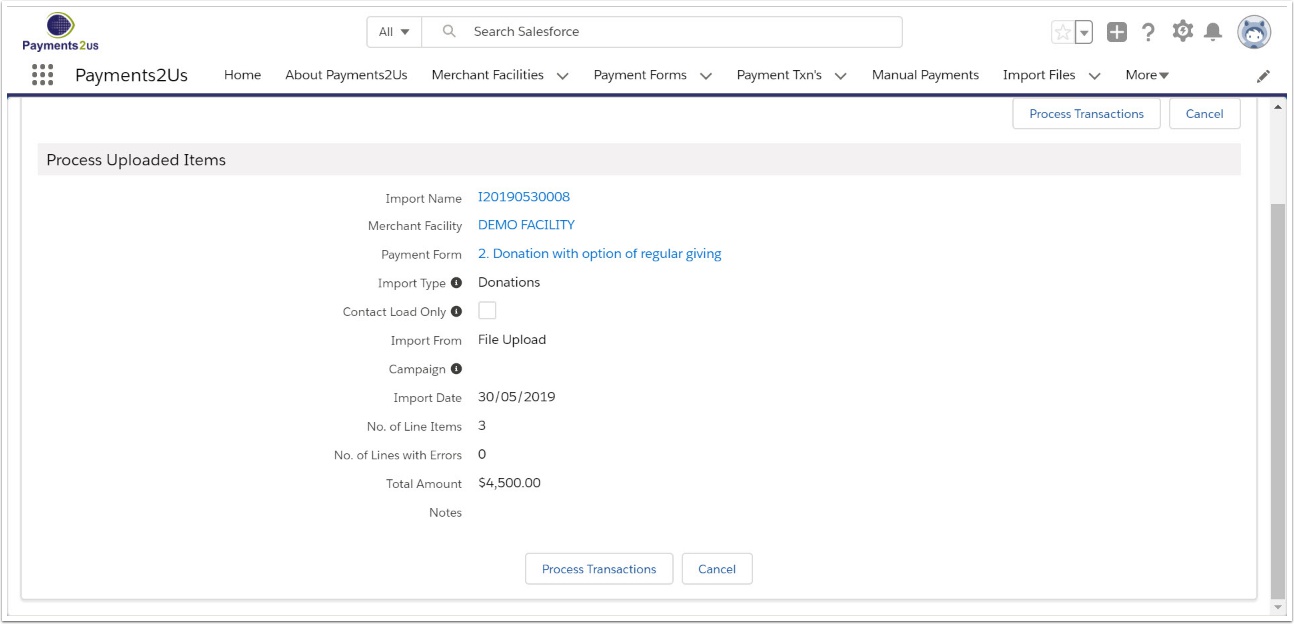
1.5. Process uploaded data
From the Import File header, Press Process.

The press Process button again to confirm.
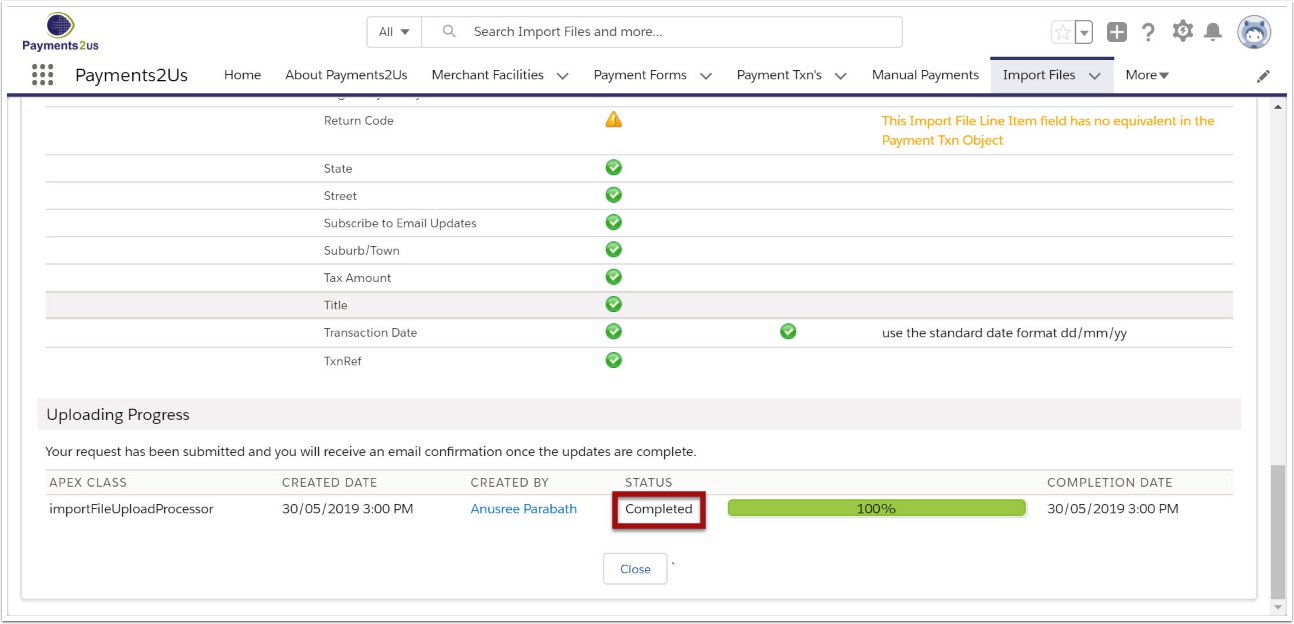
1.6. Wait for batch processor to complete
The Import files - Process uses the import line items data to create Payment Txn's.
After this process has completed, the Batch Processor will use the Payment Txn information to create/update objects just as Contacts, Accounts, Campaign members. You should wait for this process to complete first before uploading donations.
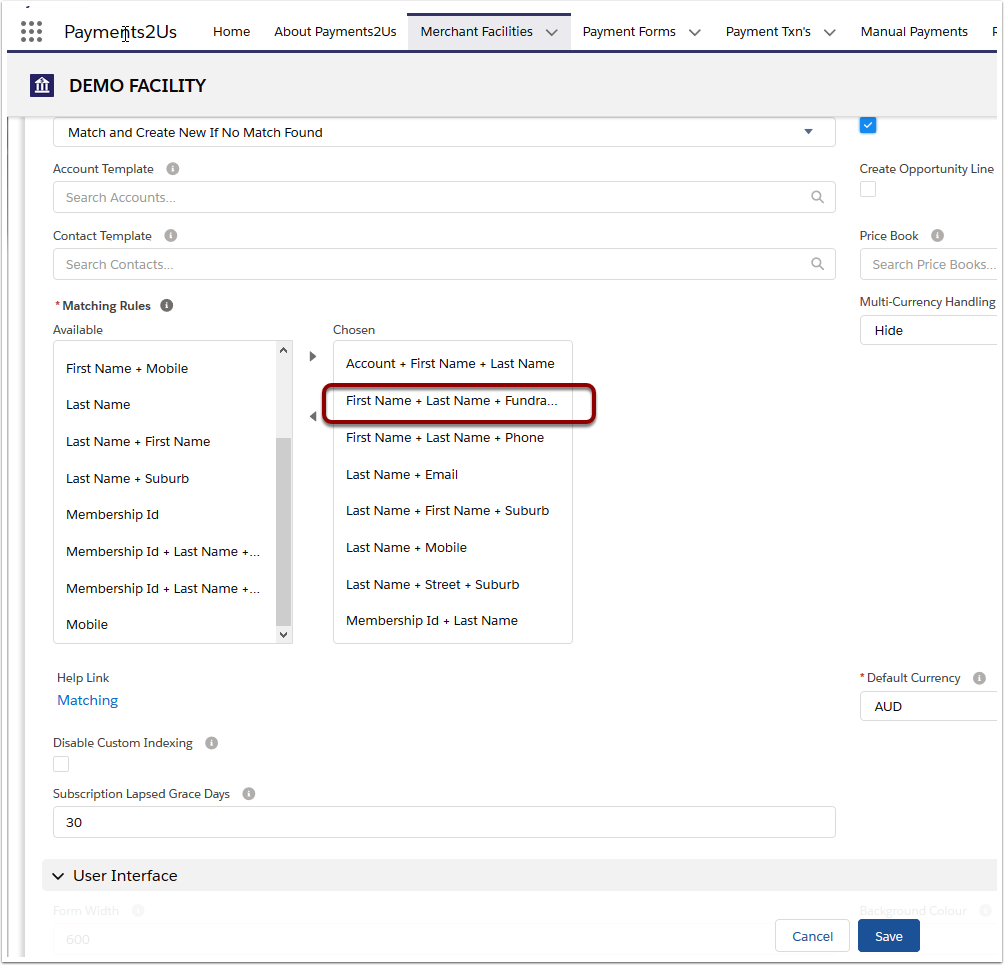
2. Matching Rule setup
As a once off setup, make sure the matching rules on the Merchant Facility include the "Fundraiser ID" option
3. Import Donations
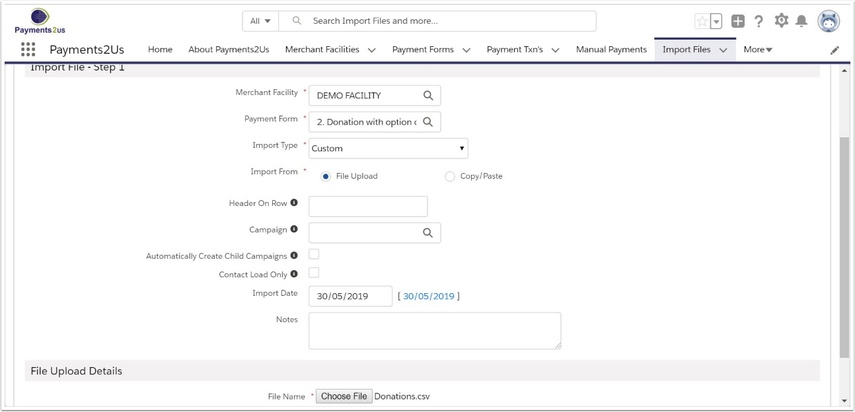
3.1. New import file for donations
Start a new import file for the donations.
Make sure your import file includes details for the donor and the donations, such as first name, last name, donation amount
AND columns for the fundraiser that is linked to the donation, such as fundraiser first name, fundraiser last name, fundraiser id (NOTE these details should have been included in the upload of fundraisers in this procedure)
3.2. Map CSV columns
Map the column in the CSV file with the data elements in Salesforce. Be sure to include a minimum of the fields highlighted below.
Once all you mapping is complete. Press the Import button and wait for the import processing to complete.
It is recommended that you use a Import File Template. You can enter any value you wish here and press Save Mapping (so it can be used for future use).
Note the name before the " - " is used for payment source and for the Fundraiser Id Source. In the example below, the Fundraiser ID source is set as "Raisley". This is important when using with multiple fundraising platforms as the same contact could be linked with multiple sources. The Fundraising Source is used as part of the matching process to ensure it link the donation with the correct fundraiser.
3.3. Process Imported data
From the Import File, press the Process Button
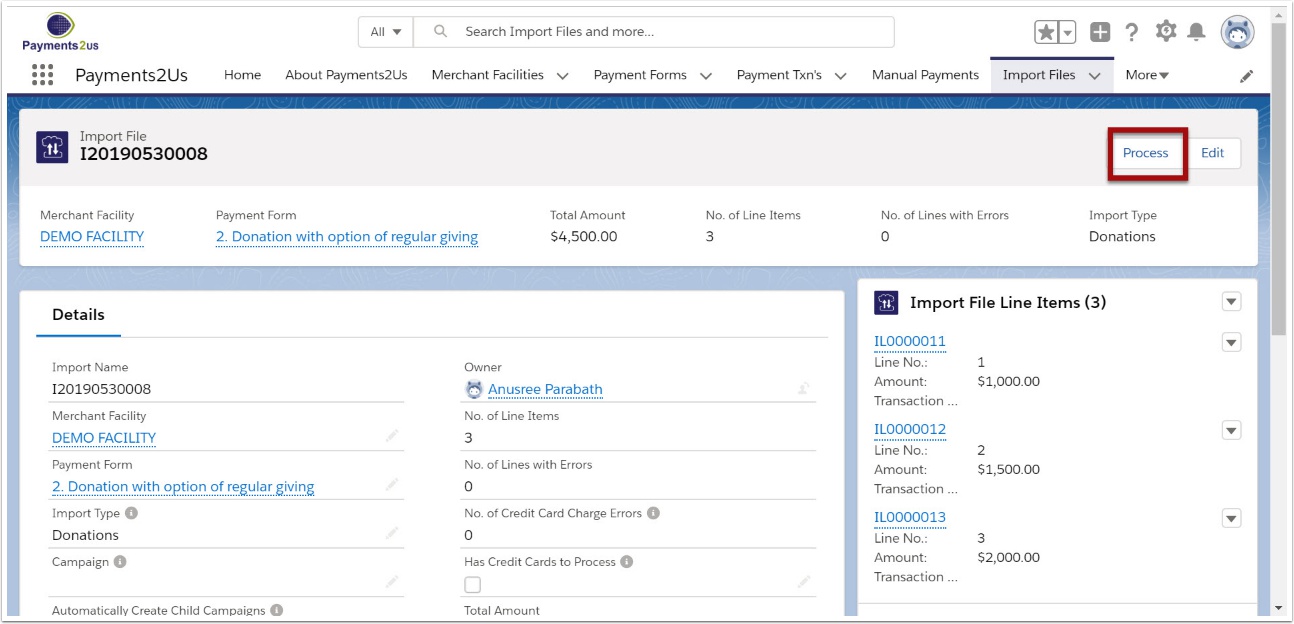
Then process again to confirm
3.4. Wait for Batch Process to complete
The Import File process creates Payment Txns.
There is a separate process that runs approximately every 10 minutes. This process uses the information in the Payment Txn file to create/update Accounts/Contacts/Campaign Members/Opportunities etc.