This procedure is no longer applicable.
Please use the Payment Form Builder to add text fields to the Checkout Forms. See procedure: How to configure a form using Payment Form Builder
This procedure was for the Classic Form.
Text fields were added to the Modern form in version 7.6.
Quick steps
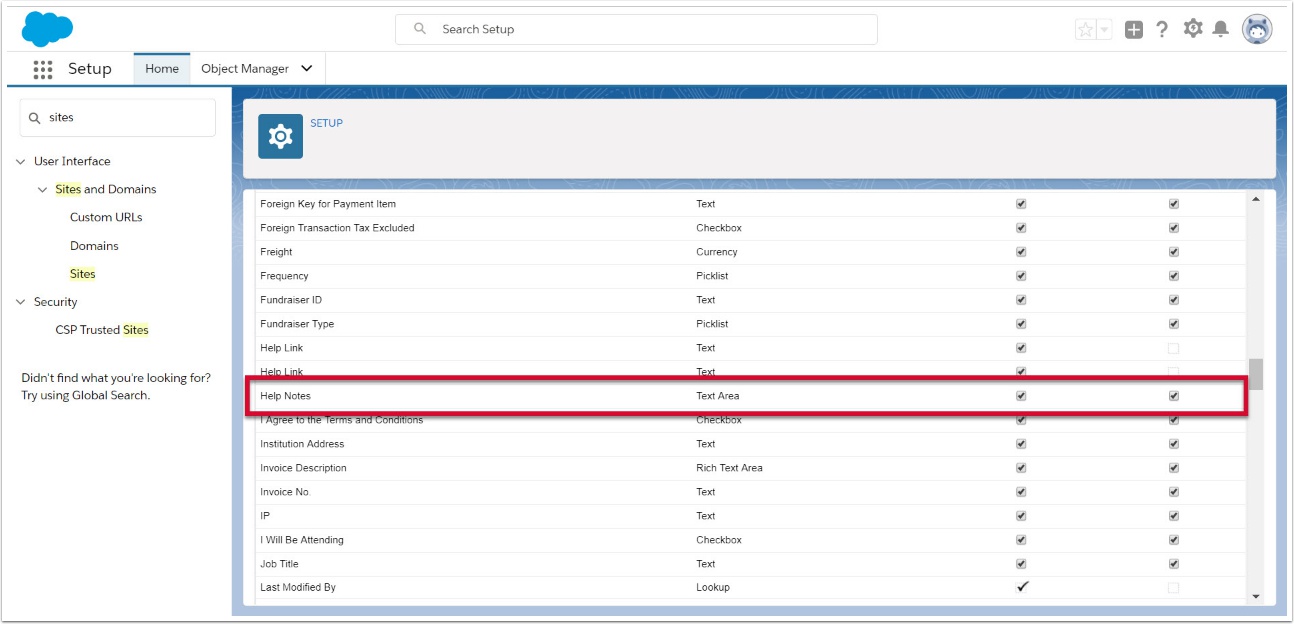
- Create a new Text or Text Area field on the Payment Txn. Keep the API name ending with "form_text"
- Set the sites profile security for the new field so it is visible, but read only
- Add the new field to appropriate Payment Txn - field set
1. Add notes to forms overview
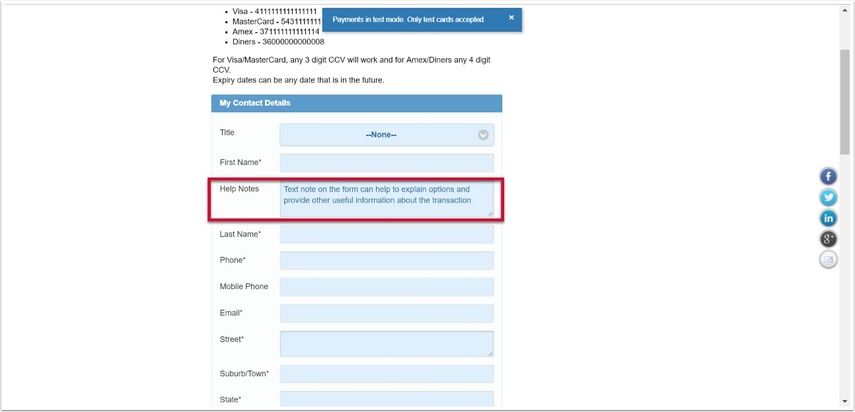
You can add your own custom notes almost any section of the checkout form.
This is currently not available in the events attendees section, family memberships section or fundraising details section of Peer-to-Peer registration.
The steps below will take you through adding the text as shown in this screen shot.
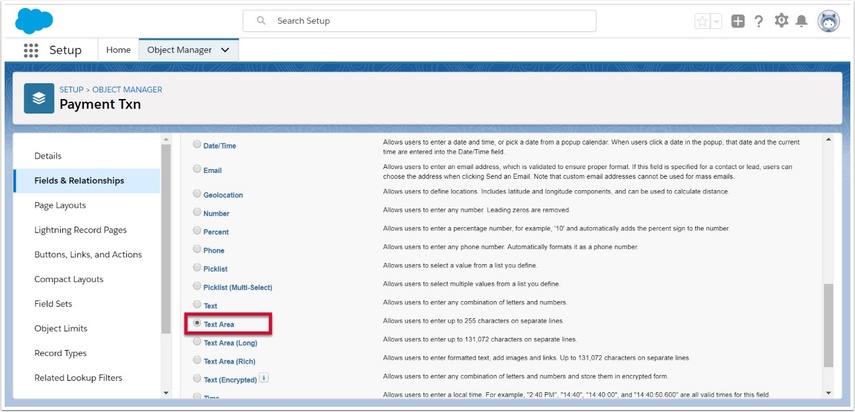
2. Create a new Payment Txn - Text Field
The text shown on the form comes from a custom field on the Payment Txn object.
2.2. Select 'Fields & Relationships' and select ‘New’
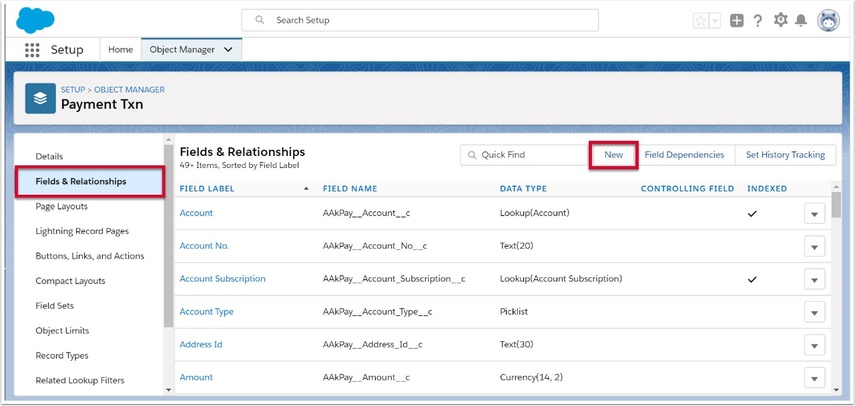
2.3. Specify the type as Text or Text Area and then Next
2.4. Enter details about the field, plus the note to display and press next
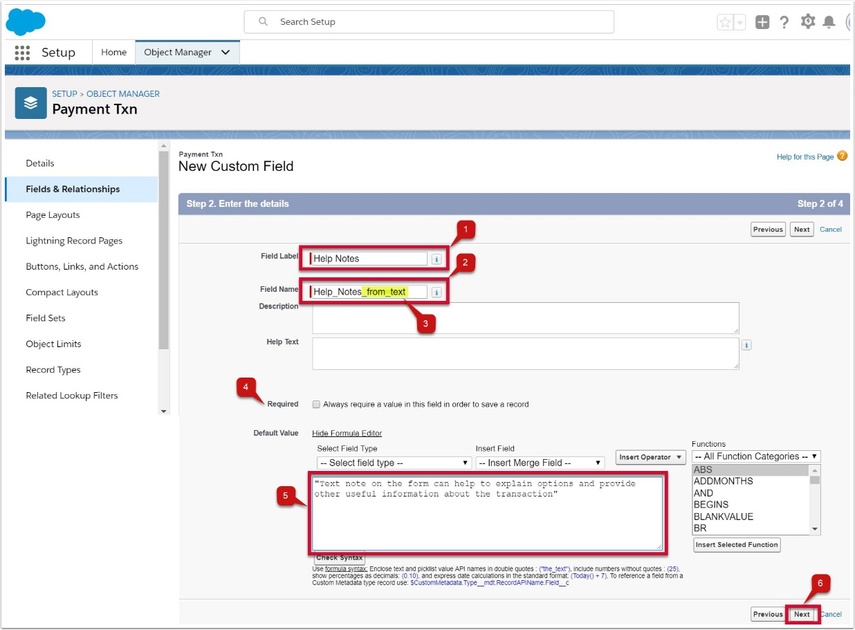
- Enter a short name that describes the field
- The Field Name will default from the Help Notes, but can be changed
- If the field name ends with "form_text" then the label will not be shown on the checkout form
- Click "Show Formula Editor" to display a larger area to enter step 5
- Enter the note you would like to have shown on the screen. Note, these must begin and edit with quotes ( " ).
- Press Next button
2.5. Select which user profiles can see the field and Next
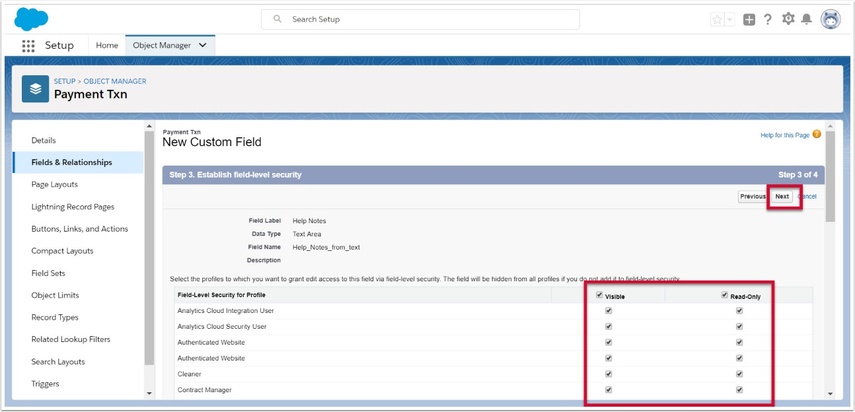
Make sure this field is marked as read only for internal users.
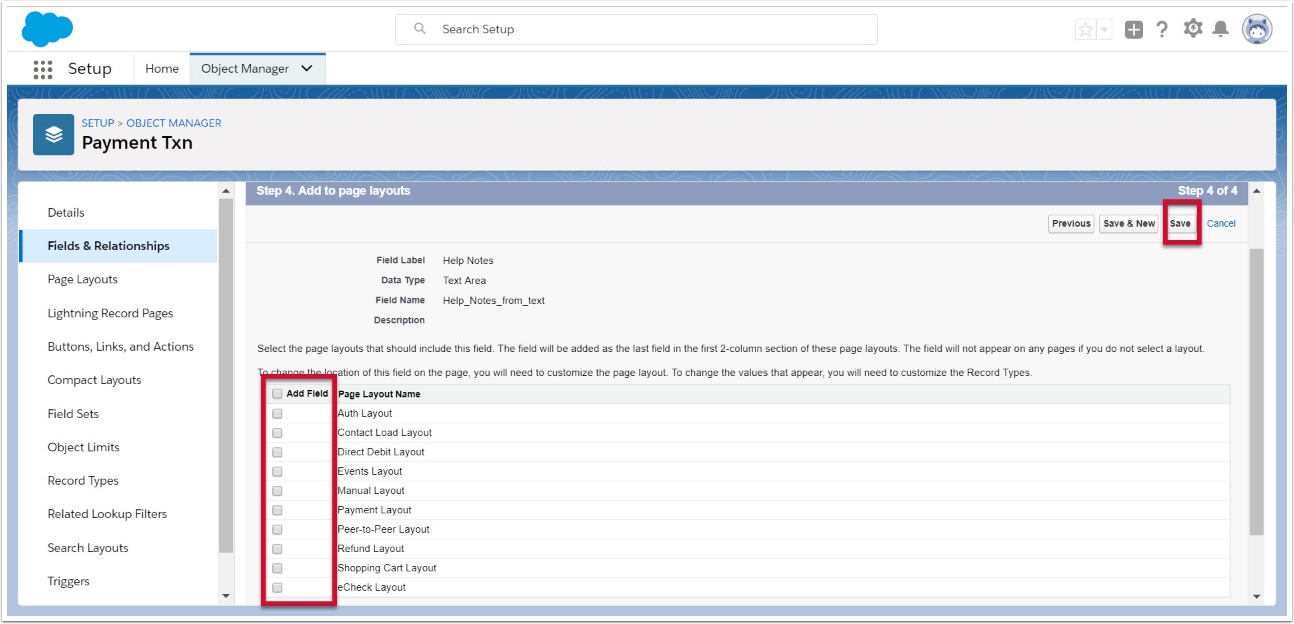
2.6. Don't add to any page layouts and Save
3. Make your fields publicly visible and read-only
When creating a new field, the security settings just make the field visible to normal salesforce users. In order to make them visible on the public website form, you will need to follow the steps in: How to make a custom field visible on public web forms
The addition to the above procedure is to make sure the field is marked as read only.
3.1. Make sure the notes field is set as read only.
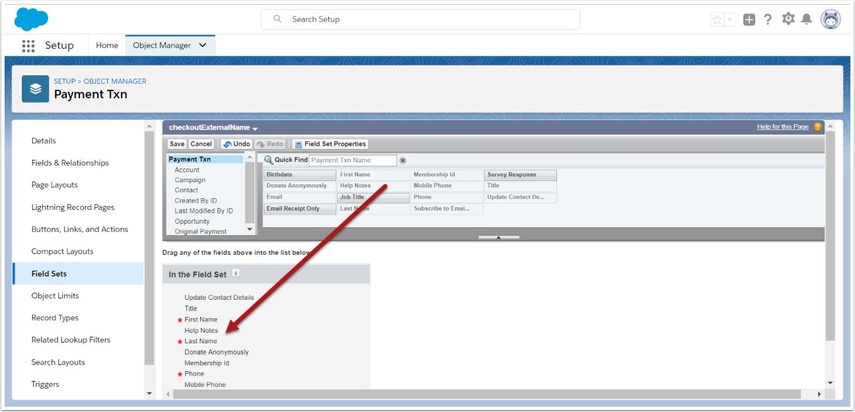
4. Add the new field to the appropriate Payment Txn - field set
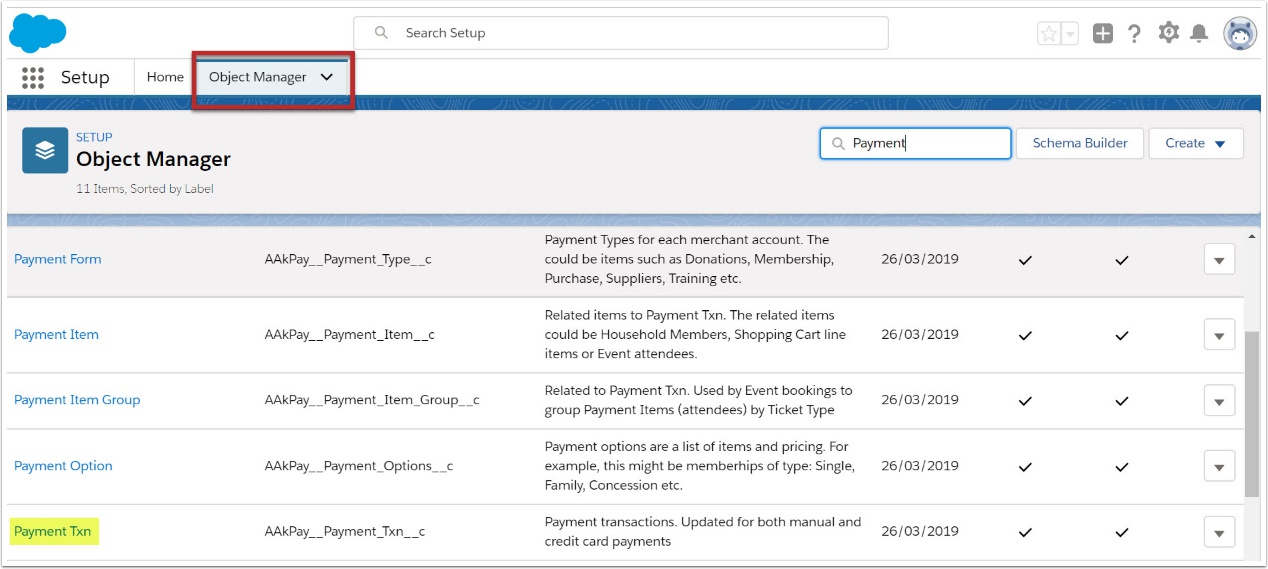
4.2. Select 'Field Set's and click into your custom field
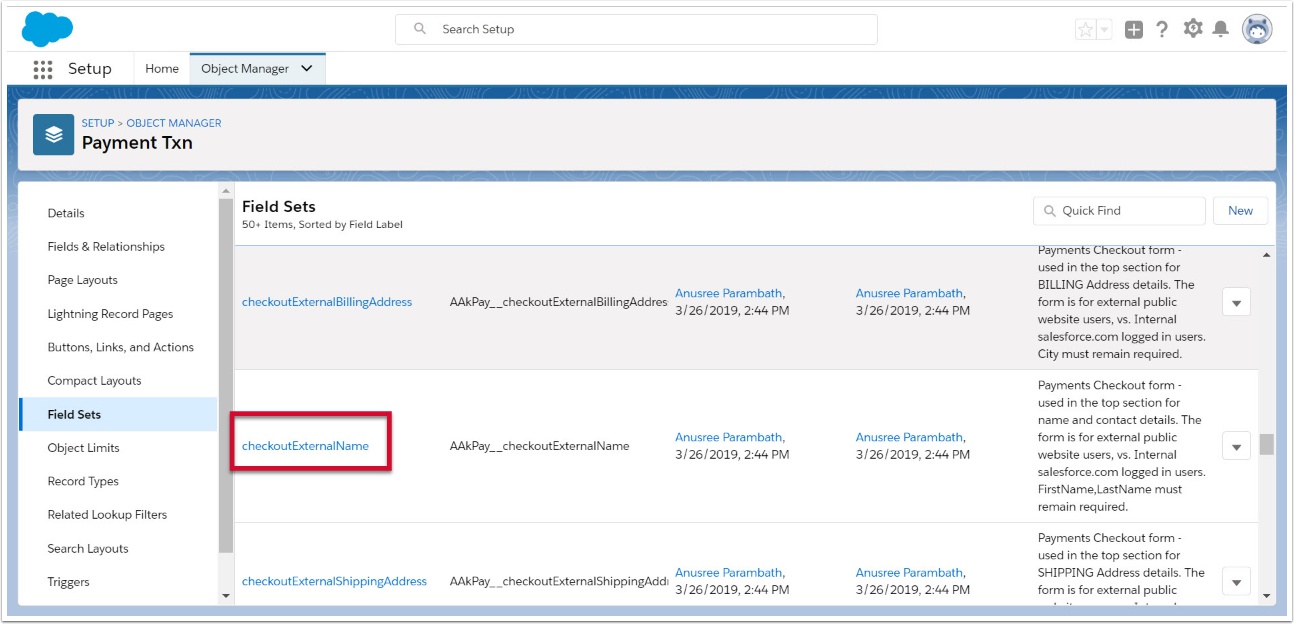
Select the appropriate field set to edit. Each fieldset represents a section on the Checkout Form. Please see How does the web form work? for more details about the various sections and fieldsets.
4.3. Add your new field to the field set and Save