1. Start Splits Entry
You can open the Split Entry Screen from
- Selecting the Split Entry Tab (If you do not see the tab due to screen width, then it will appear under the more option)
- Press the down arrow next to "More" tab and select "Split Entry"
- Alternatively, click on the 9 dots and search “Split Entry”

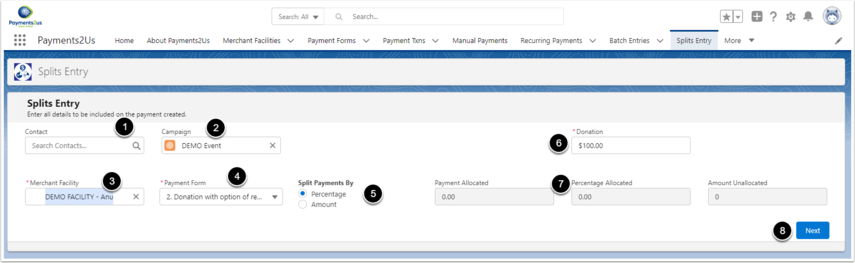
2. Enter Split Payment Header information
This section is for the entry of the total of the payment received. For example, if you received a cheque or Credit Card Payment for $100, then this is the $100 before it is allocated to the various funds/projects.
- Search and select a Contact. If the Contact does not already exist, then create a new one in another browser tab, then select.
- Enter a primary Campaign if required. This will default to the "Default Campaign" that is on the "Payment Form" selected
- Enter a Merchant Facility. This defaults to the Primary and Active Merchant Facility
- Select a Payment Form. This defaults to the Primary Payment Form for the Merchant Facility Entered.
- Select how the funds are going to be split by. This will be either by Amount of Percentage.
- Enter the total amount received for the Payment.
- The fields "Payment Allocated", "Percent Allocated" and "Amount Unallocated" are updated as the Split Line items are entered.
- Press "Next" button to start entering line items
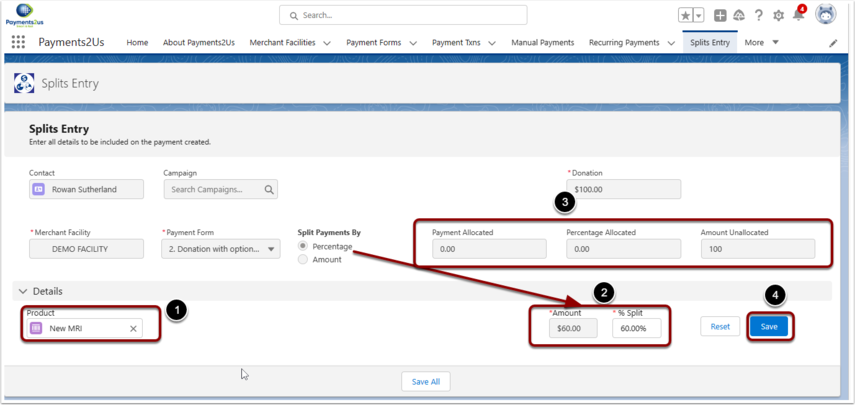
3. Enter Split Payment Line Items
- Select Product (Note, Products need to have been setup previously).
Also NOTE, the values selected in this area are configurable. Please see the Splits Entry Setup section in the User Manual - Enter the split percentage or amount. Only one of these fields will be editable. The editable option is determined by the "Split Payments By" in the header.
- The allocation section/totals are updated after the Save button is pressed
- Press the SAVE button to record this split. After saving, another line will appear if the total allocated is less than 100%
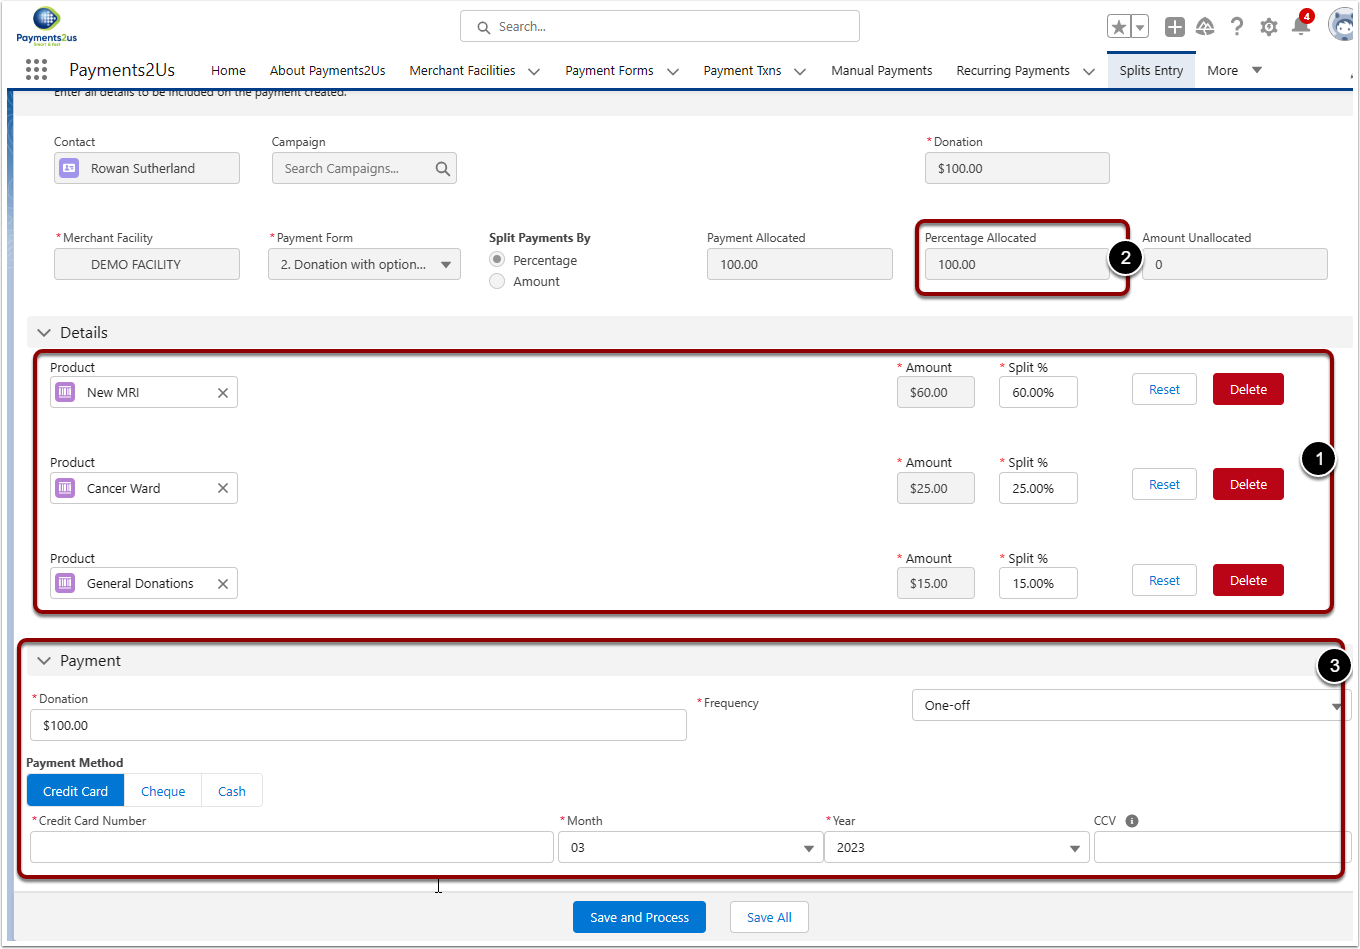
4. Continue adding Split Allocations
- Continue entering line items details
- When the percentage allocate is 100%, then the "Payment" (3) section will appear
- Enter payment details and then press the "Save and Process" button
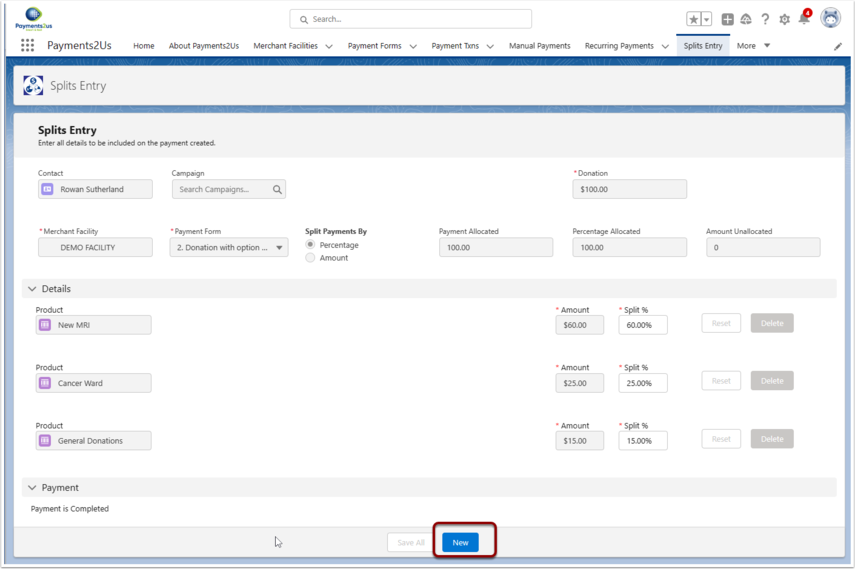
5. Enter next Split Payment
After the Payment has been processed, press the "New" button to start entry of the next Split Payment.