Before using this component for the first time, please ensure How to setup Experience Cloud for Payments2Us procedure has been completed.
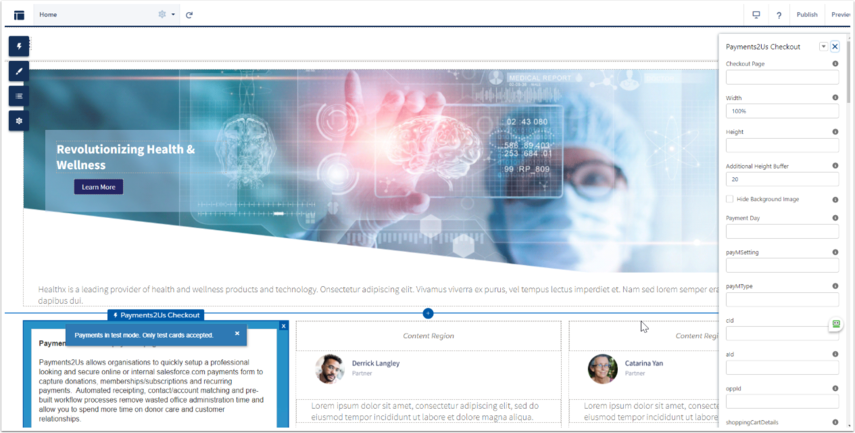
To set up Checkout in Experience Cloud, simply drag the component into the position on the page you would like it to be.
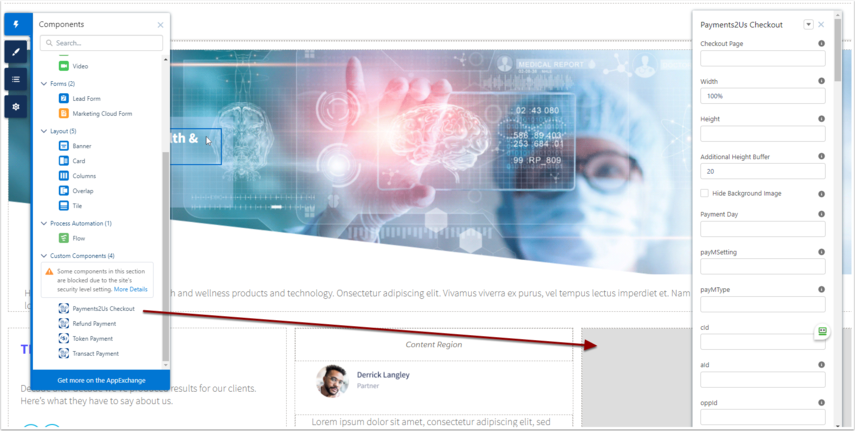
You are then able to set parameters for the page.
For a list and description of the Parameters, see help guide "Which parameters can I use with the various URL Parameter options"
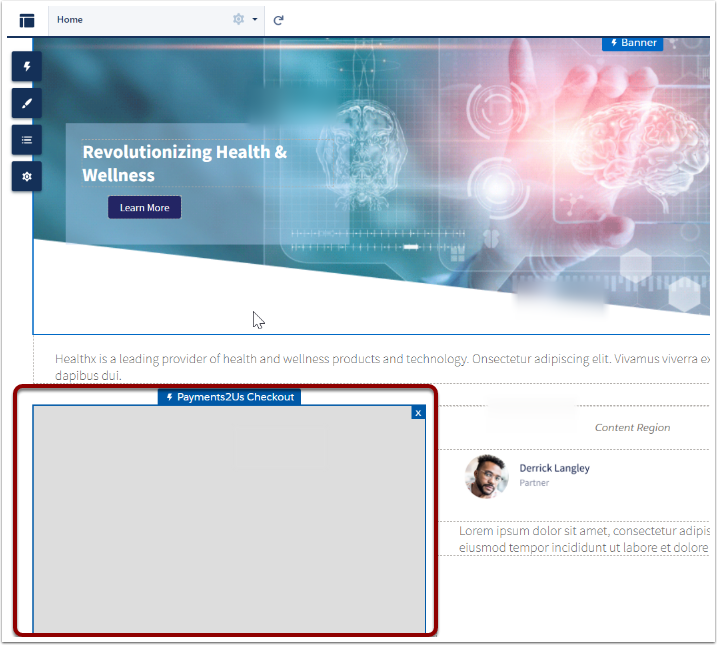
I have added the Payments2Us Checkout Component in the Experience Builder but it is showing as greyed out and with a connection error?
This error is to do with framing the site from the experience builder livepreview not functioning properly. When you publish the site, the checkout component should work fine, however if you do need to see the preview of the page in the builder, please follow the following steps. Caution: These steps involve weakening your sites security and should be reversed once you are satisfied with the experience builder view.
Affected sites will look like this
1. Navigate to your experience builder site setup page.
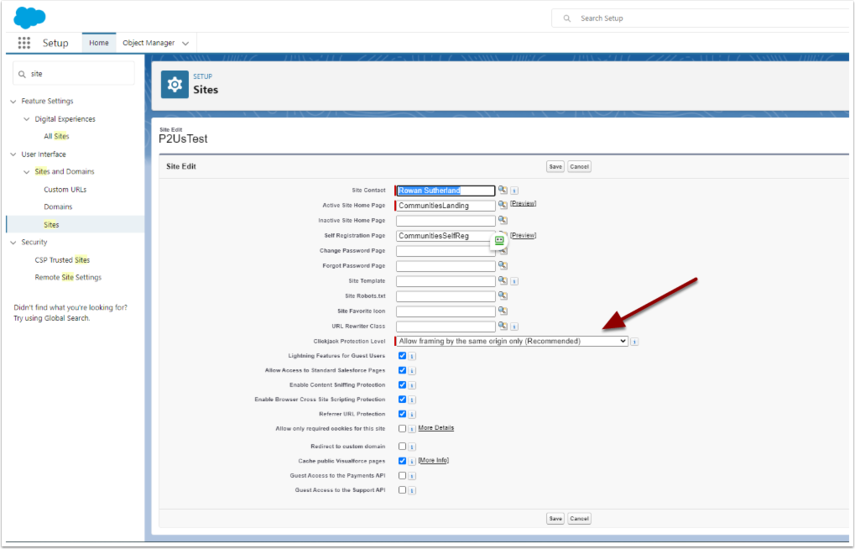
Set Clickjack Protection Level to 'Allow framing by any page (No Protection)'. This will allow the livepreview site to use the component properly.
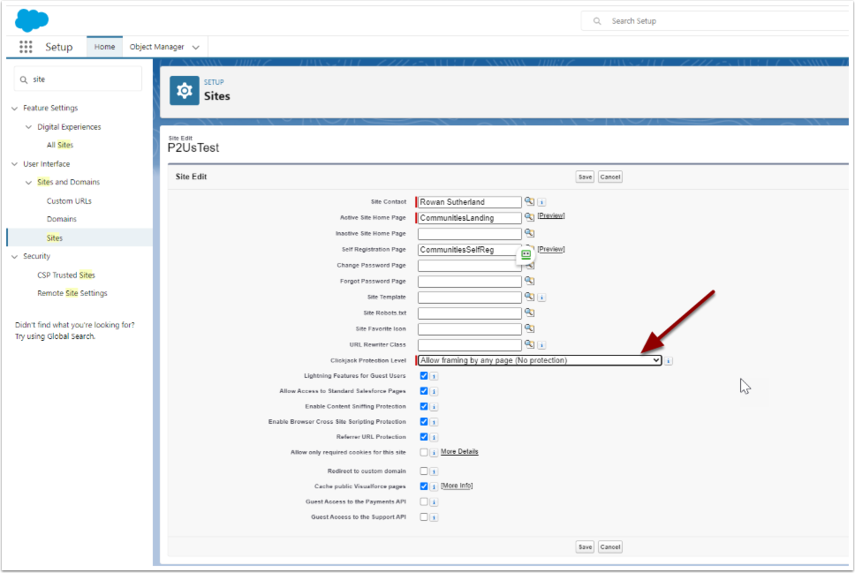
Your Checkout Component should be displaying correctly.
Remember to reverse these changes once you have finished working in the Builder.