The import file process allows for extra fields to be added and processed.
Quick Steps:
- Add a new Custom field to the "Import File Line Item" Custom Object
- Add a new Custom field with the same API name to "Payment Txn" Custom Object
- Optionally add a new Custom field with the same API name to Account, Contact or Opportunity
1. Data Model and the Processes
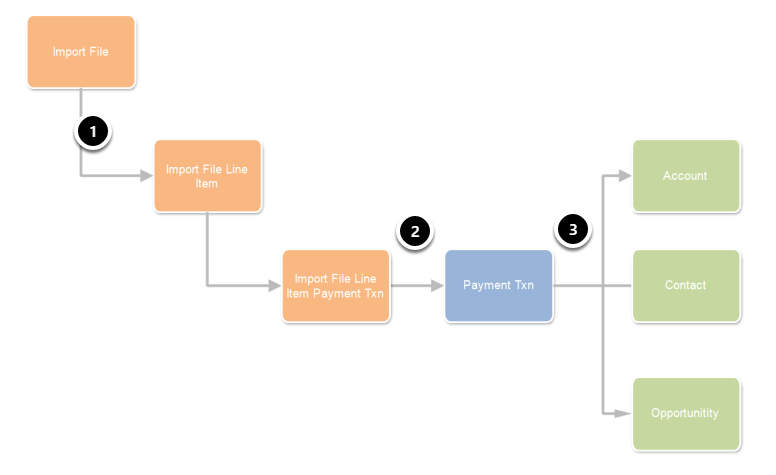
Before adding new fields, it is useful to understand which Objects are updated and when.
The above process shows the data model being used as part of the Import Files Process
- When you add a new Import File, select the CSV to upload, match the columns to the field names in Salesforce and press the "Import" button. This creates the "Import File" and "Import File Line Item (s)". Each import line item represents a row in the CSV file imported.
- On the Import File screen in Salesforce, when you press the "Process" button, followed by "Process Now", this process creates the "Import File Line Item Payment Txn" record and an "Payment Txn" record. The records are created for every "Import File Line Item" record.
The main reason why a "Import File Line Item" is not matched directly to a "Payment Txn" record, and the "Import File Line Item Payment Txn" record is created is because one "Import File Line Item" (row in a CSV file) could match to multiple "Payment Txns". Eg. when using BPAY and a person over pays a payment. - The Batch Processor runs every 10 minutes and processes Payment Txn records. For more info about the Batch Processor, see: How does the Batch Payments Processor work
2. Field Mappings

- The first column has picklists that match the column headings in the CSV import file (selected in prior step of the wizard)
- The second column has fields from the "Import File Line Item" Object
- If the "Payment Txn" Object does NOT have a field with the same API Name as the "Import File Line Item" Object then a warning message is shown.
If your CSV file (1) contains a column that you wish to import and store in Salesforce, then you need to create a new custom field (2) on both "Import File Line Item" Object and the "Payment Txn" Object.
The next steps will take you through adding a new example field for "Fee"
3. Adding a new custom field to Import File Line Item
During this process, we will add an example field called "Fee" that is of type Currency.
3.1. Locate Custom Object Import File Line Item
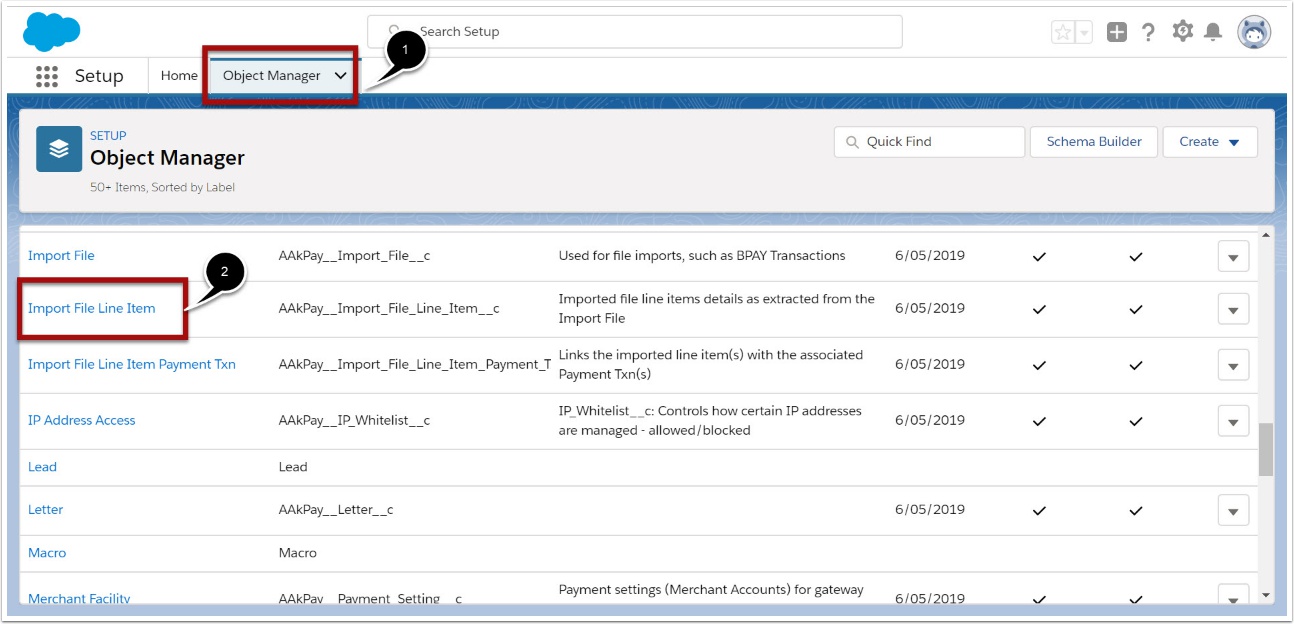
- Classic : Navigate to Setup > Create > Objects then Click into "Import File Line Item"
- Lightning : Navigate to Setup > Object Manager then select the Import File Line Item"
3.2. Add a new field
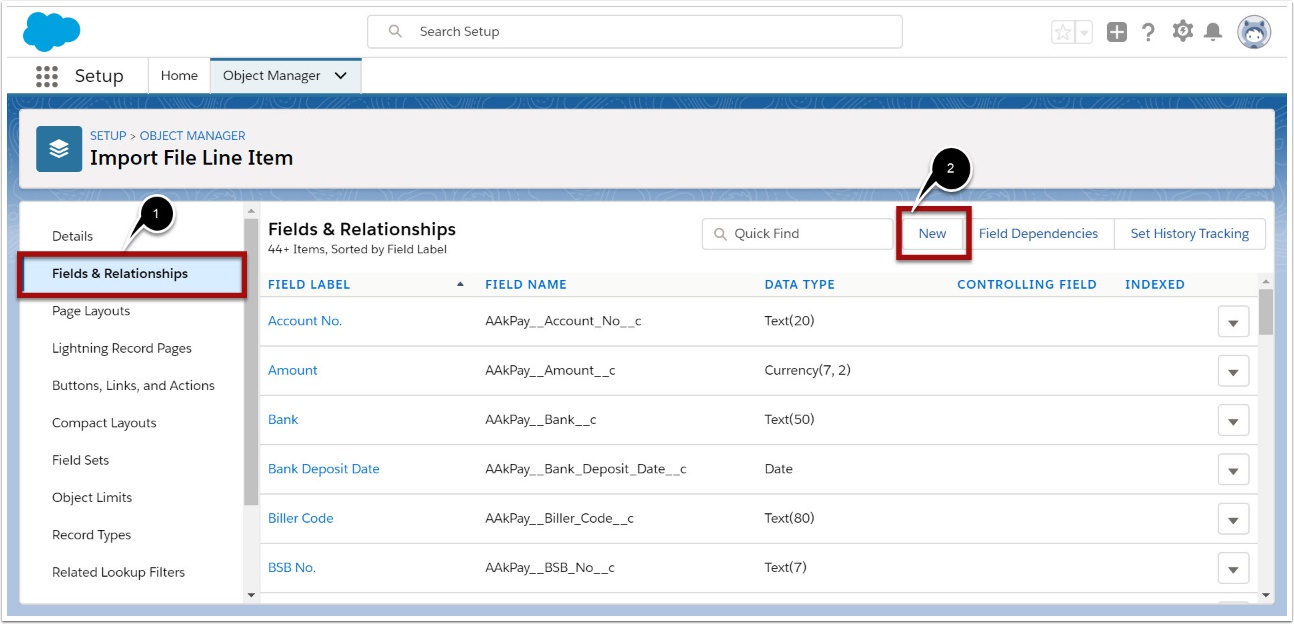
- Classic - Scroll down to the "Custom Fields & Relationships" section. Then press NEW button
- Lightning - Select "Fields and Relationship" tab and press New button
3.3. Choose field data type

- Select Field data type. In our example, we are adding a new Currency field.
- Press the NEXT button
3.4. Enter field Label and Continue with Wizard
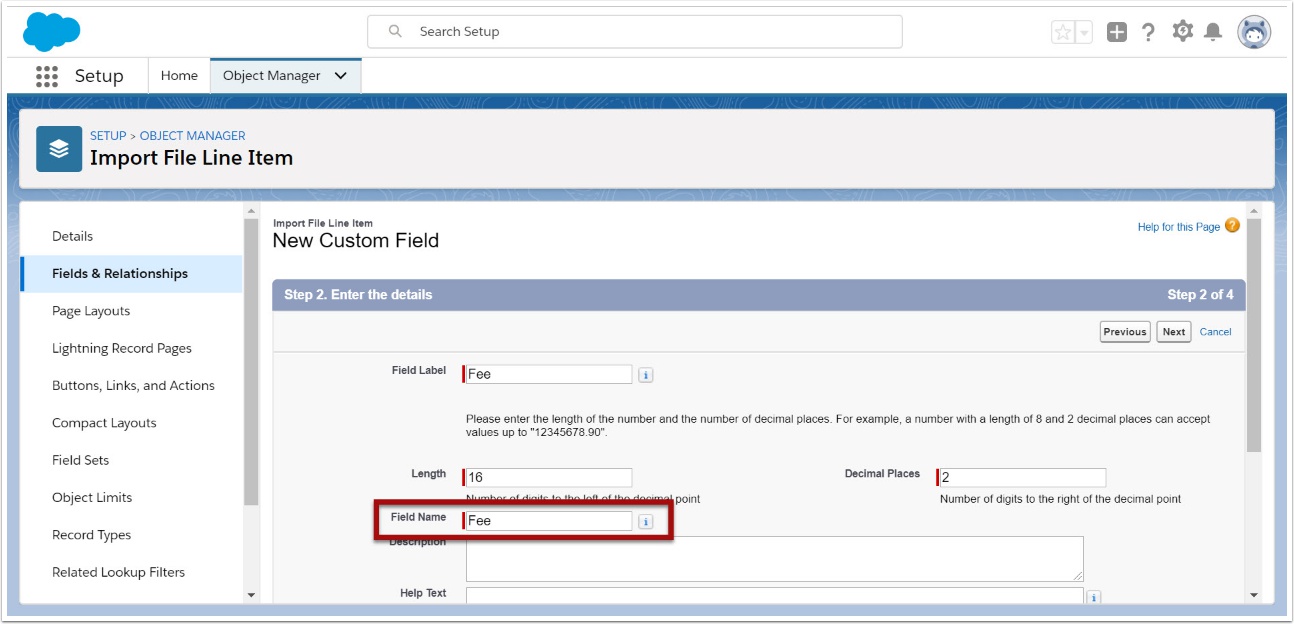
The key item in this step is the "Field Name" value. This field is also known as the API Name.
For the matching process, this field name must be exactly the same for all objects.
After entering the required information, press the NEXT button and continue with the wizard all the way through using the default values.
4. Adding a new custom field to Payment Txn
4.1. Locate Custom Object Payment Txn
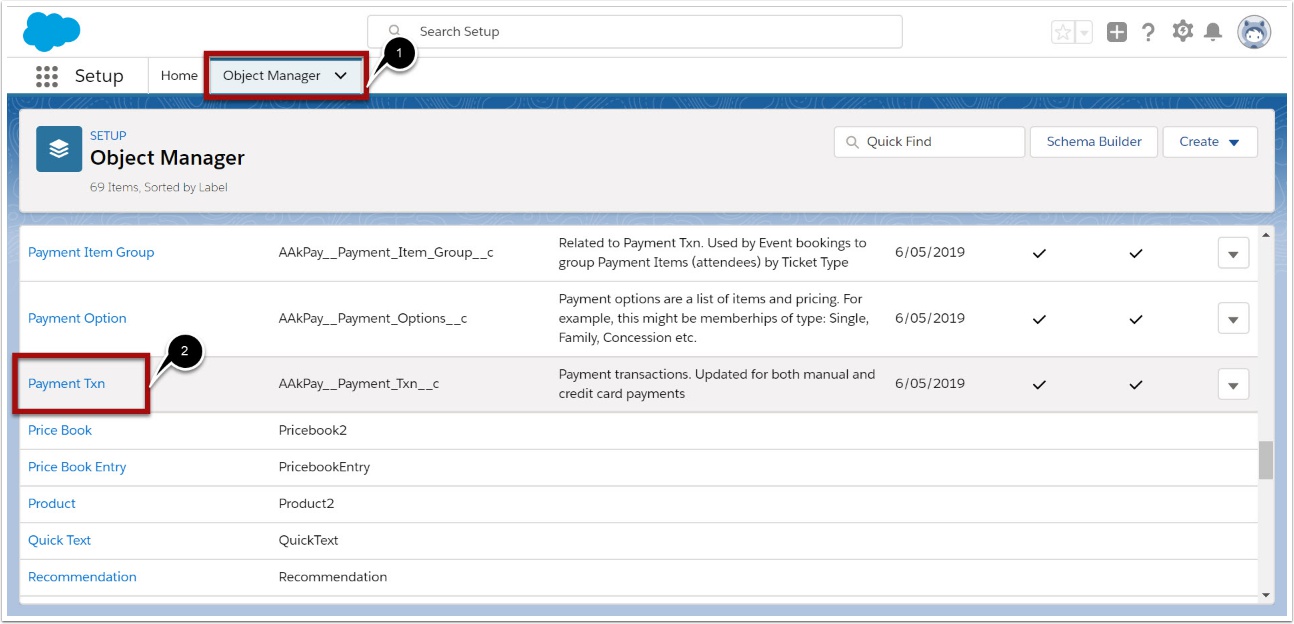
- Classic : Navigate to Setup > Create > Objects then Click into "Payment Txn"
- Lightning : Navigate to Setup > Object Manager then select the "Payment Txn"
4.2. Add a new field
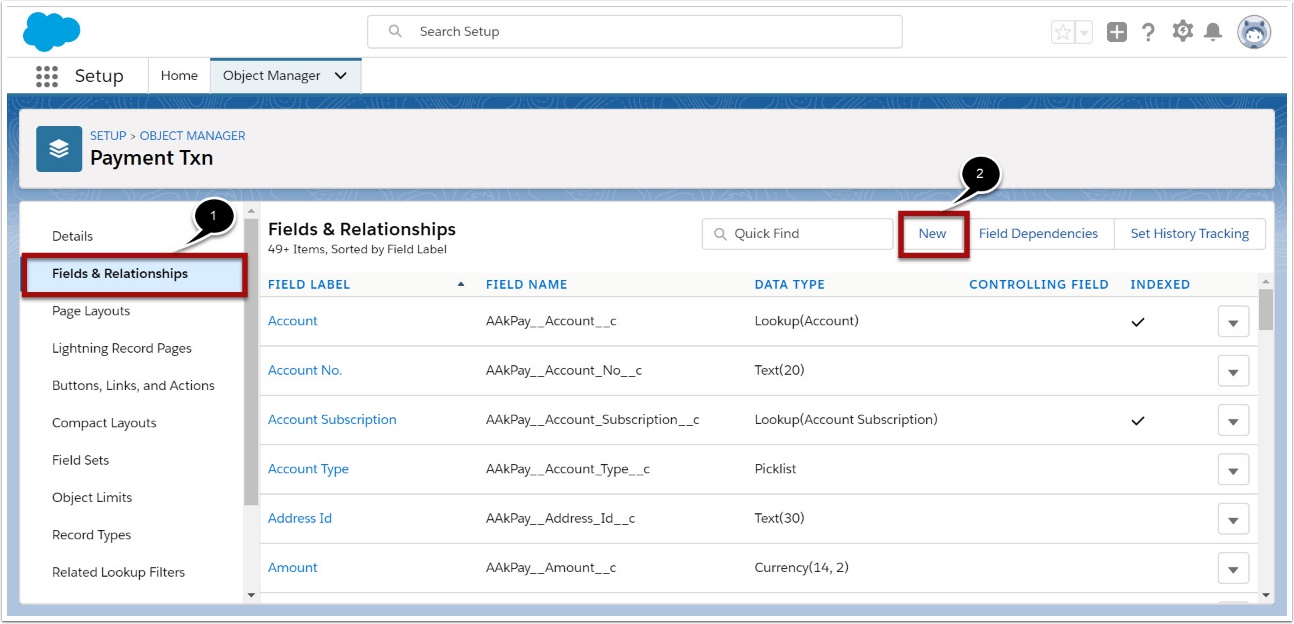
- Classic - Scroll down to the "Custom Fields & Relationships" section. Then press NEW button
- Lightning - Select "Fields and Relationship" tab and press New button
4.3. Choose field data type
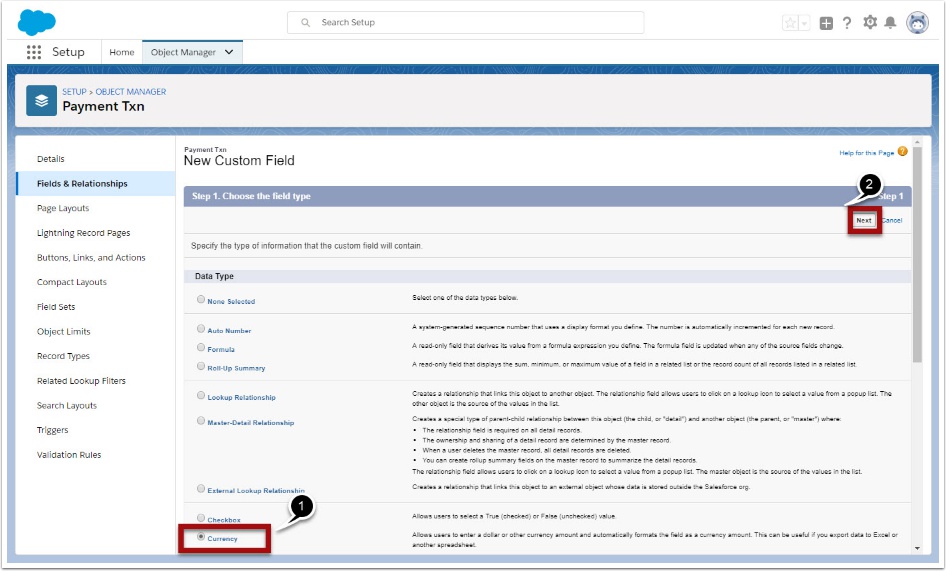
- Select Field data type. In our example, we are adding a new Currency field.
- Press the NEXT button
4.4. Enter field Label and Continue with Wizard
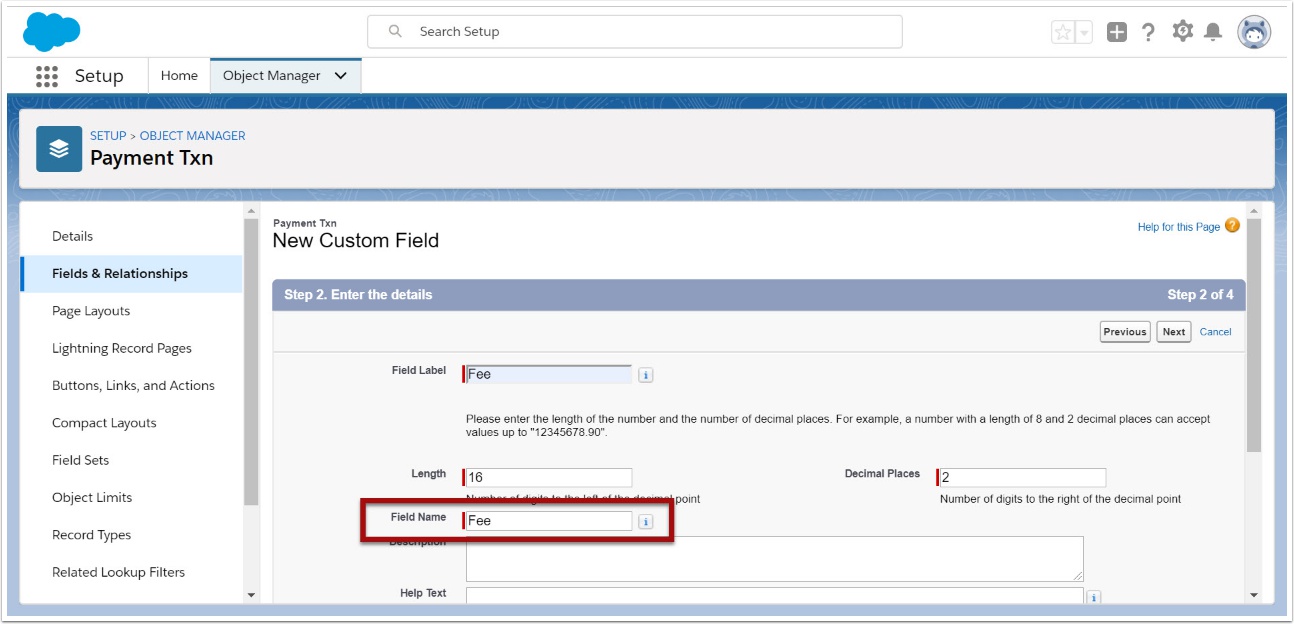
The key item in this step is the "Field Name" value. This field is also known as the API Name.
For the matching process, this field name must be exactly the same for all objects.
After entering the required information, press the NEXT button and continue with the wizard all the way through using the default values.