This procedure includes notes on how to change section headings and labels using the Payment Form Builder.
Should you wish to make global changes for field labels so that page layouts and reports inside Salesforce use the updated labels, then please review the Language Translation workbench and updating of object field labels and custom labels.
1. Change Section Headings and Messages
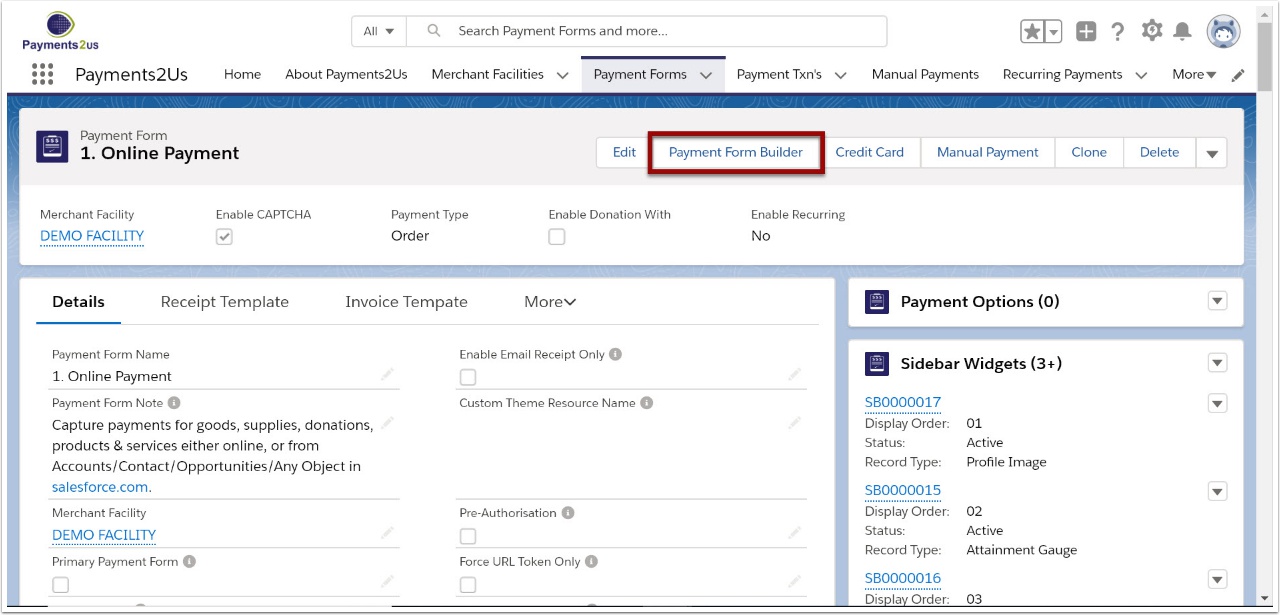
1.2. Select Online Payment and select ‘Payment Form Builder’
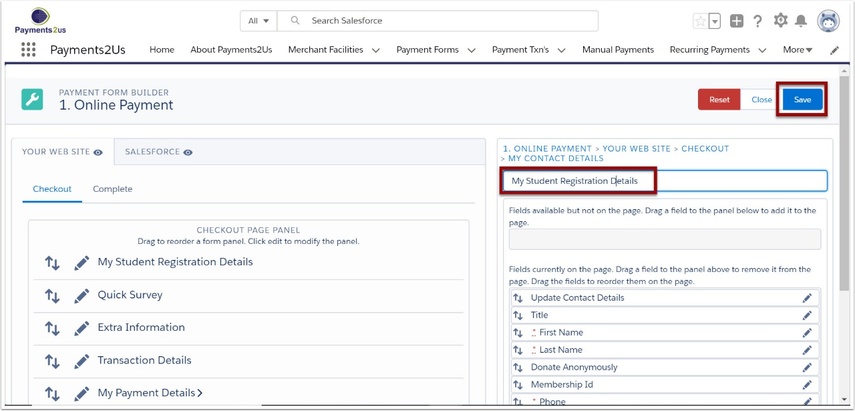
1.3. Checkout Page Panel
- Select heading need to modify form the checkout page panel
- Press the edit button corresponding to the Heading
- Modify the details
- Press Save
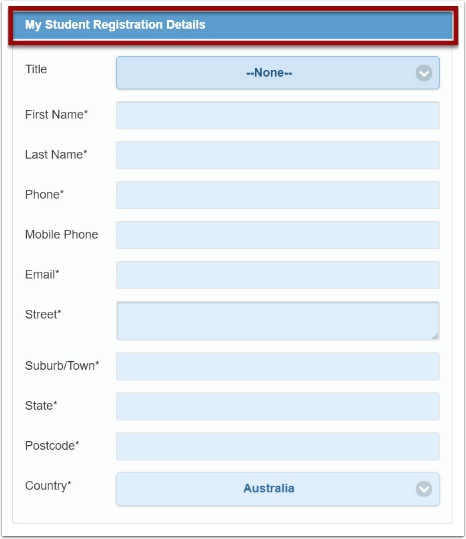
1.4. Review your updates
2. Overriding Field Labels
This procedures takes you through the steps in changing field label for a field such as first name.
If you are looking at changing Section headings, button labels or messages, please see: Change Section Headings and Messages
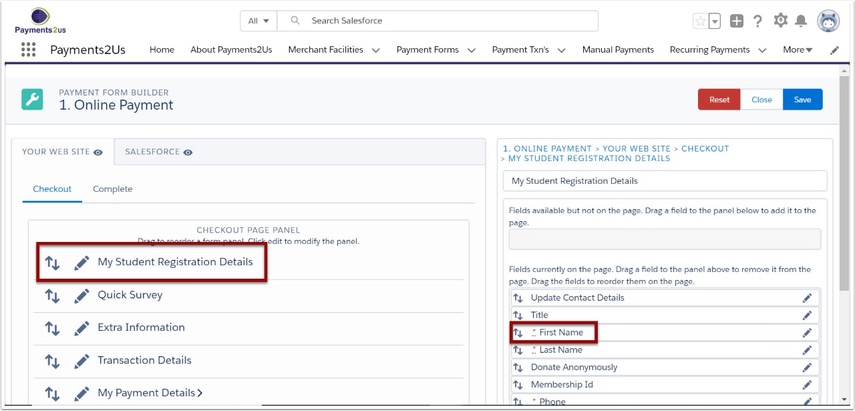
2.1. Select Online Payment and select ‘Payment Form Builder’

- Select the 'Edit' button corresponding to 'My Student Registration Details'
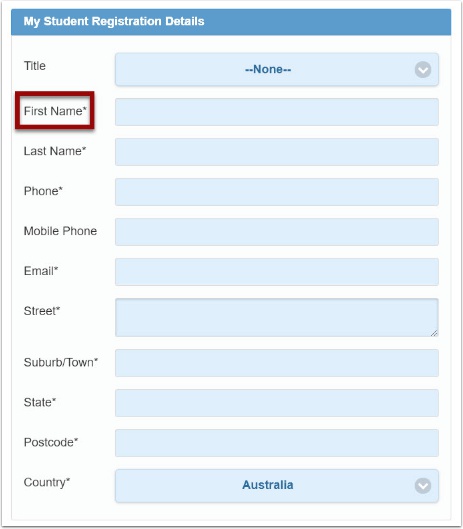
- Select the 'Edit' button for the 'First Name'
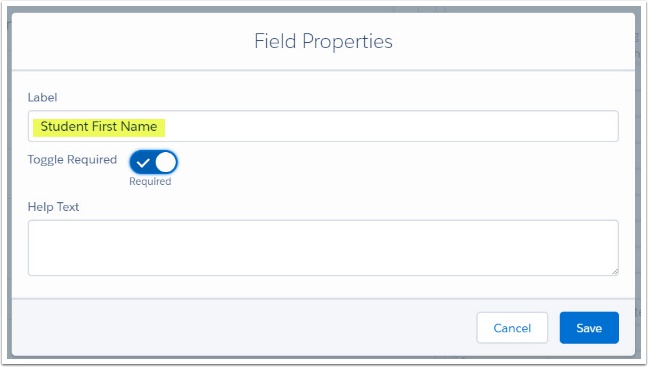
- Update the label
- Press 'Save' button
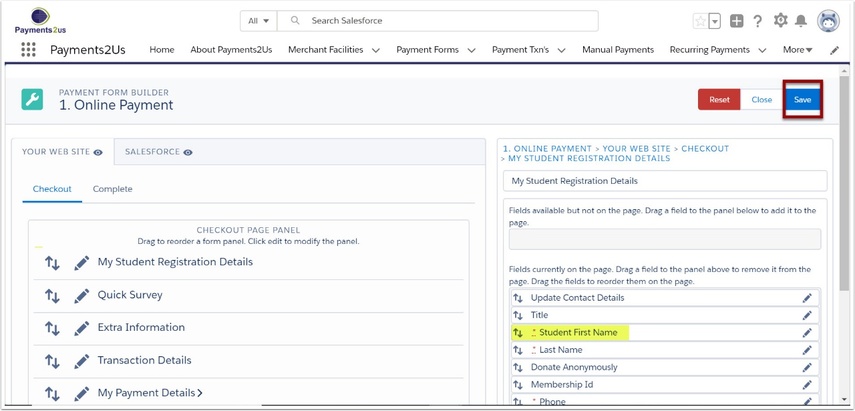
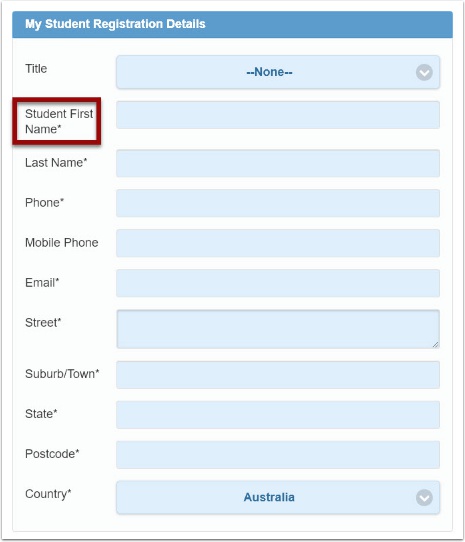
2.2. Review your updates
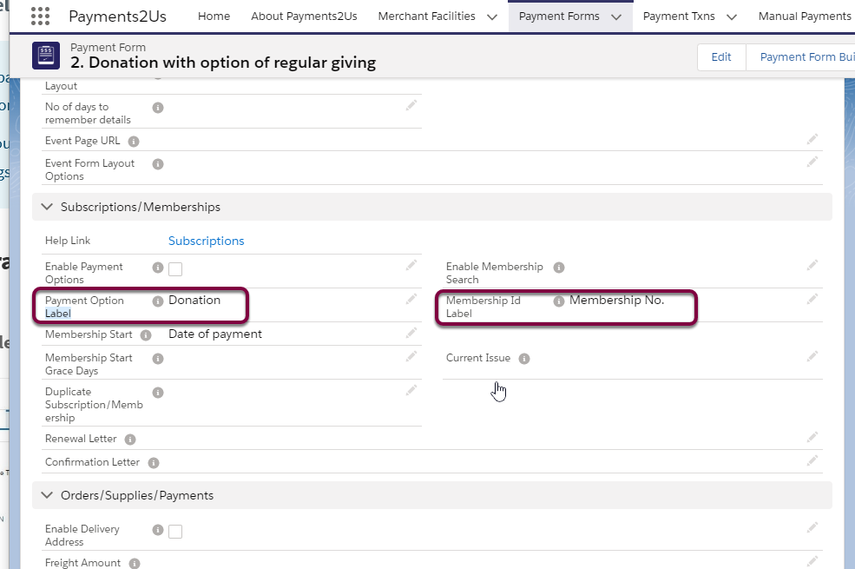
3. Payment Form Fields
Some details that are shown on the checkout page are derived from fields on the Payment Form Object.
This includes:
- Appeals Label
- Payment Option Label
- Membership Id Label
- Pay Now Label
- Confirmation Page Button Label
- Donation By Label
4. Enabling Translation Workbench
As Payments2Us is part of a managed package, you cannot update the object field labels using the normal administration options. However, you can use the translation workbench to achieve the same outcome.
To update labels, you will need to first enable the translation workbench, then update the object label or the custom label settings.
Setting up and using the language translation workbench is a great way of having different languages for different users. It is also a great way of changing the labels so they appear throughout the Salesforce system, including page layout and reports etc.
4.1. Setup available languages
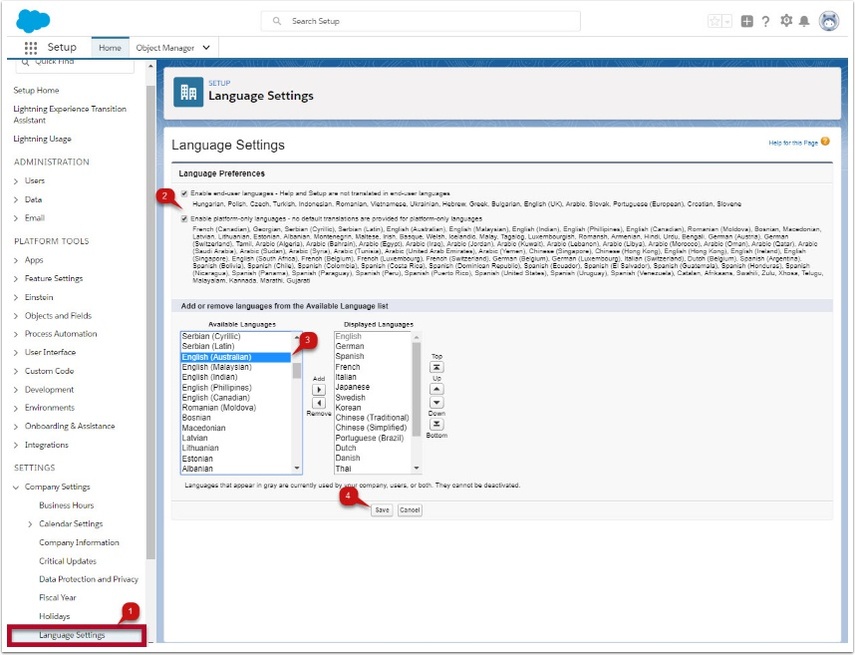
This option is necessary if you are going to be changing field labels to a language that is not available as standard. This can include variations of English that are not US English, for example en-AU for Australia locale.
- To maintain the list of available languages, navigate to Administration setup > Company Profile > Language Settings.
- Check both “Enable End User Language” and “Enable Platform Only Languages”
- If your language is not one of the standard ones, then select that language from the Available Languages and move this to the Selected Languages
- press SAVE button
4.2. Enable Translation Workbench
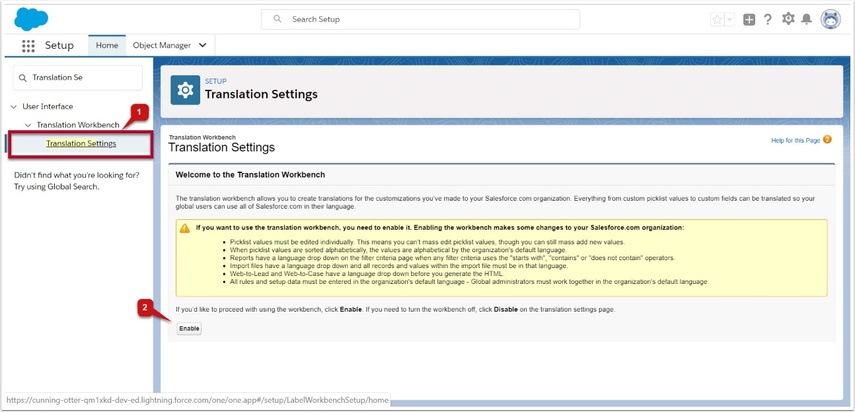
- Under setup > administration setup > Translation Workbench > Translation Settings
- Click ENABLE
4.3. Add Languages for Translation Workbench
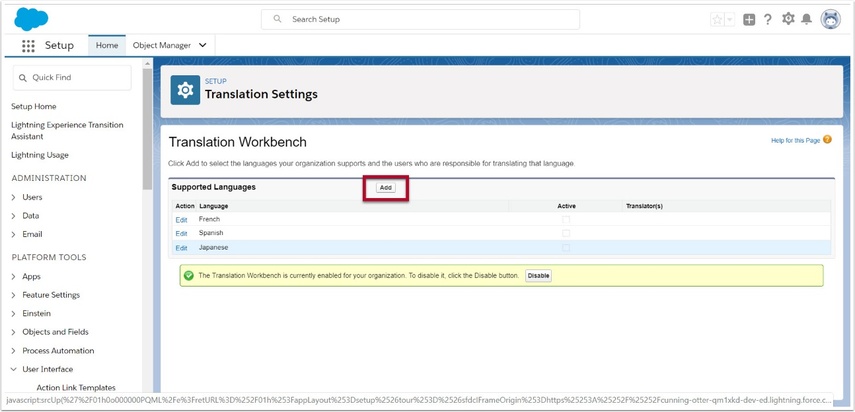
Then add a translation language.
4.4. Select Language to Add to Translation Workbench
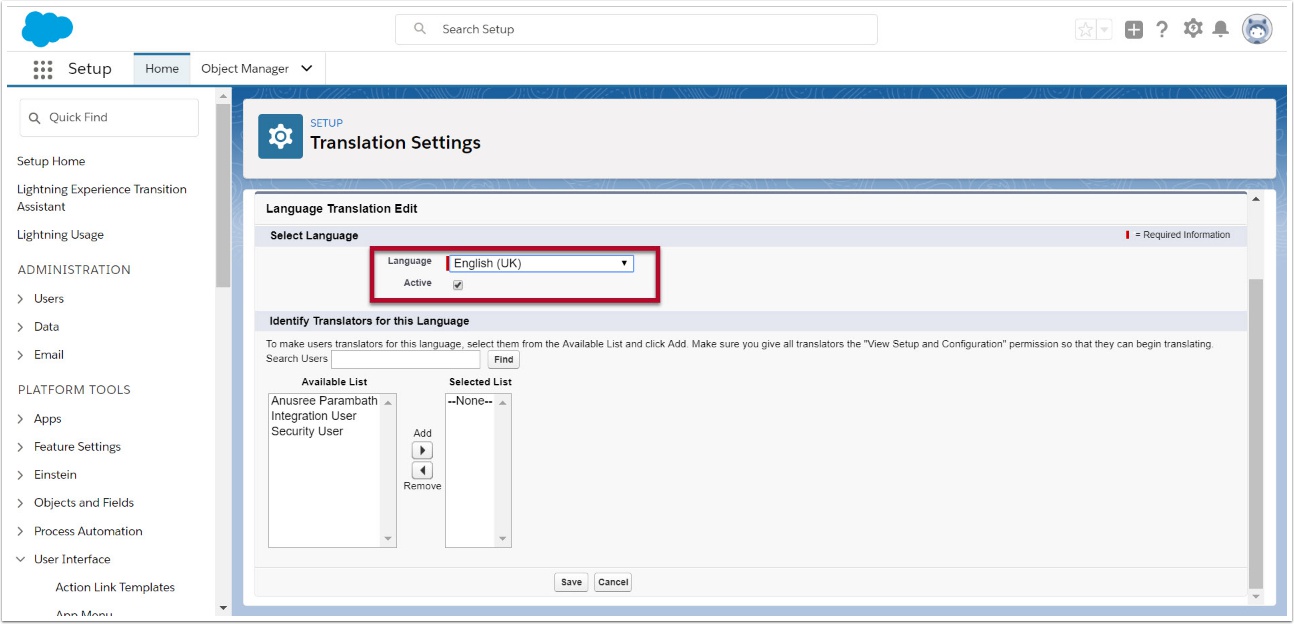
- Add English if you need to override standard labels provided in Payments2Us.
- Press SAVE button
For experience site users, there is one more additional step in order to make sure that language translation workbench is working properly. The additional step is listed down in the following FAQ article: Language Translation Workbench for Experience Site Users
5. Translation of Object Fields
It is common for people using this procedure to miss a key step that is required first.
Please see "Enabling Translation Workbench" and in particular the Platform Language setup, which is the previous step (4). You will need to complete this before starting on this procedure.
This section takes you through the process of changing Payments2Us Managed Package fields. After updates are made here, they will appear on all page layouts and report field headings.
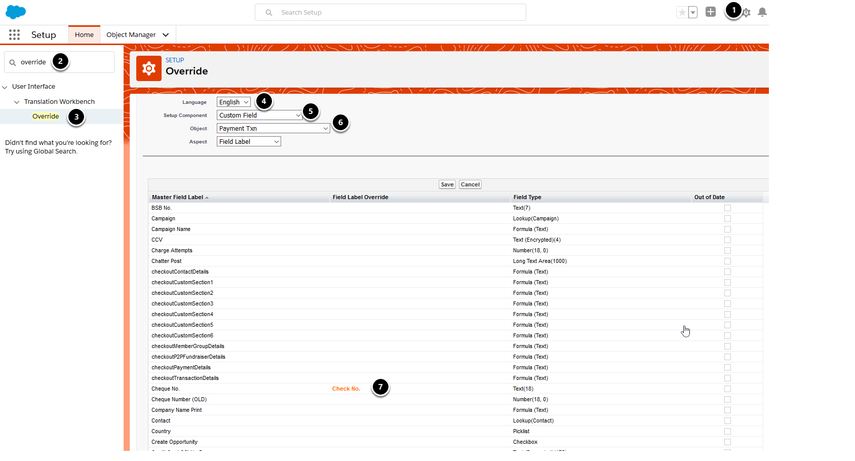
- Click on the setup option
- Quick find "Override"
- Click into the Translation Workbench - Override menu option
- Select the language you wish to translate to
- Select custom field
- Select the Payments2Us Object you wish to update
- Enter your override field
- SAVE
6. Translation of Custom Labels
Payments2Us uses customers labels throughout the App. This includes default button labels, form section headings, error messages and more.
It is common for people using this procedure to miss a key step that is required first.
Please see "Enabling Translation Workbench" and in particular make sure your Platform Language setup. You will need to complete that entire section before starting on this procedure.
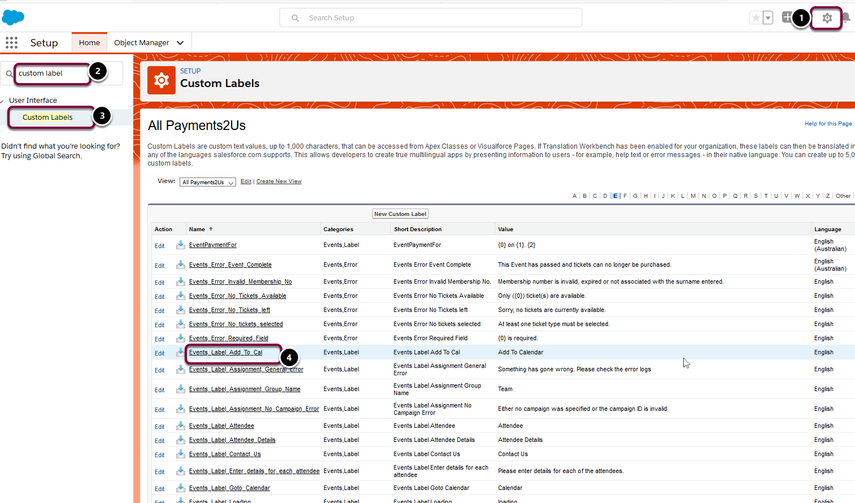
6.1. Locate the Custom Label you wish to edit
- Click on the setup cog (top right corner)
- Quick Find "Custom Label"
- Click into the menu option "Custom Labels"
- Click the custom label you wish to override and click into it.
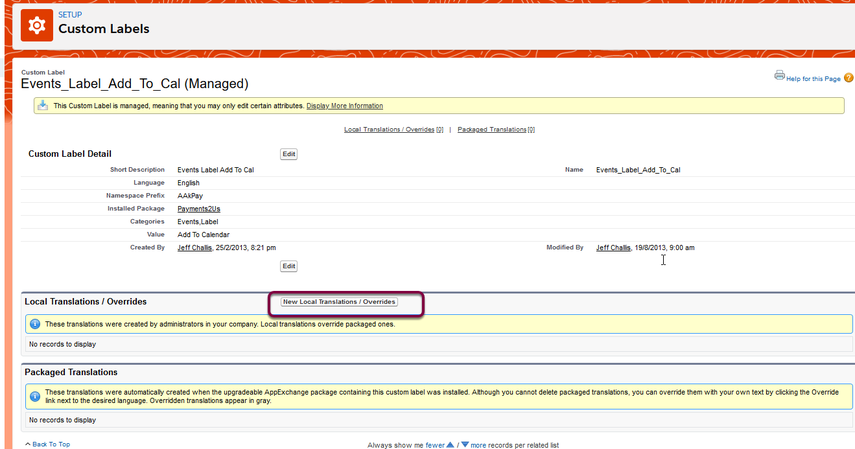
6.2. Add a custom label for your language
- Click on the "New Location Translations / Overrides"
- Select your language and enter your next text.
For some labels, payments2us will mailmerge in other values. These are indicated with {nn} (where nn is a number from 0 and up. 0 being the first argument, 1 being the second etc.).
6.3. Common Labels for translating
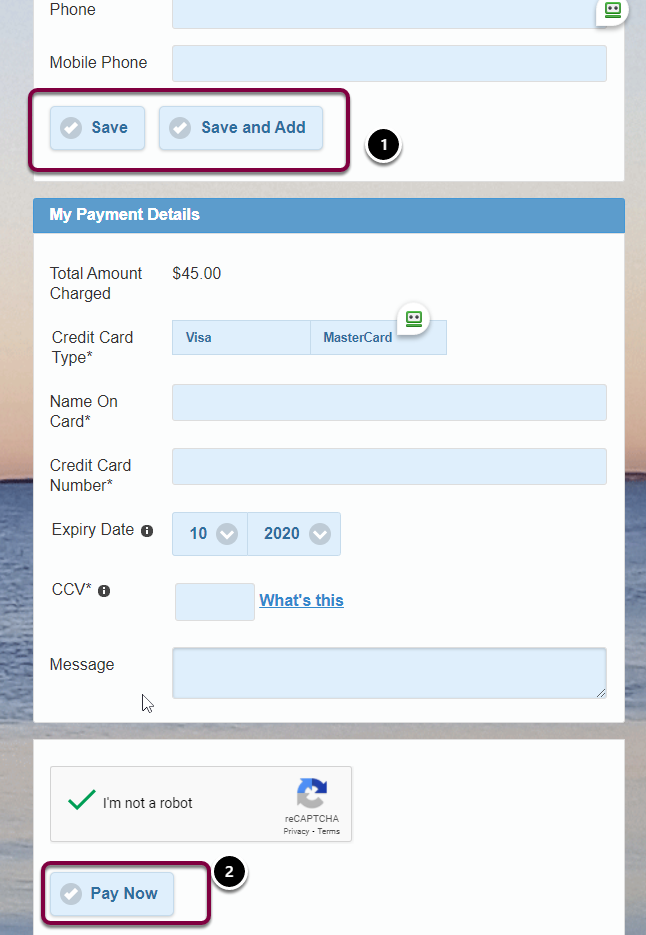
- Membership Save, Save and Add Buttons (1): Checkout_Members_Label_Save_Button, Checkout_Members_Label_Save_and_Add_Button
- Buttons at bottom of form “Submit”, “Donate”, “Next” (2) etc. One of:
- This field can be updated on the Payment Form - field: “Pay Now Label”.
Alternatively, then following custom labels can be translated, - Checkout_Label_Paynow_Later
- Checkout_Label_Paynow_Next
- Checkout_Label_Donate_Now
- p2p_register
- checkout_Label_Paynoew
- Checkout_Label_Card_Update
- This field can be updated on the Payment Form - field: “Pay Now Label”.
- Free Events - Checkout_Label_Complete
- Events Attendees save, save and add buttons: Events_Label_Save, Events_Label_Save_and_Add;
- Suggested Amounts/Donation Amount Radio buttons My Choice Button label: Checkout_Label_My_Choice, Checkout_Label_Not_at_this_stage
- (Enter your choice) - Checkout_Label_Your_Choice
It is common for people using this procedure to miss a key step that is required first.
Please see "Enabling Translation Workbench" and in particular make sure your Platform Language setup. You will need to complete that entire section before starting on this procedure.
Picklists and Radio buttons on the Checkout Form can be translated using the translation workbench.
Fields that are shown as radio buttons are maintained in Salesforce as Picklist fields.
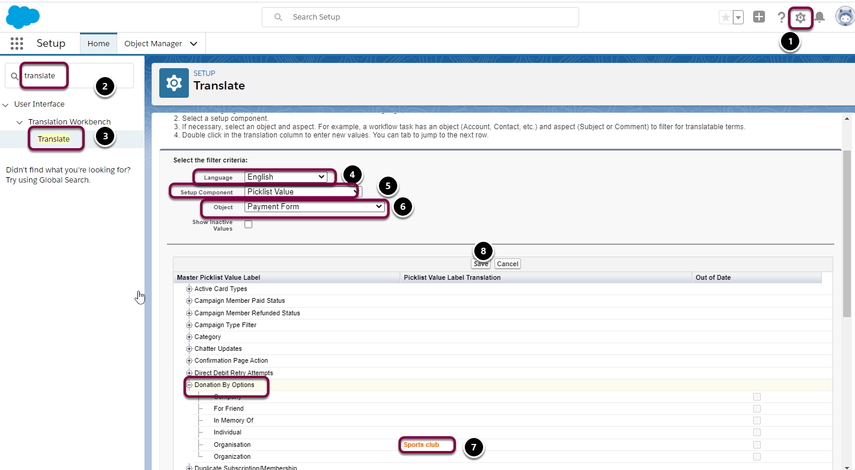
- From the setup cog
- Perform a quick find for "Translate"
- Click into the menu option "Translate"
- Select the language you wish to translate to
- Select "Picklist Value"
- Select the Object you wish to Translate
- Select the field, picklist value you wish to override and enter the new value
- Press the Save button
7.1. Common Picklists for translating
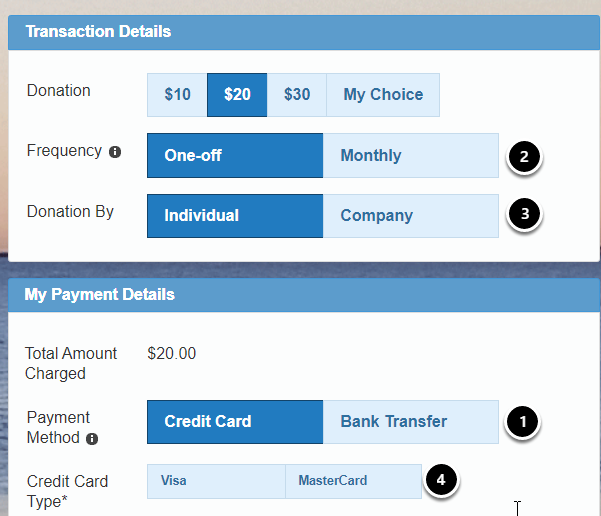
- Payment Methods e.g. “Credit Card” from Merchant Facility (AAkPay__Payment_Setting__c), field: AAkPay__Payment_Method__c
- Payment Frequencies e.g. “Monthly” from Payment Form (AAkPay__Payment_Type__c) field: AAkPay__Payment_Frequency_Options__c
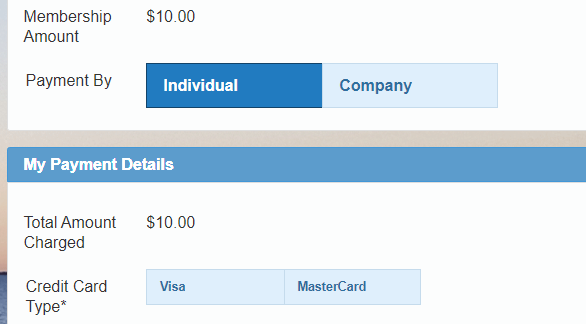
- Donation By e.g. “Company” from Payment Form (AAkPay__Payment_Type__c) field: AAkPay__Donation_By_Options__c
- Card Types e.g. “Visa” from Payment Form (AAkPay__Payment_Type__c) field: AAkPay__Active_Card_Types__c
8. Translation Trouble Shooting
8.1. Check your selected language matches the Sites user language
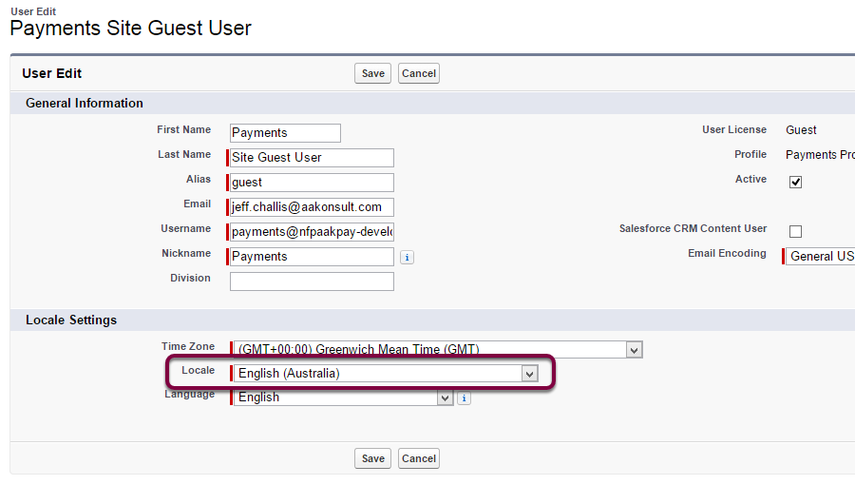
When you added a language to the Translation Workbench, ensure that this language matches the locale for the user setup for the "Sites" User.
Ie. Under Setup > Develop > Sites. Click into your website. Click on Public Access Settings button, click onto View Users/Asssigned User button. Click Edit next to the users and review/update the Locale. For more information and steps on this users, please see the installation manual: How to set up external site security (older version) - in particular the Name and TimeZone section.
8.2. Why does the value not change on my form
It is common for people using this procedure to miss a key step that is required first.
Please see "Enabling Translation Workbench" and in particular make sure your Platform Language setup. You will need to complete that entire section before starting on this procedure.
Please check the language setup in the translation workbench matches the "Check your selected language matches the Sites user language" procedure above.
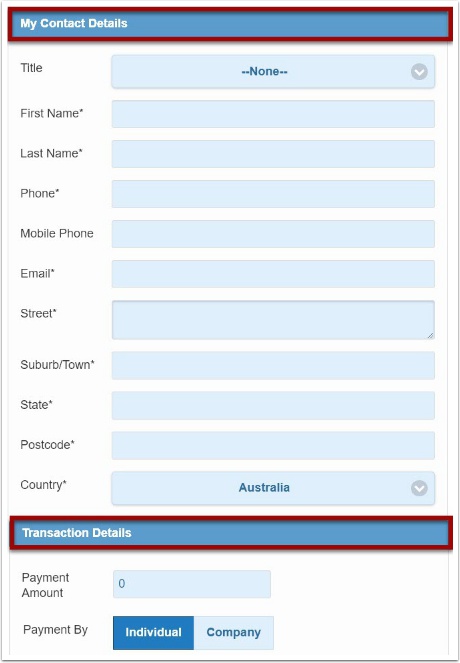
8.3. Example form translations and FAQ
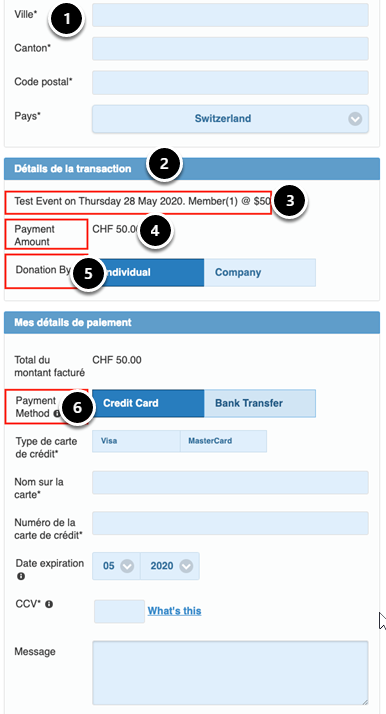
The example form below shows some examples of where/how fields are translated.
- Payment Form Builder is used to change the field label.
- Payment Form Builder is used to change the section heading.
- This field is used on the events module and is created from a number of pieces of data.
The Custom Label "EventPaymentFor" is used to combine "Campaign Name", plus Campaign - "Event Date" to produce the text "Test Event on Thursday 28 May 2020."
The "Member" comes from the Payment Option Name (i.e. ticket type selected). The quantity comes from the number of tickets selected by the user and the amount is also on the Payment Option. This is combined to product "Member (1) @ $50. - "Payment Amount". The "Payment" comes form the Payment Form - field "Payment Option Label" and the "Amount" comes from a Custom Label - "check_label_amount"
- The Payment Form - field "Donation By Label" is used for the label "Donation By".
- The "Payment Method" label comes from the custom object - Merchant Facility - field "Payment Method".
For the above, use the following sections of this guide to update.
- Payment Form Builder
- Payment Form Builder
- Translation of Custom Fields, plus setting up for Payment Options (related to Payment Form) and Translation of Custom Labels
- Payment Form, plus Translation of Custom Labels.
- Payment Form
- Translation of Custom Fields
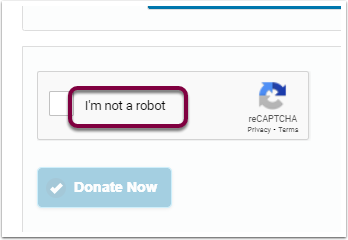
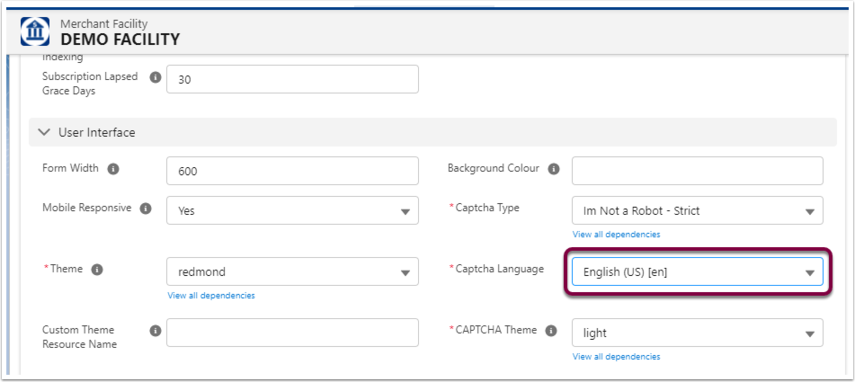
9. How to change the Captcha Language
You can change the Captcha language by updating the "Captcha Language" picklist field on the Merchant Facility.