Events can be set up with three simple steps:
- Event Payment Form
- Ticket Types
- Event Details
1. Event Form
Set up a payment form for your event
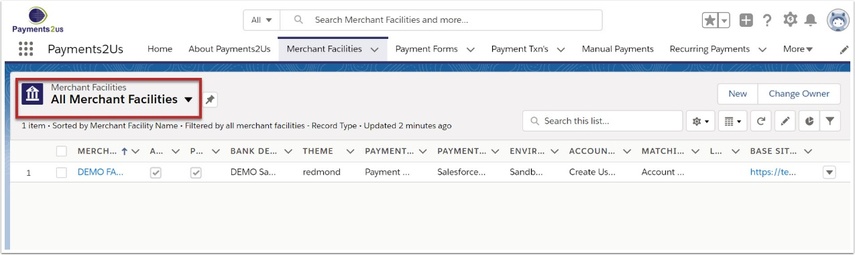
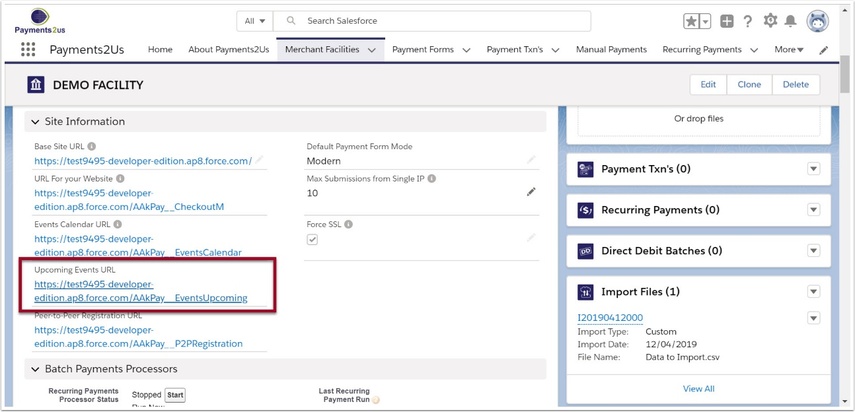
The Merchant Facility tab can be found within the Payments2Us menu (Top right picklist in Salesforce - Select Payments2Us), or it can be found under the "More" at the end of the tabs. (In Salesforce Classic - It can be under the "+" at the end of the tabs)
Once you have clicked on the Merchant Facility Tab, select the appropriate List view (Example - "All Merchant Facilities") and click into Merchant Facility you wish to update.
1.2. Select Payment Form
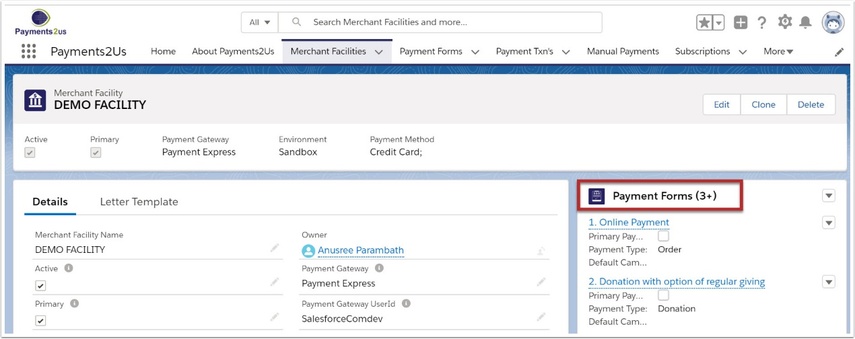
1.3. Select the 'New' Payment Form

1.4. Enter details for Information
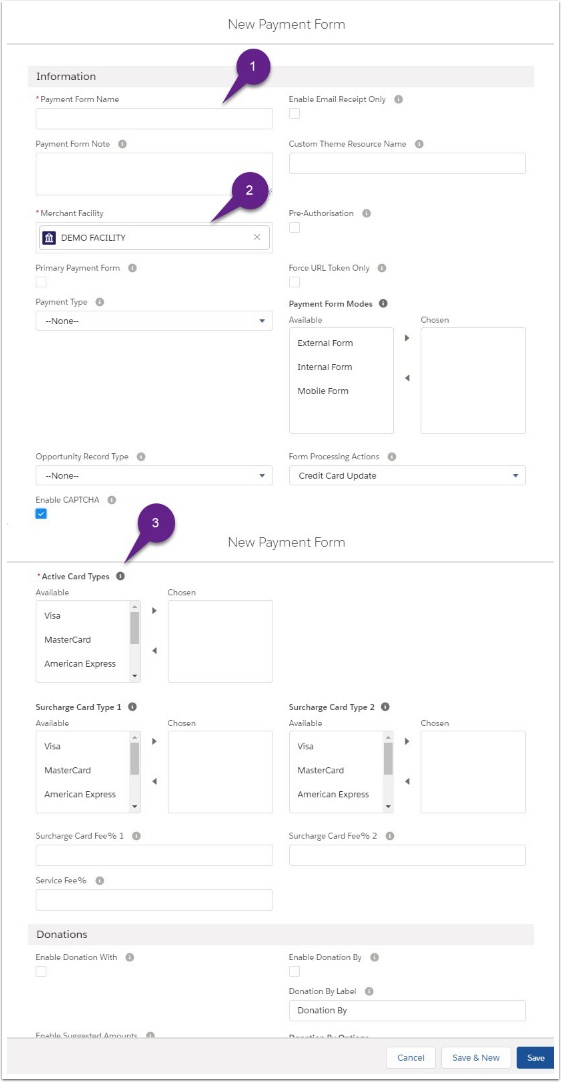
Customise to suit your event's requirements
Compulsory fields:
- Name of your Payment Form
- Link to Merchant Facility
- Types of credit cards
1.5. Scroll down to the Events heading
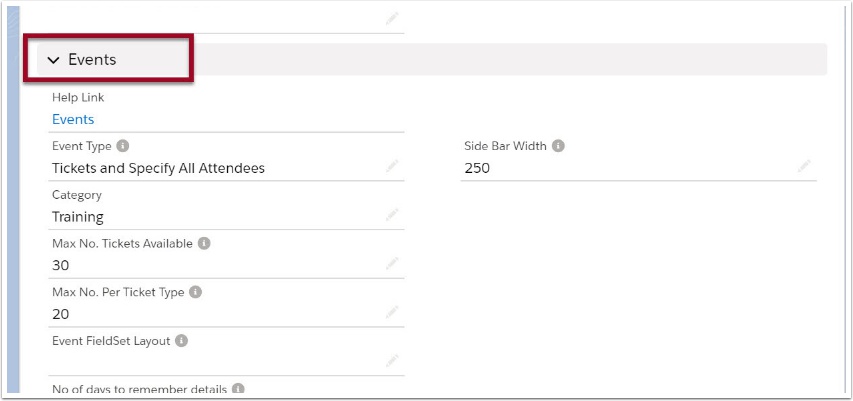
1.6. Select the type of tickets required
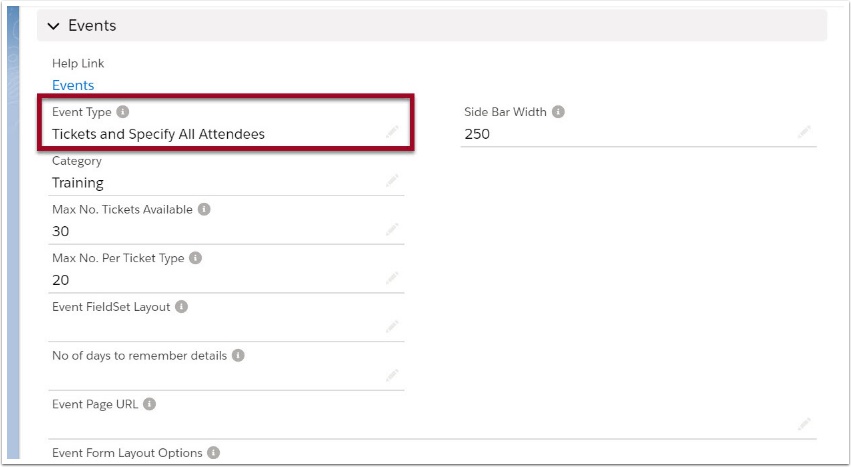
- Tickets Only - This is a movie style ticket option, e.g. buy two tickets and turn up, there is no need to specify all attendees.
- Tickets and Specify Attendees - This option asks for attendee details if more than one ticket is purchased.
- Tickets and Specify All Attendees - This option ALWAYS asks for all attendee details, even if just one ticket is purchased. Use this when the person buying the ticket may not be the attendee.
- Tickets and Optionally Specify Attendees - This is useful for groups of people, e.g. golfing for a team of four and each of the players are asked for (however, if not all players are known at the time of booking, then they don't need to be specified).
1.7. Select the FieldSet Layout and SAVE
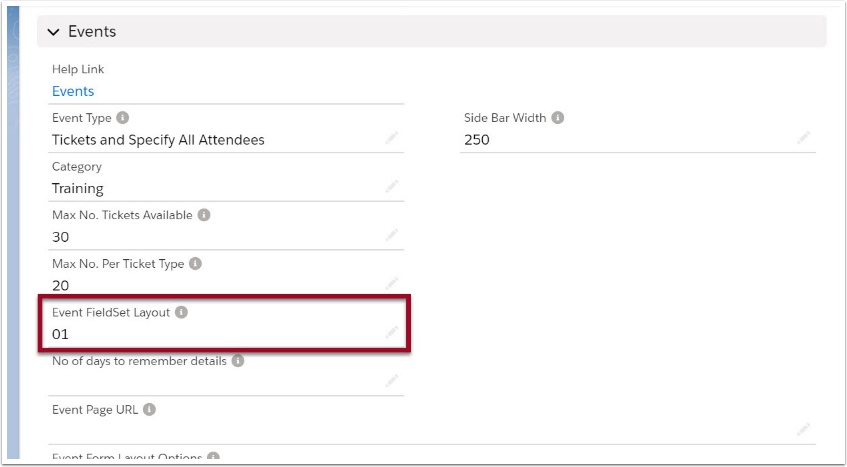
Note: There are 10 different form layouts to choose from. Please refer: How to customise event forms.
2. Ticket Types
Set up the types of tickets for your event

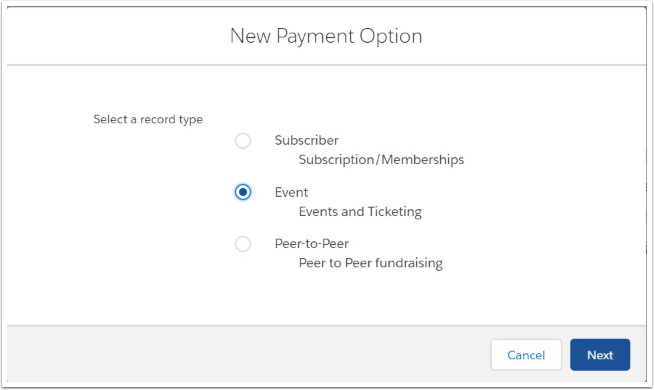
2.2. Select Event from the given record types
2.3. Create your own payment options (ticket types) and SAVE
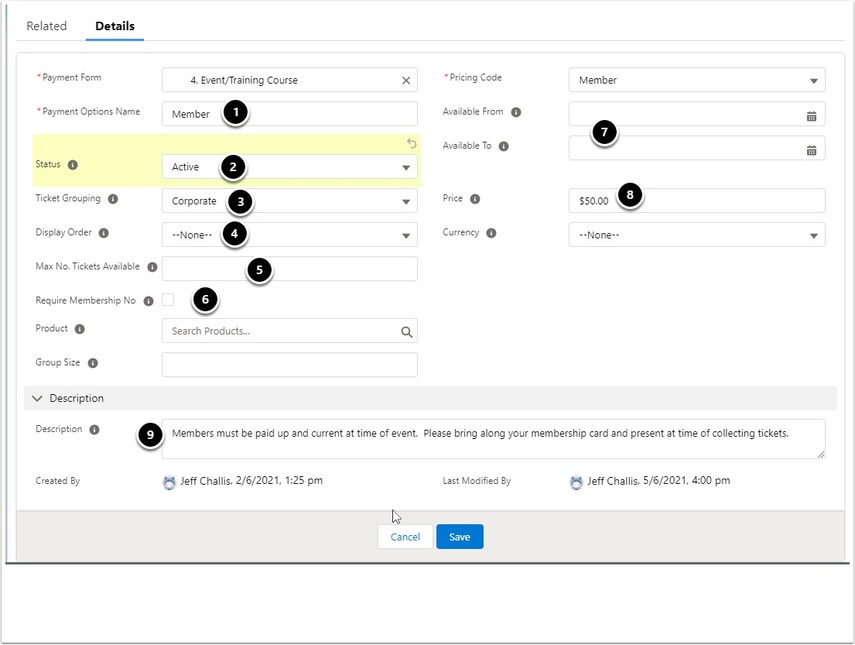
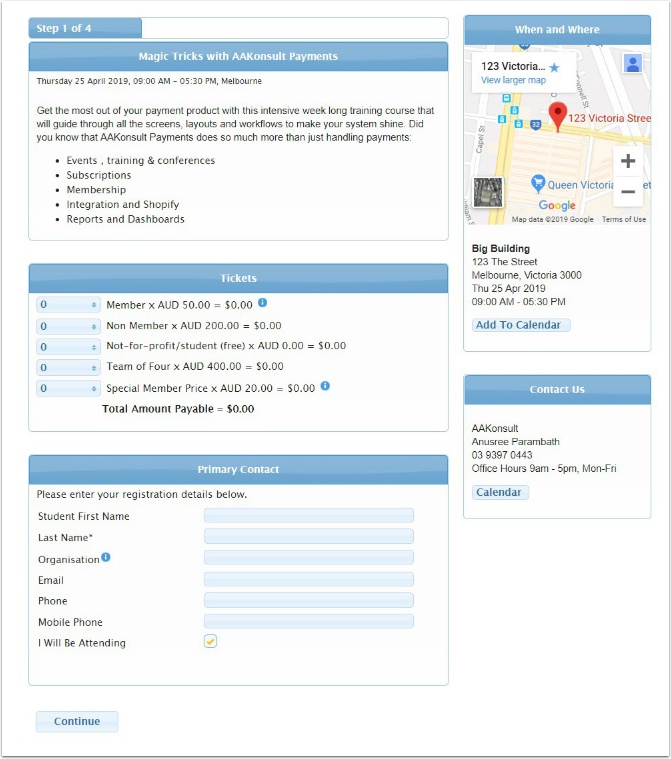
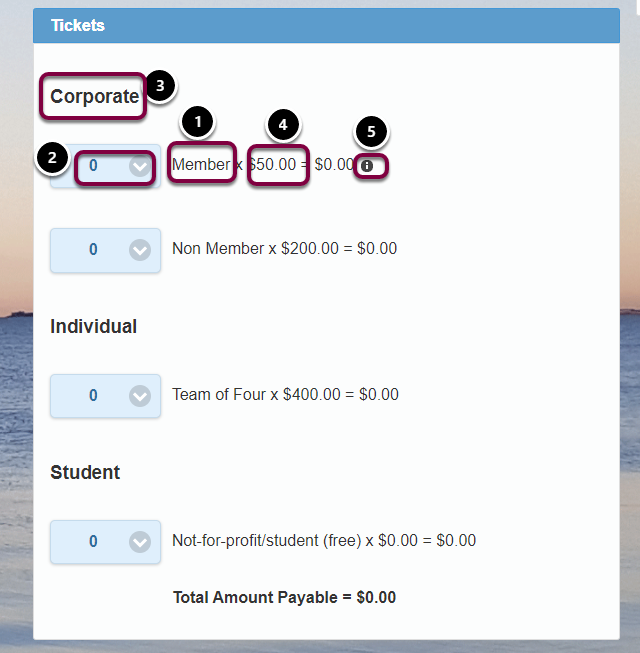
- Payment Options Name - This is the ticket name that will show on ticket selection (See (1) on screenshot below)
- Status - should be "Active" for publicly available tickets .
"Active - Internal Only" is for ticket types that are not publicly available and can only be selected by users using Payments2Us from within Salesforce. This would typically be used for VIP type tickets. - Ticket Grouping. If this has a value, then all tickets with the same value will be shown under the same heading. (See (3) on screenshot below)
- Display Order - appearance order sequence on form
- Max No Tickets Available - Maximum number of this ticket type the can be sold. If there is no value here, then the "Max No. Tickets Available" on the Payment Form is used for ALL Ticket types.
If set, the drop down list of ticket quantity will reflect the "Max No Tickets Available" less any tickets that have currently being sold. Should the Payment Form, field "Max No. per Ticket Type" field be a less value then this will be the maximum number available in the drop down list. (See (2) on screenshot below) - Requires Membership No - User must enter a membership number when registering their details. Their last name and Membership No. must match. This ensures only Members can select this membership type.
- Available From/To Dates - Enter date range for when this ticket is available. Date ranges are typically used for Early Bird ticket availability/pricing.
- Price of ticket. (See (4) on screenshot below)
- Description - Information tip for extra information about the ticket. (See (5) on screenshot below)
3. Event
Set up the event details

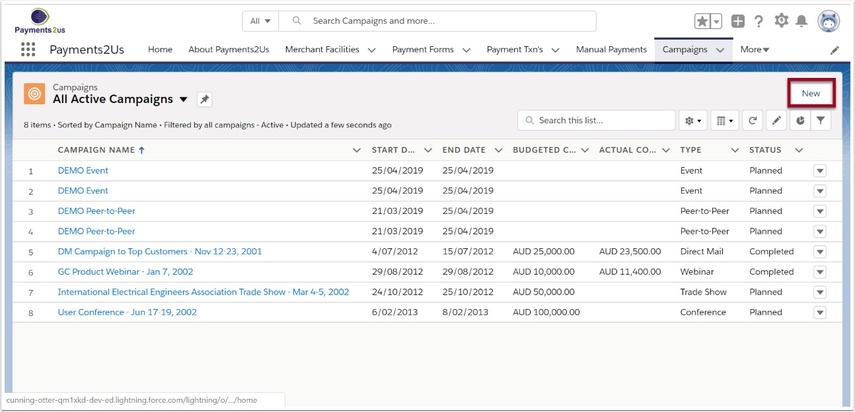
3.3. Fill in the Campaign Information for the event

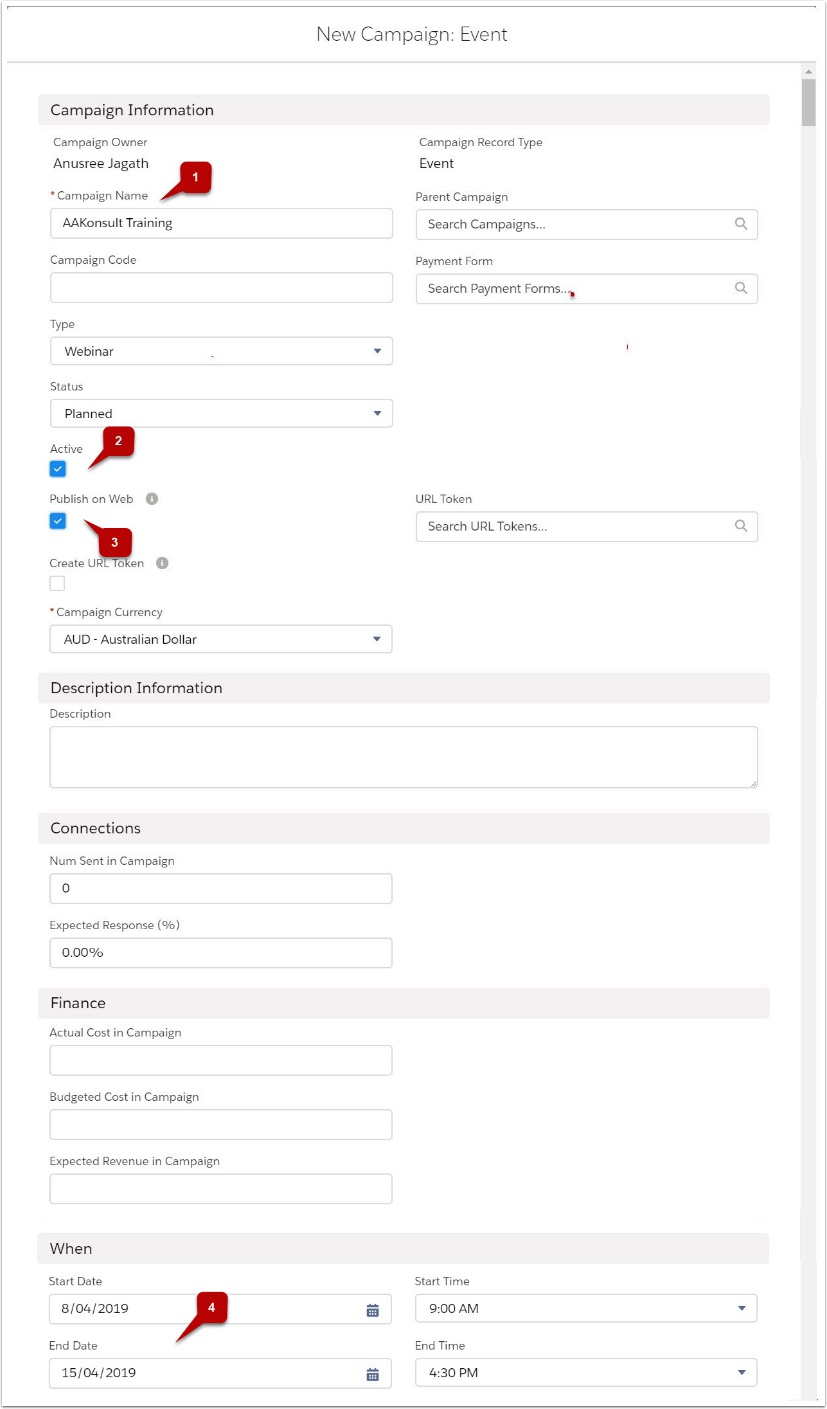
- Create a meaningful name
- Ensure the event is 'Active'
- Check that the Publish on Web checkbox is ticked.
- Check that the Start Date is on or after today
- Link the Event Form (just created)
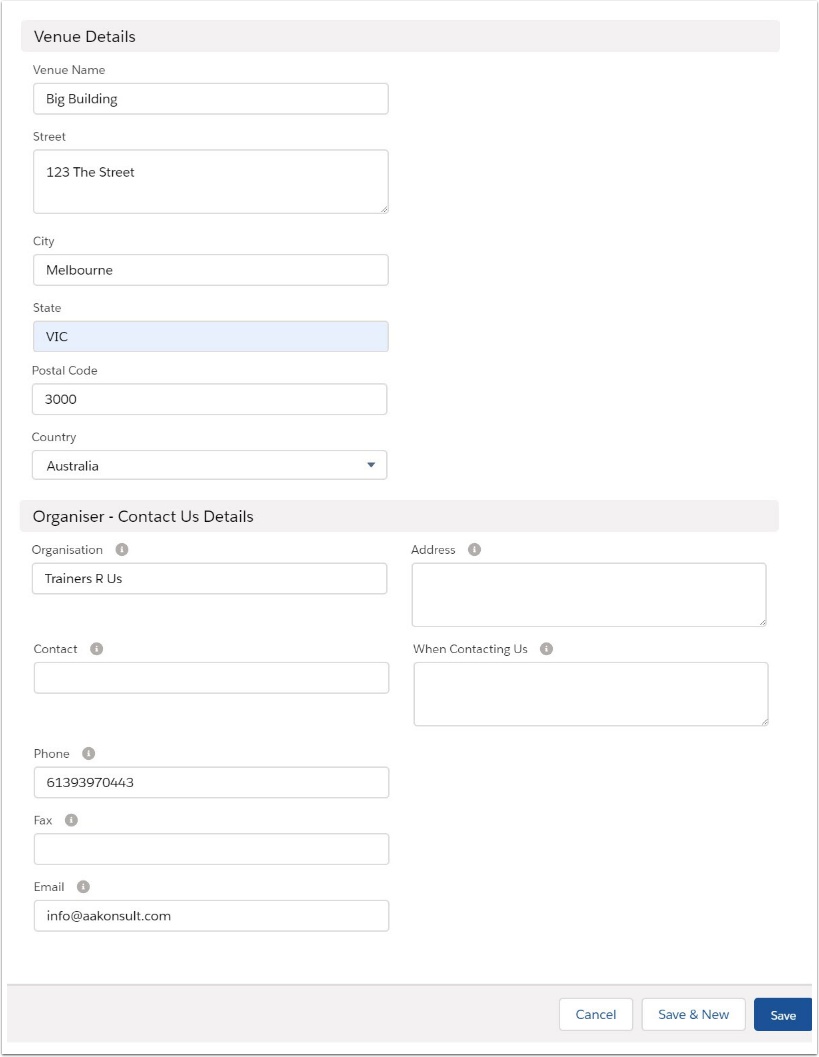
3.4. Fill in Event Details
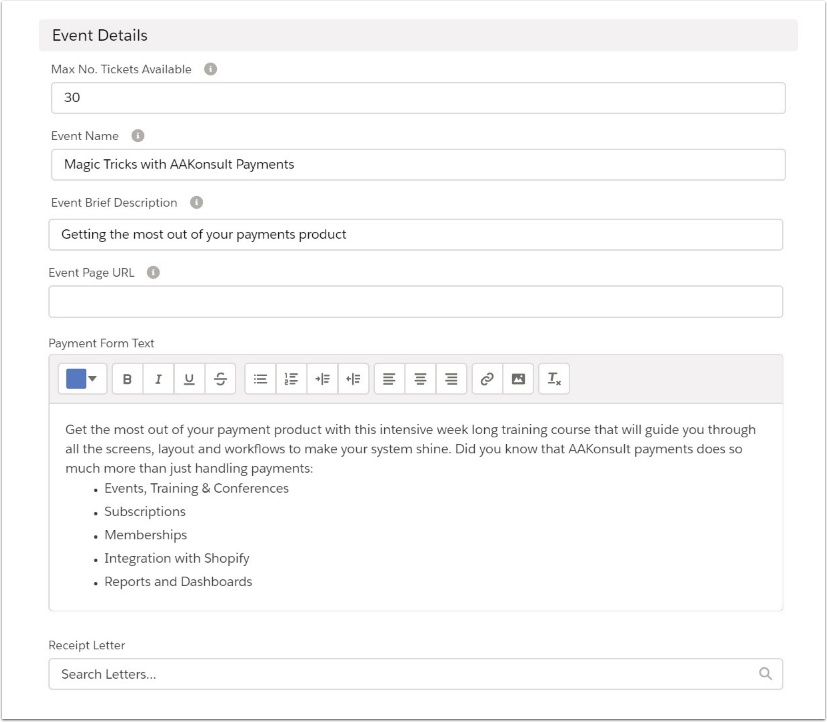
3.5. Fill in extra details if required and SAVE
4. Test
4.2. Check your form