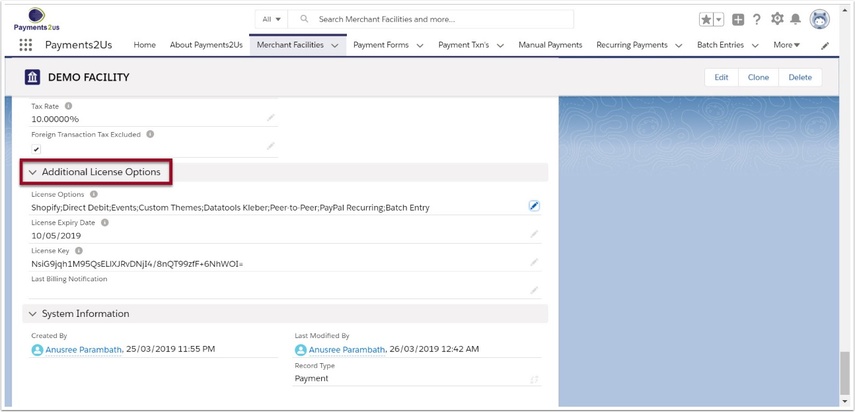
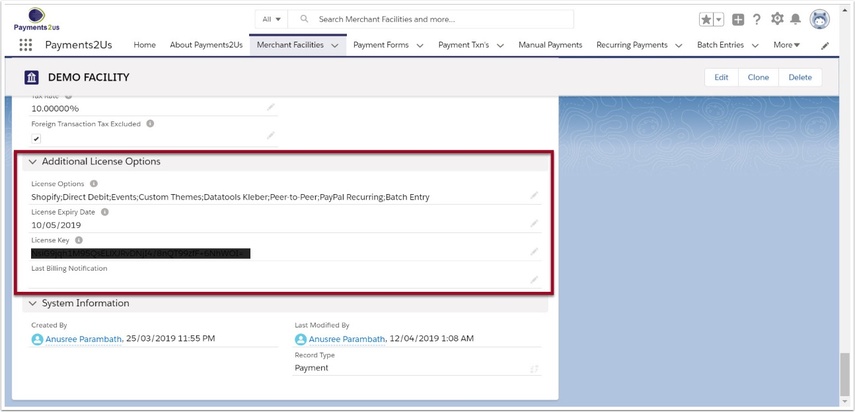
Themes give you control over the appearance of your checkout forms. This will help them fit your organisation's branding.
In addition to the standard themes that are available, you can define our own custom theme. This is available as an additional license option. Please contact support@aakonsult.com for more info.
Please note, Payments2Us is currently compatible with jquery themes 1.9.2. This may change as new releases of Payments2Us comes out or JQuery updates their themeroller. Payments2Us does not warrant forward/backward compatibility, so please check new themes out thoroughly before deploying.
Please note: As of March all Payment Forms will require the "Modern" checkout form option, you will need to go to Jquery Mobile https://themeroller.jquerymobile.com
Salesforce will no longer support Payments2Us Classic Payment Forms.
For organisations using Stripe Payment Gateway, the background colour for the Credit Card entry is set to the same background colour of the first visible input field. You may need to manually edit your CSS to update the background colour.
1. Activate Custom Themes
1.2. Select 'Custom Themes' from available additional licenses.
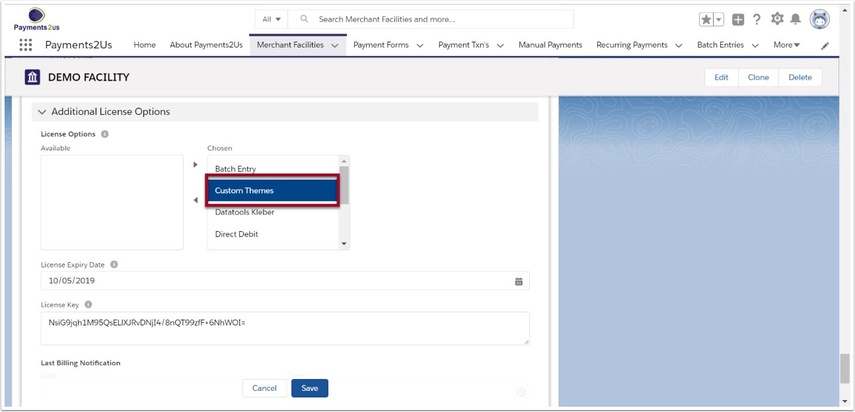
1.3. Enter 'License Expiry Date' and 'License Key' to activate
2. Create a custom theme
When using the "Modern" forms with Payments 6.0+, navigate to https://themeroller.jquerymobile.com
NOTE: The different tabs "A", "B", "C" etc. represent the Swatch. Please keep a note of which one you are using as you will need to select the correct value when setting up the custom theme name on the Merchant Facility in steps below.
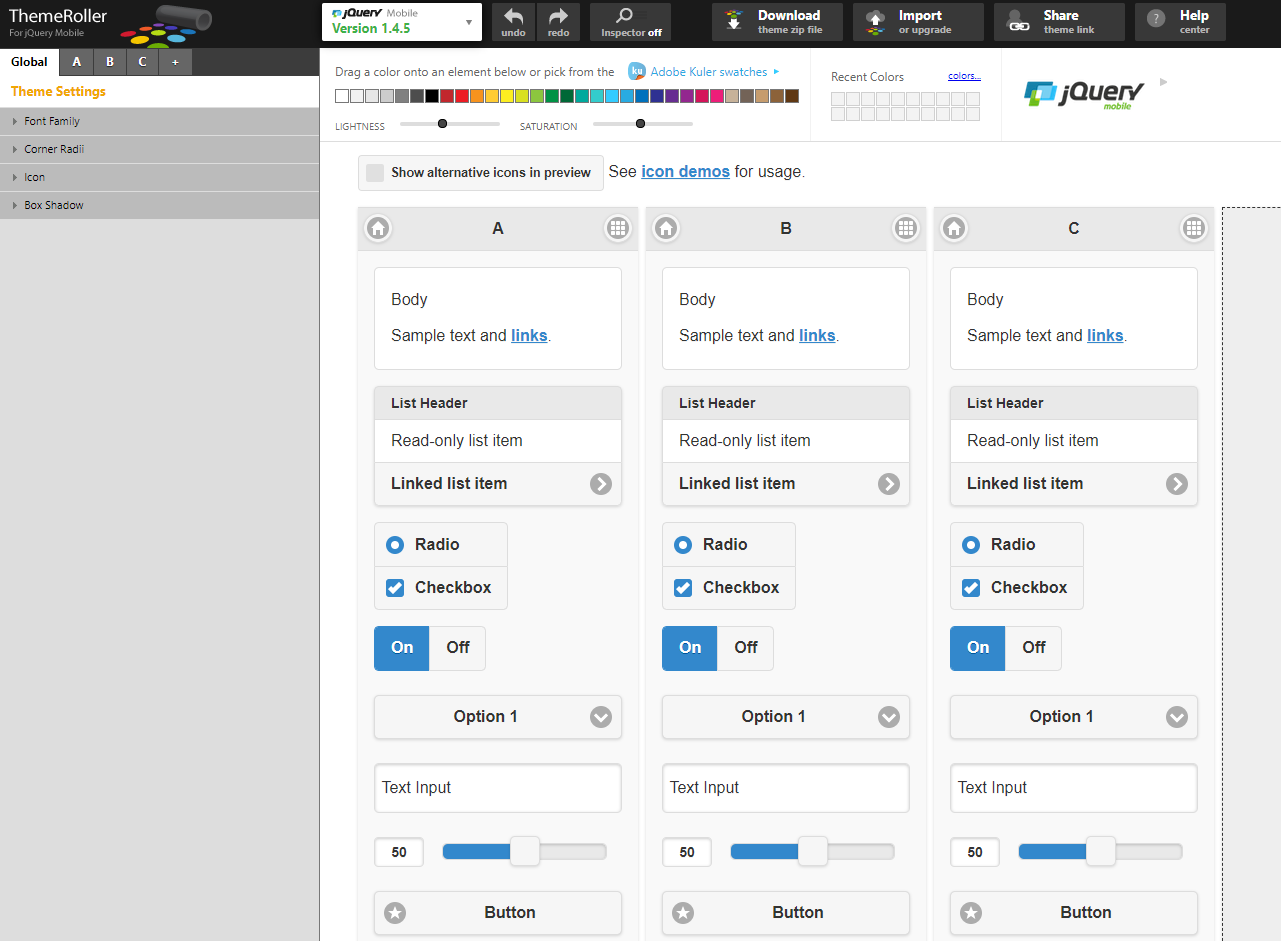
2.2. Design your theme
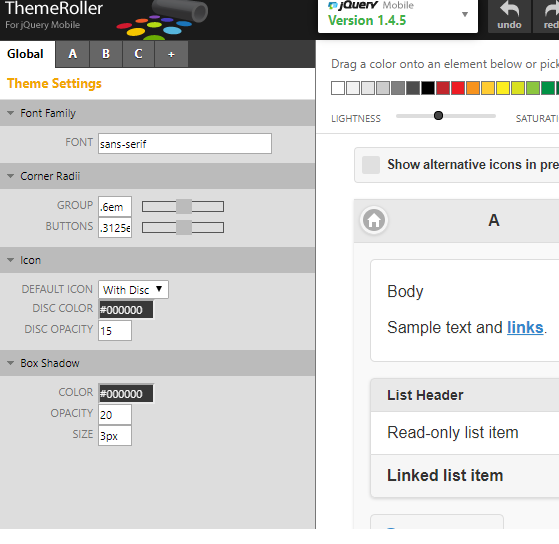
Themes can be configured to suit your organisation's style
2.3. Download your theme

Step through the Download Builder
2.4. Save the theme to your hard drive

3. Prepare file for loading
Before starting this section, we recommend that you have the option to see file extensions turned on and that these steps are carried out on a PC.
To turn on file extensions to be shown, open windows file explorer - then click on the view menu option, then options - change folder and search options. Then click on the View Tab and untick the option "Hide Extensions for known file types".
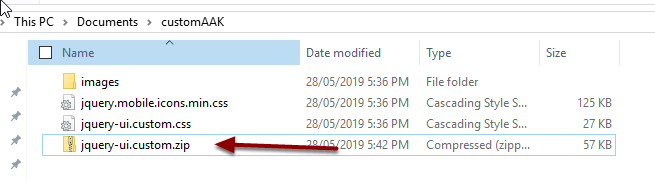
3.1. Unzip and open folder
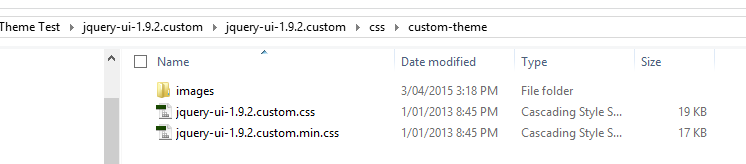
Navigate through the unzipped folder structure until you come across a folder with images and the css. for example jquery-ui-1.9.2.custom\css\custom-theme.
This folder may contain additional files in addition to the three shown above.
3.2. Rename files
Your folder will probably contain these files:
- An "images" folder
- ThemeName.min.css
- ThemeName.css
- jquery.mobile.icons.min.css
Where "ThemeName" is the name you entered on the download page in ThemeRoller.
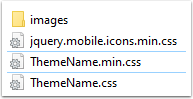
Rename the "ThemeName.css" file to "jquery-ui.custom.css"
Rename the "ThemeName.min.css" to "jquery-ui.custom.min.css"
These file names must be exact.
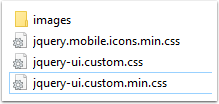
3.3. Select these 3 files and the images folder
3.4. Zip these files together
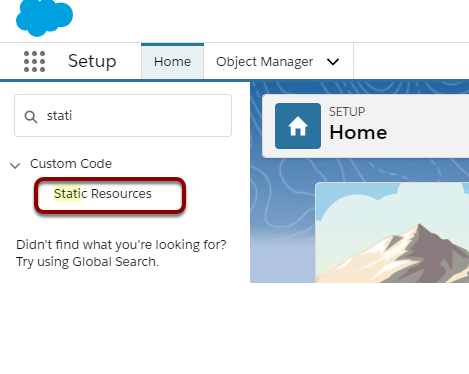
4. Load the new zipped custom theme into Salesforce
4.2. Select ‘New’

4.3. Enter details for the Custom Theme and ‘Save’
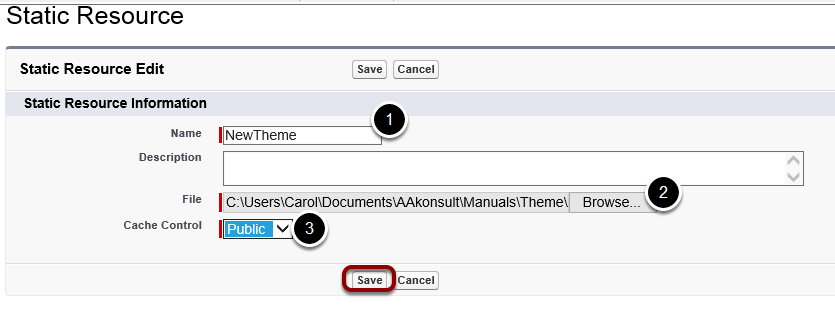
- Provide a name for the theme (no spaces)
- Upload the zipped file (that you created) from the folder
- Set Cache Control to 'Public'
- Save

4.5. Change Theme to ‘Custom Theme’

4.6. Enter your new Custom Theme name and select Swatch
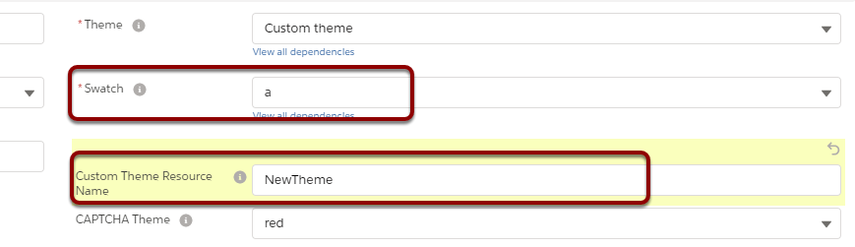
4.7. Save
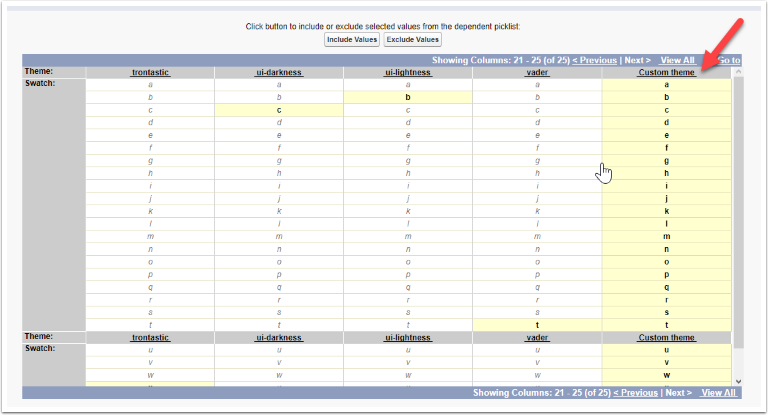
4.8. If Swatches are not showing
If no swatches are available, edit the field dependencies list for the themes by going into Setup>Create>Objects>Merchant facility. Click edit on the 'Theme' field, scroll down to the field dependencies section, click edit on 'Swatches'. Select A-Z under custom themes, click save.
5. Test custom theme
5.2. View your new custom theme
6. Adding custom fonts to your theme
The below section is added to assist you. Premium Support is required to be purchased and time needs to be booked in for any assistance. Our standard support does NOT cover adding custom fonts.
6.1. Download your font
Download your True Type Font (.ttf) or Open font format (.oft) file
6.2. Upload fonts to Webfont Generator
Upload your font (.ttf or .oft) file to Webfont Generator. Then download the generated files.
6.3. Upload the files to Salesforce static resource
zip the generate files together into a single file.
The navigate to setup (cog in the top right) - Quick find "Static Resources" and then click into the menu item
Press New
- Enter a name (Note this name as you'll need it for later)
- Make sure the Cache Control is set to public
- Select the zipped file and upload

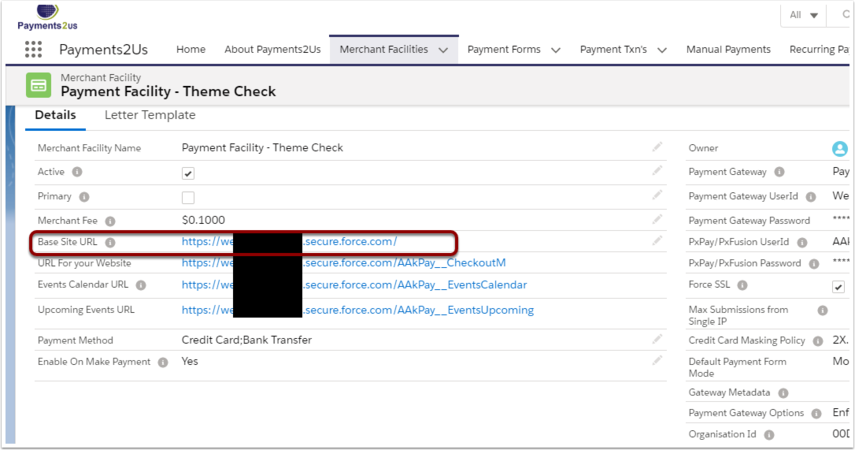
6.4. Locate your Site's Base URL
Navigate to the Merchant Facility Tab. Click into the primary active merchant facility and copy Base Site URL. You'll need this for use later in this procedure.
6.5. Reference the font in your stylesheet
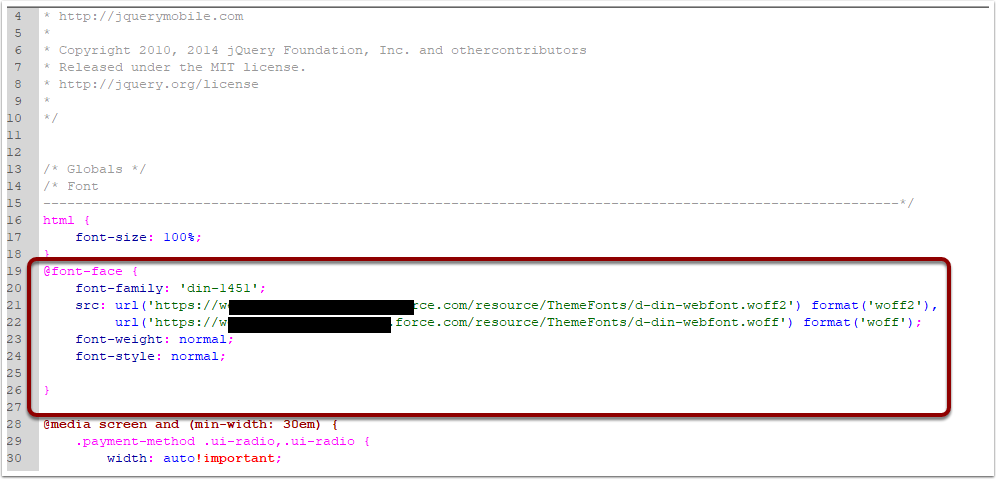
6.5.1. Edit Style.css from Webfont Generator download
Start with the style.css file that was generated by Upload fonts to Webfont Generator step.
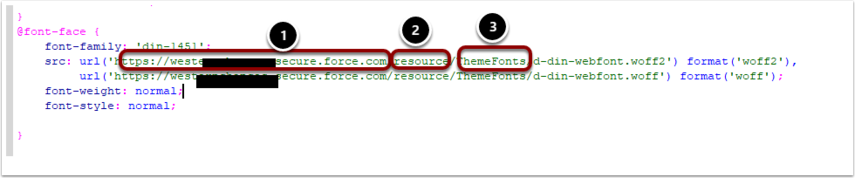
for the URL, enter the {base site url}/resource/{static resource name}
- Site Base URL as copied in step: Locate your Sites Base URL
- Is always the text "resource"
- Is the Static Resource Name that was used in the steps above "Upload the files to Salesforce static resource".
6.5.2. Edit Custom Theme
Edit the field "jquery-ui.custom.css" (This is the custom theme generated file that was previously uploaded as a static resource)
In the section /* Globals */ section copy the @font-face from the previous section and paste.
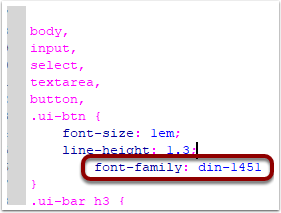
You can now reference the font in you css.
Re-zip the theme folder and upload into Static resource.