There are several options where the Payee might be allowed to pay later, these include:
- Invoice Me
- Send By Post
- Bank Transfer
- NDIS Claim
- Check
- Cheque
- Pay Using PayID
For these options, the payee commits to the payment/donation on the webform checkout and then later posts in (or bank transfers) the amount. An internal staff member receives the payment and marks the payment as received.
1. Enabling Pay Later Options
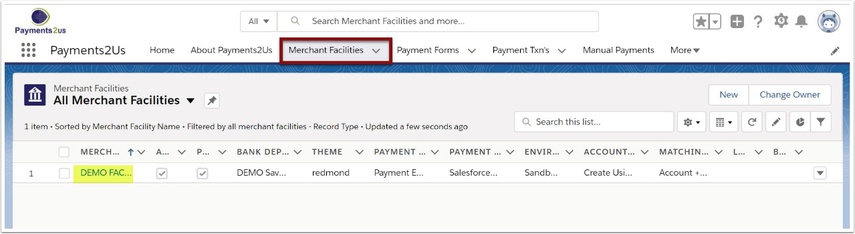
The Merchant Facility tab can be found within the Payments2Us menu (Top right picklist in Salesforce - Select Payments2Us), or it can be found under the "More" at the end of the tabs. (In Salesforce Classic - It can be under the "+" at the end of the tabs)
Once you have clicked on the Merchant Facility Tab, select the appropriate List view (Example - "All Merchant Facilities") and click into Merchant Facility you wish to update.
1.1. Select the allowable Payment Methods
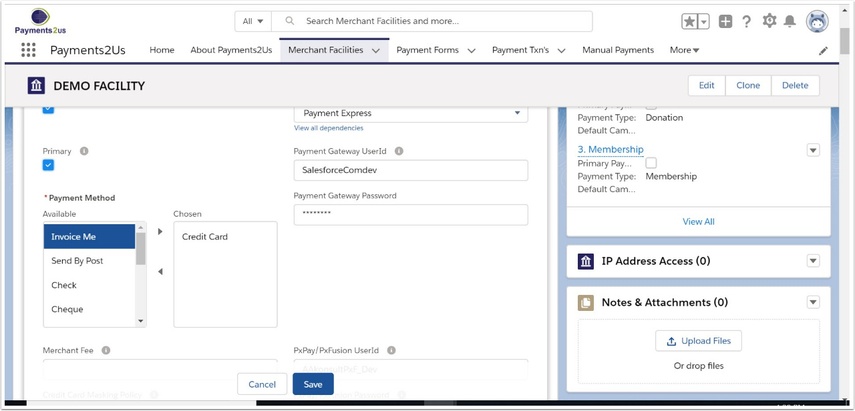
- Locate the Payment Method field and double click
- Select PayPal and then press OK button followed by the SAVE button
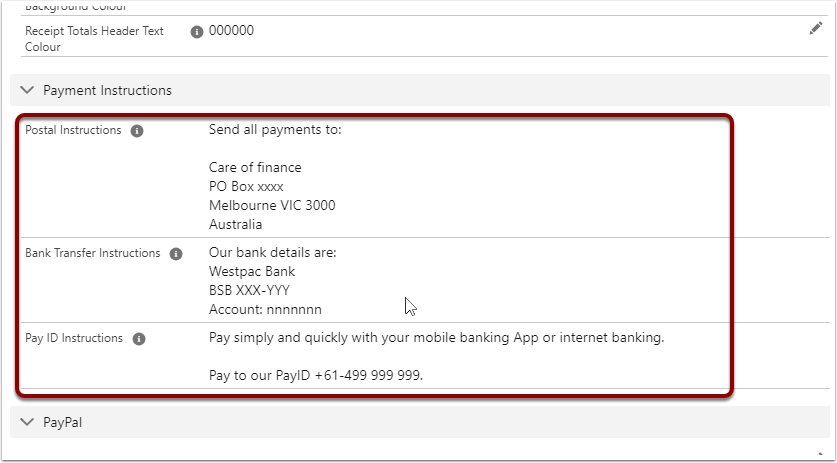
1.2. Setup the Pay Later Instructions
Update the Payment Instructions on the Merchant Facility.
1.3. Payment Instructions assignment
During the Checkout processing, the combination of Payment Method and Payment Instruction used to update the field "Payment Instruction" on the Payment Txn.
This is then used by the Workflow Rule: "Send Pay Later Instructions" to email the instructions to the payer.
The first line of the instructions is defaulted in from custom label (setup - search "custom labels").
This is also merge with either "donation" or "order" depending on the Payment Txn related Payment Form, field "Payment Type". This this field has "Donation" then the word "donation" is used, otherwise the word "order" is used.
Assignments are as per the table below.
| Payment Method | First line of Instructions | Following Lines of Instructions - Merchant Facility Field |
|---|---|---|
| Pay Using PayID | Label.Checkout_Complete_Label_Pay_Using_PayID + donation/order |
Pay ID Instructions |
| BPAY | Label.Checkout_Complete_Label_Pay_Using_BPAY + biller code + |
|
| Send By Post | Label.Checkout_Complete_Label_Postal + donation/order + Payment Txn Name |
Postal Instructions |
| Cheque or Check | Label.Checkout_Complete_Label_Postal + donation/order + Payment Txn Name |
Postal Instructions |
| Pledge | Label.Checkout_Complete_Label_Pledge + Payment Txn Name |
Postal Instructions |
| Invoice Me | Label.Checkout_Complete_Label_Invoice_Me + order/donation + Payment Txn Name |
|
| NDIS Claim | Label.Checkout_Complete_Label_NDIS_Claim + order/donation + Payment Txn Name |
|
| Bank Transfer | Label.Checkout_Complete_Label_Bank_Transfer + order/donation + Payment Txn Name |
Bank Transfer Instructions |
1.4. Checkout preview
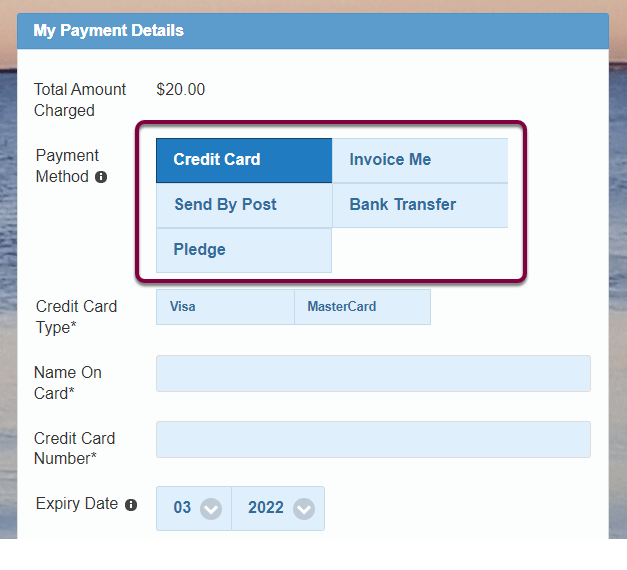
On the Merchant Facility, you can click on the Site URL and this will show you the updated checkout form. This will now include the newly included payment options.
2. Pay Later Process Overview

The sections below provide more details of the process flows. The colour coding used in the processes are:
- Payments2Us pages are those pages using salesforce.com sites functionality
- External web is a non salesforce.com page, such as Pay Pal.
- Payee Actions are manual steps that a payee needs to do. These could include sending payments.
Internal Staff are actions required by internal users of Payments2Us where they need to perform a manual step within Salesforce.
2.1. Pay Later Process Flow

In many cases, organisations will need to provide other options from Credit Card as methods of payments. These could include:
- Invoice Me. For this option, the payee is expecting your organisation to send an invoice.
- Send By Post or Pledge.
- Bank Transfer.
3. Pay Later Payment Received
Once a payment is received, you need to locate the Payment and then mark the Payment as received.
You can optionally record details about the payment such as cheque, method of payment etc.
To locate the Payment Txn, you can either:
- Do a global search based on the bank transfer reference
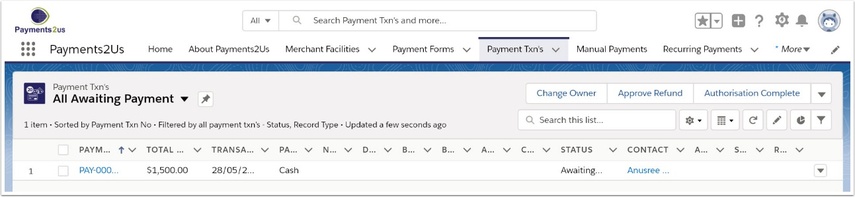
- Navigate to the Payment Txn, select the list view "All Awaiting Payment" (Shown in screenshot above)
- Locate the Contact or Account and see the related Payment Txn records
3.1. Marking a Payment as Received
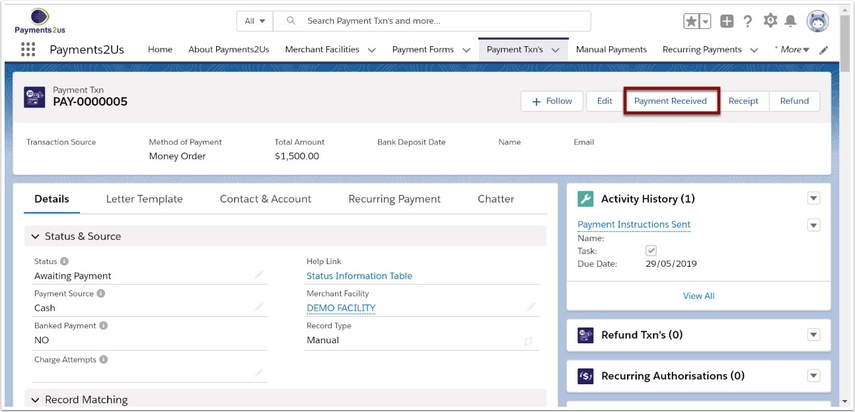
Click into the Payment Txn that you wish to mark as received.
Press the PAYMENT RECEIVED button.
3.2. Mass Marking Payments are received
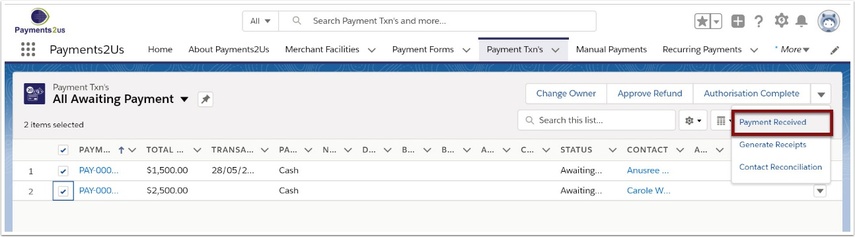
Navigate to the Payment Txn Tab, Select listview filter of "All Awaiting Payment" and Press the GO button.
- Select the transactions you wish to mark as payment received
- Press the PAYMENT RECEIVED button