1. Setting up Transact Payment
1.1. Adding Transact Payment to a Page
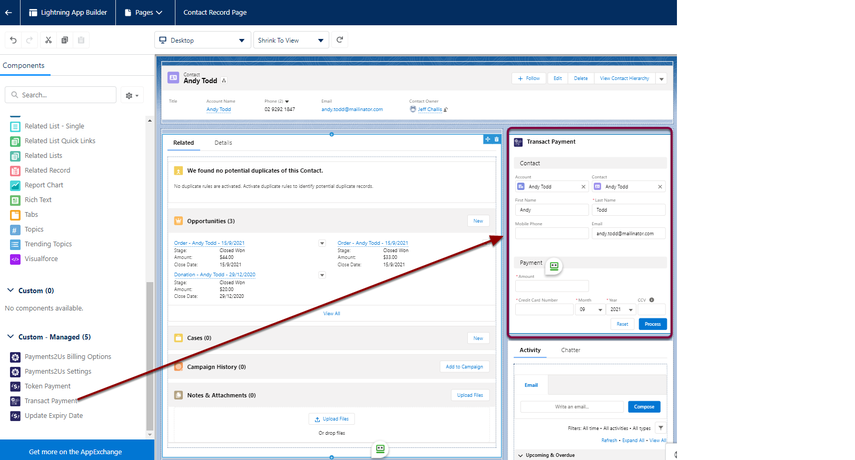
Your Salesforce administrator can add the "Transact Payment" Lightning Web Component to the Page Layout. Transact Payment can be added to:
- Home Page
- Any Standard or Custom Object
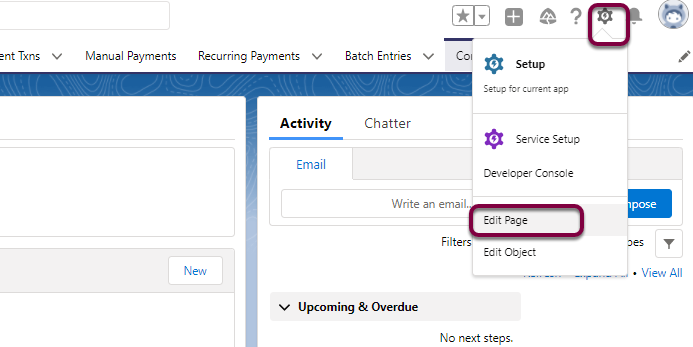
1.1.1. Edit Page
From the Cog at the top of the page, select “Edit Page”
1.1.2. Add Transact Payment
1.1.2.1. Drag the "Transact Payment" onto the Page
1.2. Set Transact Payment Settings
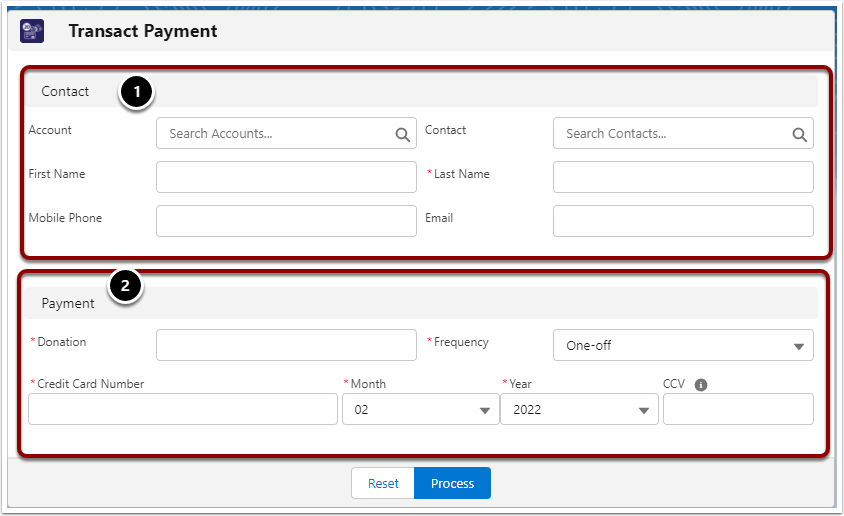
In the Lightning App Builder, click on the Transact Payment Component (1) to see component settings (2)
This section on settings is provided for advanced admins as a guide. Transact Payment Settings is not covered by our standard support. Should you need assistance, you will need to purchase Premium Support.
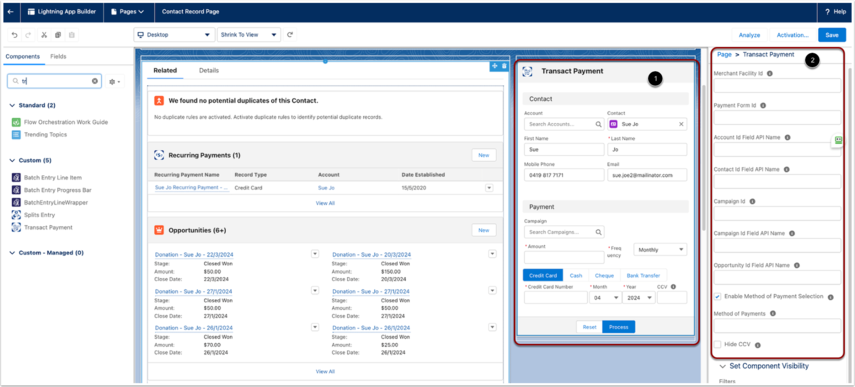
- "Merchant Facility Id" - Record Id for the Merchant Facility. The Primary and Active is used if not specified. *
- "Payment Form Id" - Record Id for the Payment Form to default in. The Primary Payment form for the Merchant Facility is used if not specified. Note, details such as Recurring Payment Frequencies will be used. *
- "Account Id Field API Name". For the related object of the page, this has is the field API name for the Account Id. If specified, this will default the Account into the Transact Payment Form. **
- "Contact Id Field API Name". For the related object of the page, this has is the field API name for the Contact Id. If specified, this will default the Contact into the Transact Payment Form. **
- "Campaign Id" - Record Id for the Campaign. *
- "Campaign Id Field API Name". For the related object of the page, this has is the field API name for the Campaign Id. If specified, this will default the Campaign into the Transact Payment Form. **
- "Opportunity Id Field API Name". For the related object of the page, this has is the field API name for the Opportunity Id. If specified, this will default the Opportunity into the Transact Payment Form. **
- "Enable Manual Payments Selection". If enabled, a radio button showing all Payment Methods will appear on Transact Payment. This allows for both Credit Card and Manual types such as Cash/Cheque/Check/Money Order etc.
The Methods payments used will from the "Methods of Payments" property, or if this is blank, the current picklist values from the Object Batch Entry Line Items, field "Method of Payments" is used. - "Methods of Payments" - A comma separated list of payment methods allowed. For example "Credit Card,Cash,Cheque"
- "Hide CCV" - Check this option to hide CCV input on the transact payment view.
NOTE: If the Transact Payment Form is added to a Contact, Payment Form, Account, Opportunity or Campaign Page Layout, then the Transact Payment will be related to the object automatically.
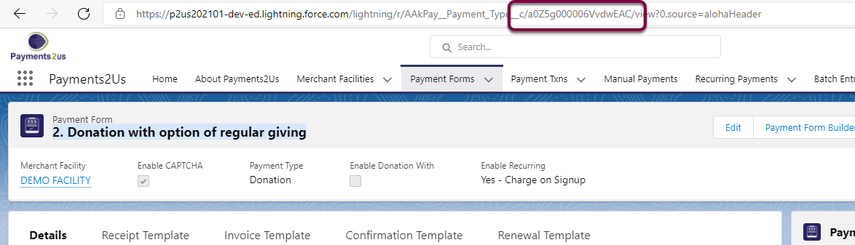
* Record Id's can be found by going into the object and copying the id from the URL. The below shows the record Id "a0Z5g000006VvdwEAC" for the Payment Form "2. Donation with option of regular giving". The value "a0Z5g000006VvdwEAC" would be entered into the "Payment Form Id" field.
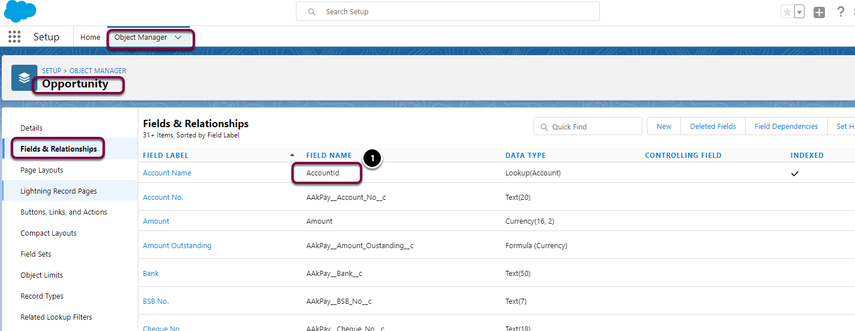
** Field API Names can be located in the Object Manager in setup. The example below is API name of "AccountId" (1) for the Opportunity Object. This would get entered into the "Account ID API Name" field. This would be applicable if the "Transact Component" was on the Opportunity Object Page.
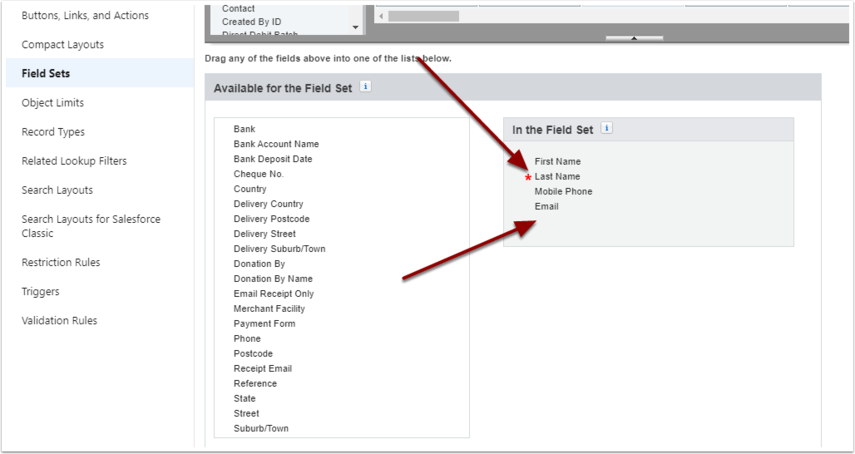
1.3. Change fields that appear on Transact Payment
The fields that can be entered are controlled by fieldsets on the Payment Txn Object. There are two fieldsets that are used:
- Contact Details (fieldset: TransactContact01)
- Payment Details (fieldset: TransactPayment01)
1.3.1. Update Payment Txn Field sets
Navigate to:
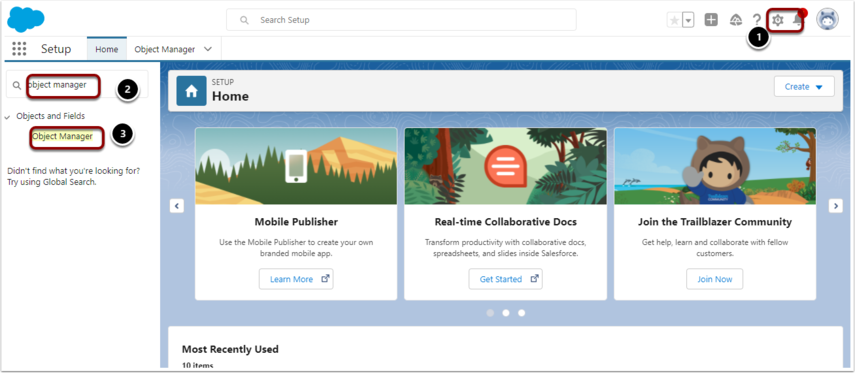
- Setup icon
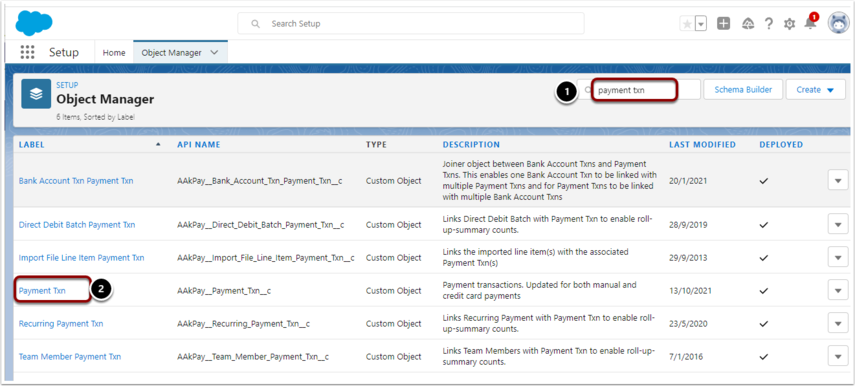
- Search "Object Manager"
- Click on Object Manager menu item
Navigate to:
- Search "Payment Txn"
- Click into “Payment Txn”
Navigate to:
- FieldSets Tab
- Scroll down and locate either "TransactContact01" or "TransactPayment01".
From the drop down menu - select edit
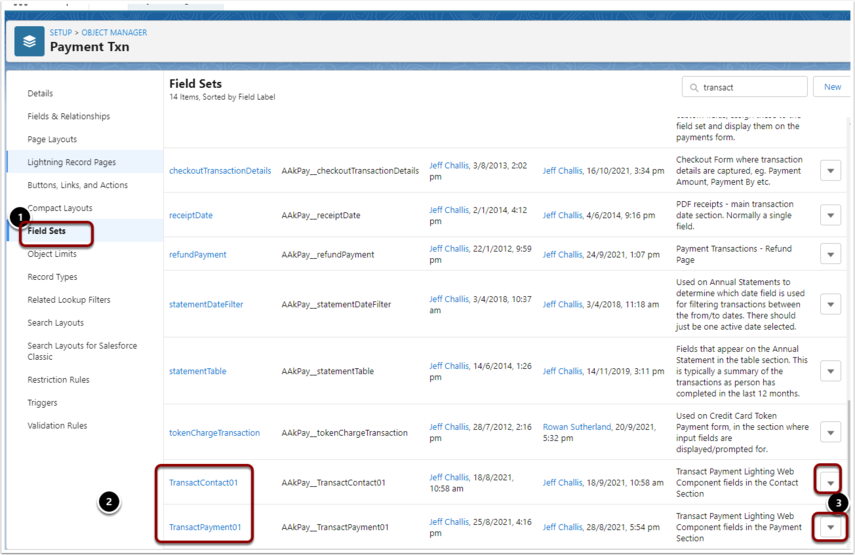
Add the fields you want to display in to the "In Field Sets" column