1. Overview of enabling Membership specific pricing
For membership specific ticket pricing, you can ask the member to enter their membership number and have this validated when entering the ticket.
The member will also have to enter their last name for Contact / Contact Group level memberships or the Account Name for Account level type of memberships.
To enable Membership level pricing, you will need to:
- Add Membership Id (Membership No) field to Payment Txn Object, FieldSet: eventPrimaryContactRegistration[01..10]
- Add Membership Id (Membership No) field to Payment Item Object, FieldSet: eventAttendeeContactRegistration[01..10]
- Turn on the "Require Membership No." validation rule on the Payment Option
- Set the "Event FieldSet Layout" on the Payment Form
- Press Refresh Button in Payment Form Builder
- Select "Require Membership No" on the Payment Option (Type of Ticket)
2. Add Membership Id (Membership No) field to Payment Txn FieldSet
Navigate to:
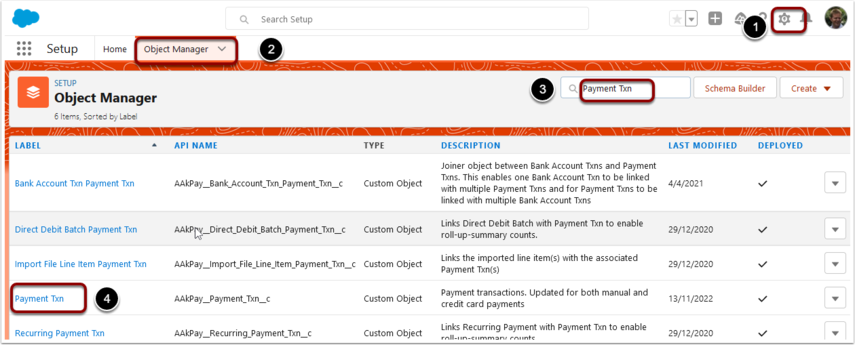
- Click on setup icon (top right)
- Click on Object Manager Tab
- Search for "Payment Txn"
- Click into the Payment Txn Object
There are 10 fieldsets available for the Event Registration form (1st step in the Event Ticket Purchase). You can use these as make sense for your organisation, for example "01" might be for volunteer events, "02" for Gala diners, "03" for webinars etc.
The FieldSet contains a list of fields that will be available on the page for user entry.
The fieldset number you select here must match the same number on the Payment Option and the same number that gets entered for the "Event FieldSet Layout" field on the Payment Form.
To edit the FieldSet.
- Select "Field Sets" tab.
- Search "eventPrimary"
- Select the fieldset number you are going to use ("02" is shown in screen shot below), then:
- Select Edit from the drop down menu.
NOTE: Prior to version 9.3, the "01" fieldset is NOT available for Membership Id, please use one of "02...10"

Drag the "Membership Id" onto the layout.
Press Save.

3. Add Membership Id (Membership No) field to Payment Item FieldSet
Navigate to:
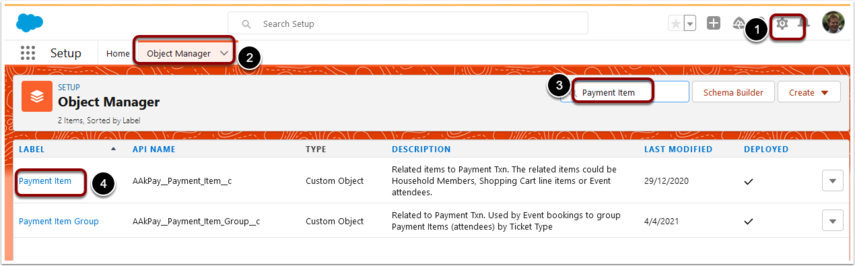
- Click on setup icon (top right)
- Click on Object Manager Tab
- Search for "Payment Item"
- Click into the Payment Item Object
There are 10 fieldsets available for the Event Contact Attendee entry step (2nd step in the Event Ticket Purchase). You can use these as make sense for your organisation, for example "01" might be for volunteer events, "02" for Gala diners, "03" for webinars etc.
The FieldSet contains a list of fields that will be available on the page for user entry.
The fieldset number you select here must match the same number on the Payment Txn and the same number that gets entered for the "Event FieldSet Layout" field on the Payment Form.
To edit the FieldSet.
- Select "Field Sets" tab.
- Search "eventAttendee"
- Select the FieldSet number you are going to use ("02" is shown in screen shot below), then:
- Select Edit from the drop down menu.
NOTE: Prior to version 9.3, the "01" fieldset is NOT available for Membership Id, please use one of "02...10"

Drag the "Membership Id" onto the layout.
Press Save.
4. Turn on the "Require Membership No." validation rule on the Payment Option
Navigate to:
- Click on setup icon (top right)
- Click on Object Manager Tab
- Search for "Payment Txn"
- Click into the Payment Txn Object

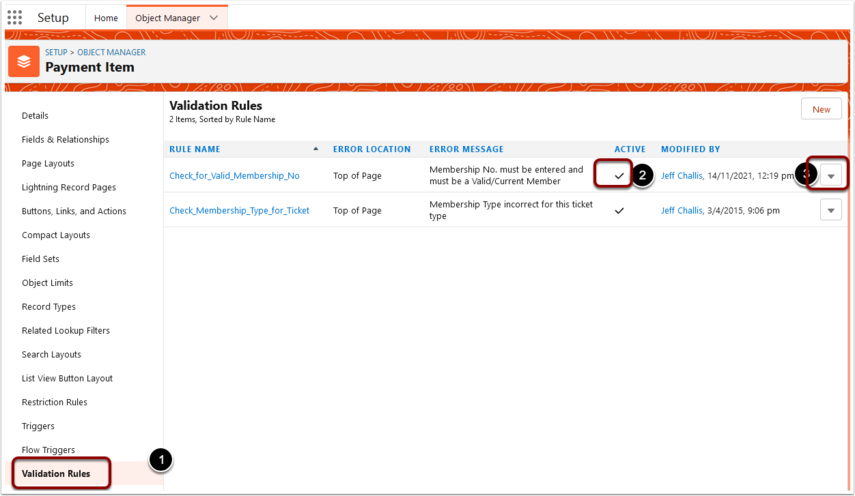
- Click on the Validation Rules tab
- Check the "Check_for_Valid_Membership_No" rule is Active. If NOT Active, then;
- Make Active, by selecting Edit from the menu button. Then select Active Checkbox and Save.
5. Set the "Event FieldSet Layout" on the Payment Form
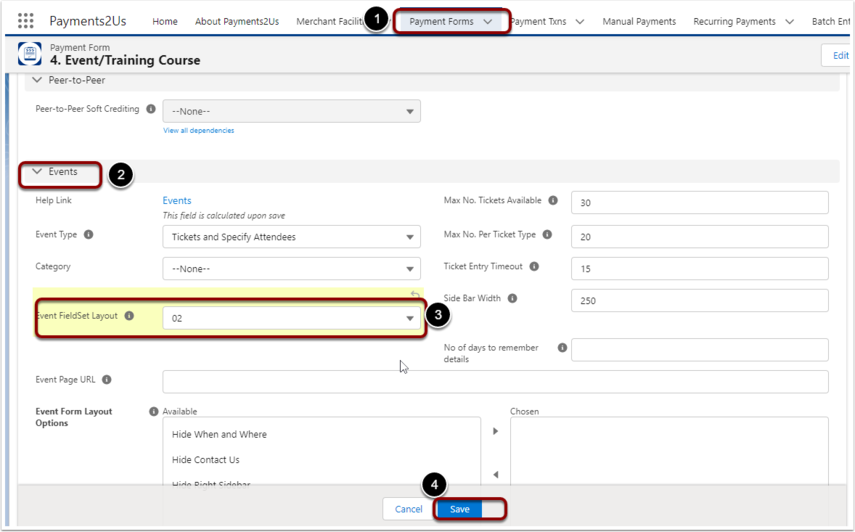
- Navigate to the Payment Form Tab. Then locate the Payment Form you are using for events that require the membership no validation and click into it.
- Scroll down to the Events Section
- Edit the Event FieldSet Layout and assign the same number as to the numbers used in the Field Sets on the Payment Txn and Payment Option above.
- Press SAVE button
- Navigate to the Payment Form Tab. Then locate the Payment Form you are using for events that require the membership no validation and click into it.
- Press “Payment Form Builder”

- Press "Full Reset" OR "Refresh"
- Press “SAVE”

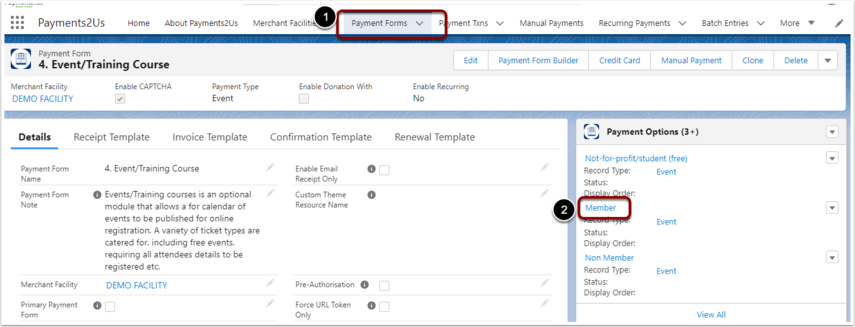
7. Select "Require Membership No" on the Payment Option (Type of Ticket)
- Navigate to the Payment Form Tab. Then locate the Payment Form you are using for events that require the membership no validation and click into it.
- Click into the related Payment Options (Type of Ticket) for which you wish to validate the Membership No as being valid.
- Select "Require Membership No"
- SAVE
