1. Before you start
Make sure you have access to the following:
- Bank Feed License option. Contact support @ payments2us.com if you need a license key
- Access to your internet banking username/password
- An Salesforce admin that can add permission sets to your user account
2. Adding Bank Feed License option
2.1. Obtaining a Bank Feed license option
Unlike other license options, the Bank Feed license option is charged for both Sandbox and Production instances as this reflects the costs AAkonsult/Payments2Us incur.
If you do not have a license option for Bank Feeds, then please request one from support @ payments2us.com. When requesting, please supply your Salesforce org id - You can get this from setup - search "Company Information", then copy/paste the "Salesforce Organization Id"
You can connect one Bank Feed license with multiple Banks and Bank Accounts. Payments2Us does have the option for multiple license options, but this is under exception use cases. If you feel you'll need more than one, please contact our support first to check.
2.2. Entering your Bank Feed license option
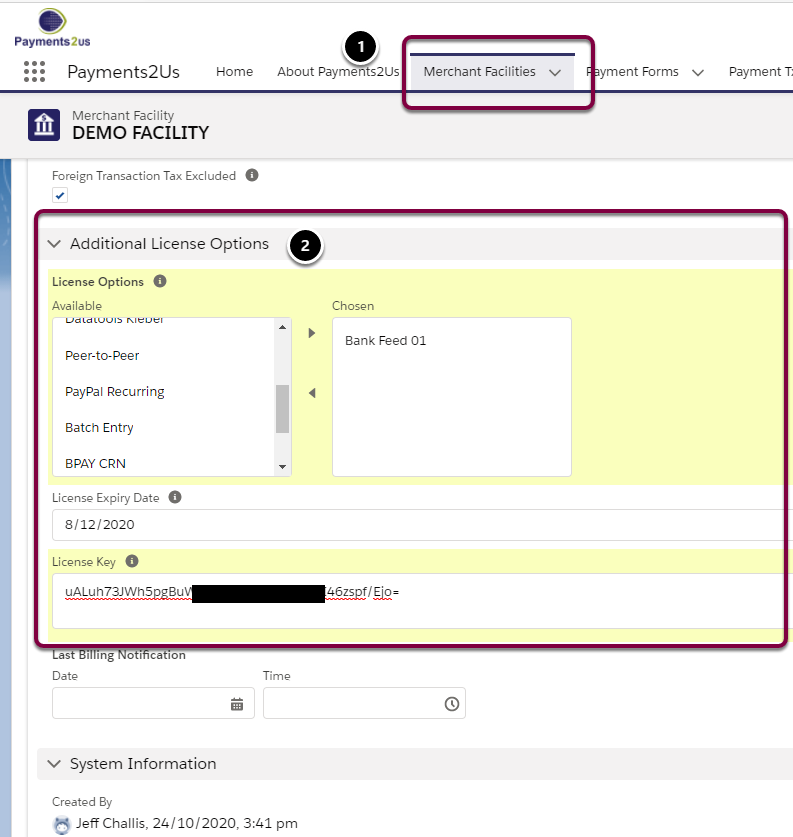
You will receive you License key and options from Payments2Us.
In Salesforce, click on the Merchant Facility Tab (1). For ALL merchant faculties that you wish to use the License Option for, edit the license details section (2) ensuring your enter the details exactly as provided in the license options email.
3. Assign Permission Sets to Bank Feed users
3.1. About the Payments2Us Finance Permission Set
Your Salesforce administrator will need to assign each person that needs access to the Bank Feeds with Automatic Reconciliation module access to these tabs/objects.
The Payments2Us Admin permission set, does not have access to these objects (unless the Payments2Us App was installed for all users). The Permission Set "Payments2Us Finance" is the correct one to use.
3.2. Locate User(s) to assign permission set
- Click on setup cog
- Search "User"
- Select "Users" menu option
- Click into the User you want to assign the Permission set to

3.3. Assign Payments2Us Finance Permission Set to User
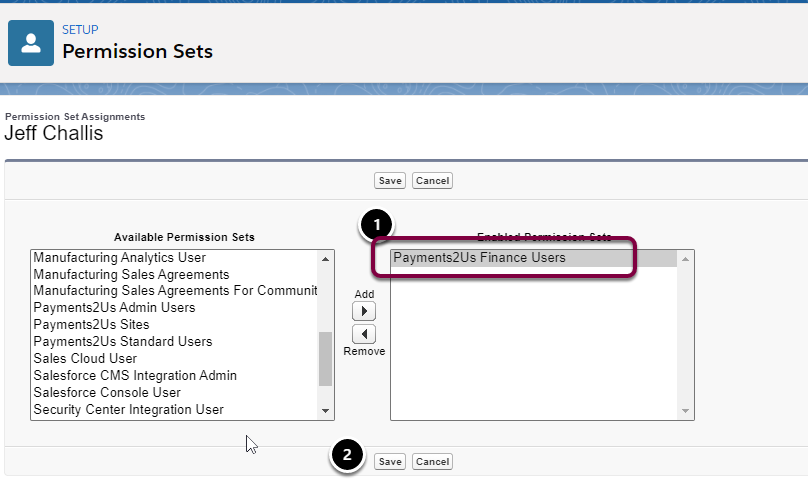
Scroll down the screen to the related list "Permission Set Assignments". Then click on the Edit Assignments button (1)

- Assign the "Payments2Us Finance Users" Permission Set
- Save
4. Link to your online Internet Banking
4.1. Create Bank Feed Entry
Each Bank Feed entry is linked to one Bank Feed license option. The Bank Feed ban be linked to multiple bank accounts.
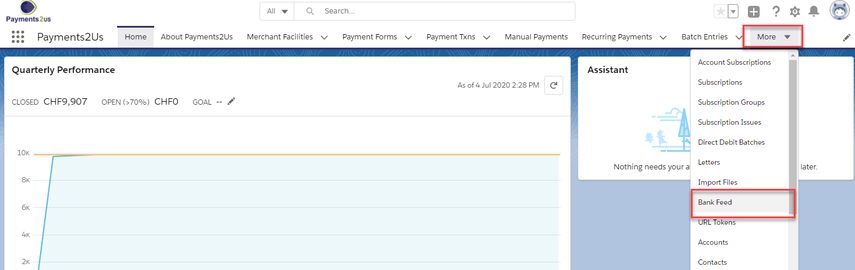
Select the Bank Feed menu option
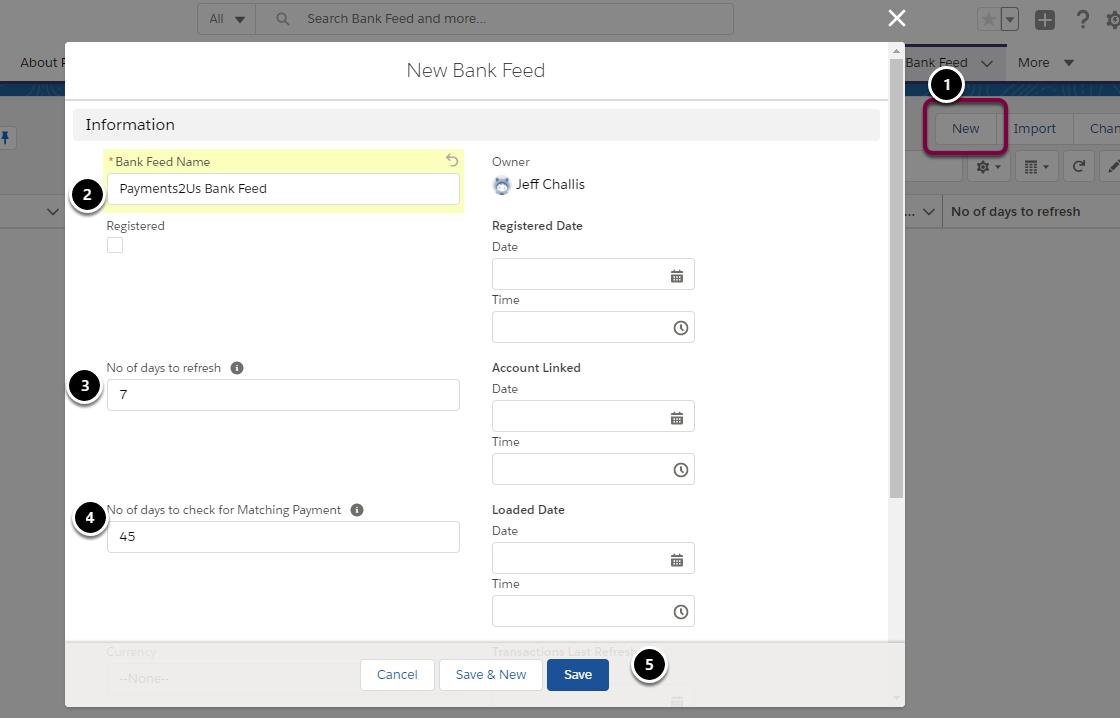
- Press the New button
- Enter a description. Normally along the lines of your organisation name and maybe the bank you'll be linking to
- No of days to refresh is how far back will the nightly Yodlee processor go to check for new/updated bank statement lines.
- The No of days to check for Matching Payment tells the nightly Yodlee processor how far back should it consider Payment Txns for automatic matching.
- Save
4.2. Register for Bank Feeds
This process creates a "bank feed" user so you can later link to your internet bank account accounts
Press the Register Bank Feed button (1), then Save (2)

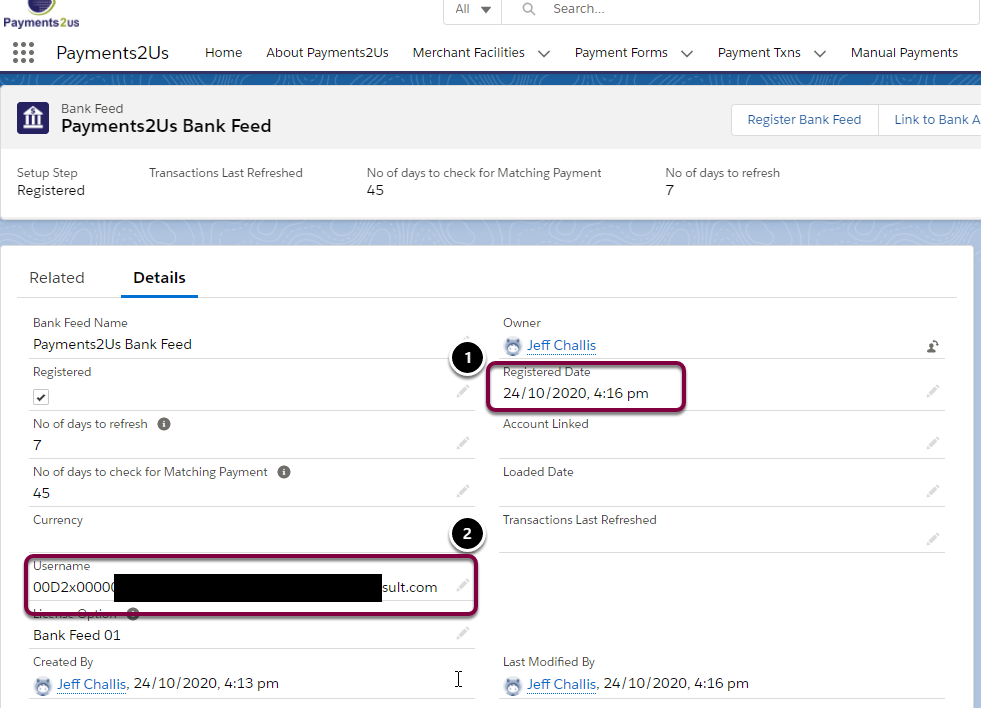
After saving, wait a few seconds, then refresh. You should now see the Date Registered (1) and Username (2) have been assigned.
4.3. Linking to your Internet Banking
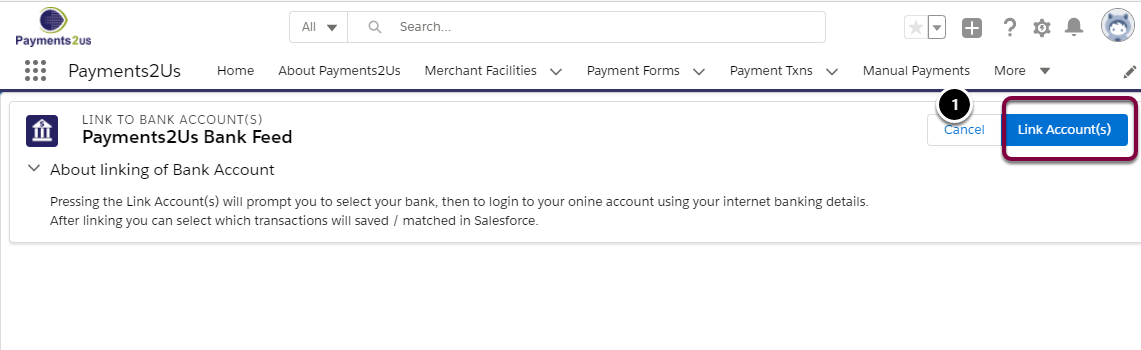
Press the Link to Bank Accounts (1) button

Press "Link Account(s)" button (1)
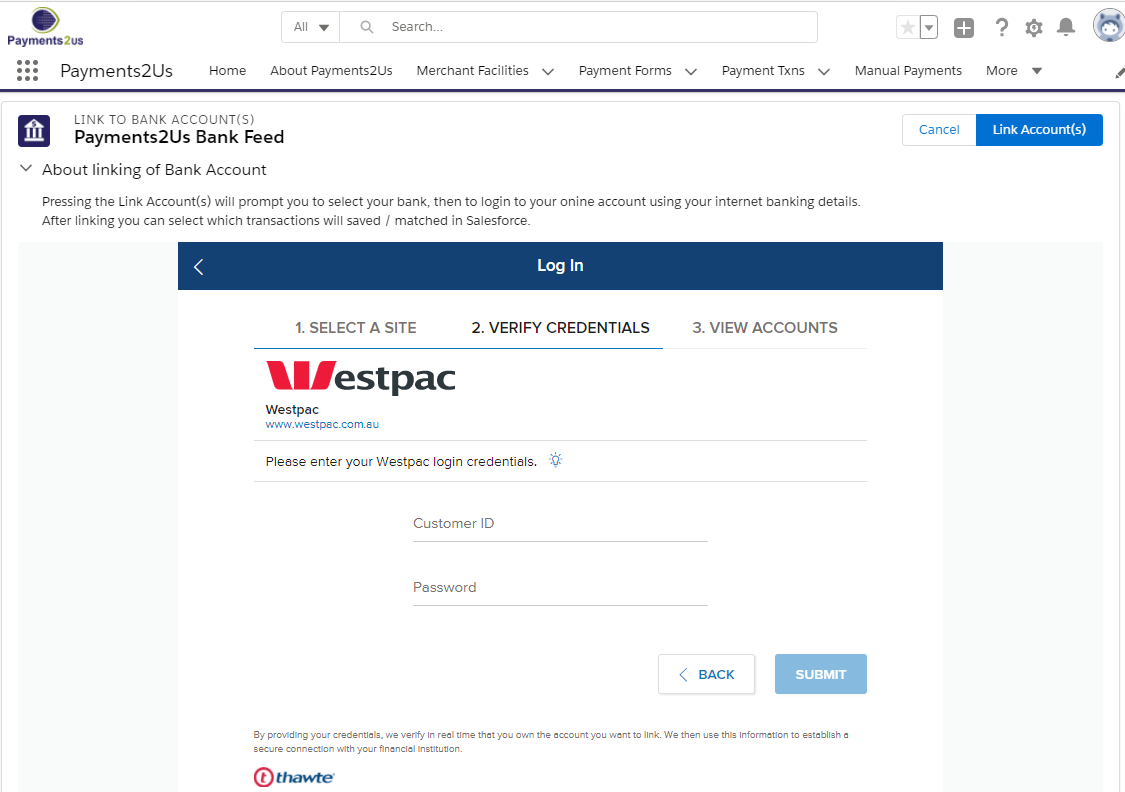
Select your bank (1) or perform a search if you do not see it (2)

Logon using your internet banking credentials
Should you have issues with the login screen not accepting your username/password, then you can try using the search option and then logging in. We've found that searching for "NAB Internet" enabled us to connect, where as clicking on the icon did not work.
If you do not want to bring an account back to salesforce, then click on the cog (1) and select delete.
- NOTE, this does NOT delete your bank account, just the link between your internet banking and Salesforce.
- As an alternative to removing an account from here, you can simple mark the bank account as not active in Salesforce and that will mean the transactions will not come in.
If you have multiple banks you can link to another bank (2).
If you have linked all accounts, then press Close button
NOTE, using this Link Account(s) option will mean you do NOT need to have a second Bank Feed license from Payments2Us.

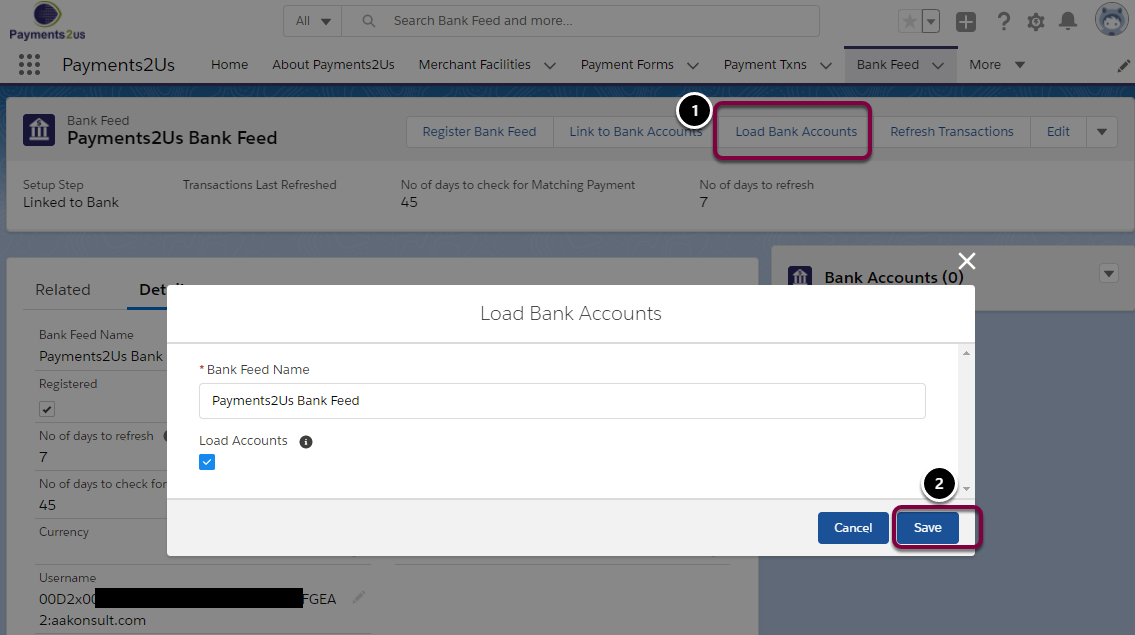
4.4. Load Bank Accounts
Now that you have linked to your internet banking you can bring the bank accounts into Salesforce.
- Press "Load Bank Accounts" button
- Save
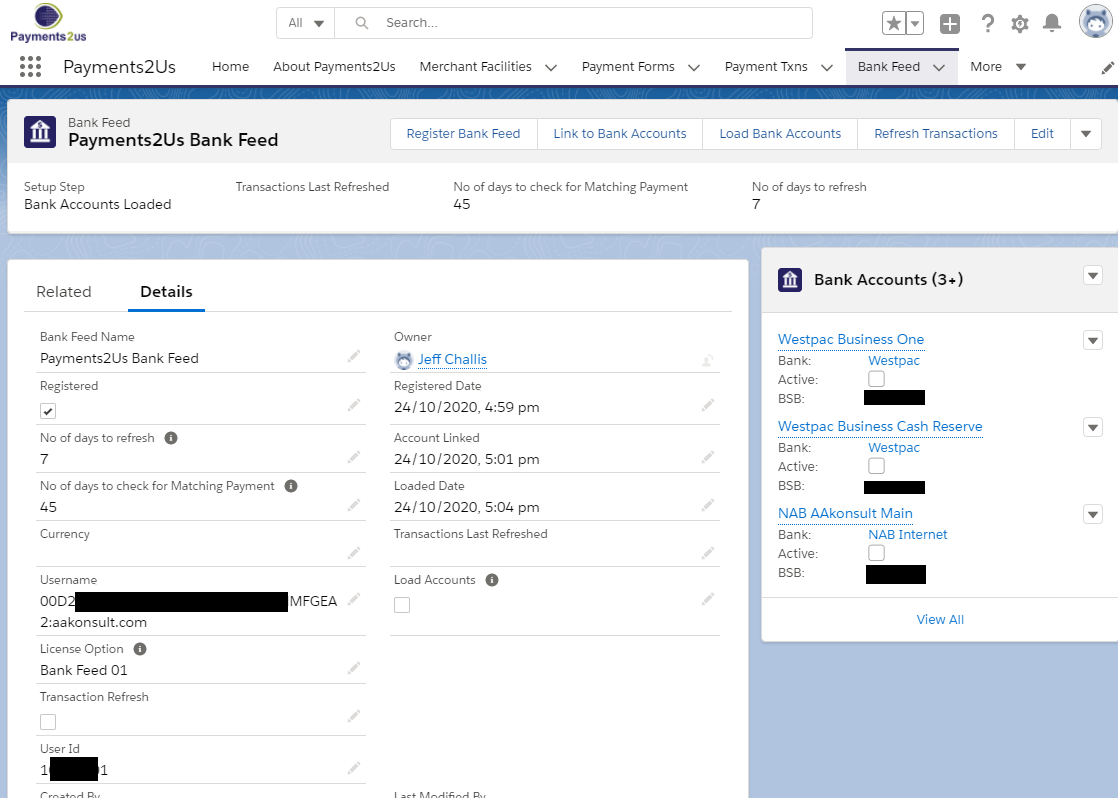
Wait a few seconds, then refresh your screen. This will then display the Bank Accounts.
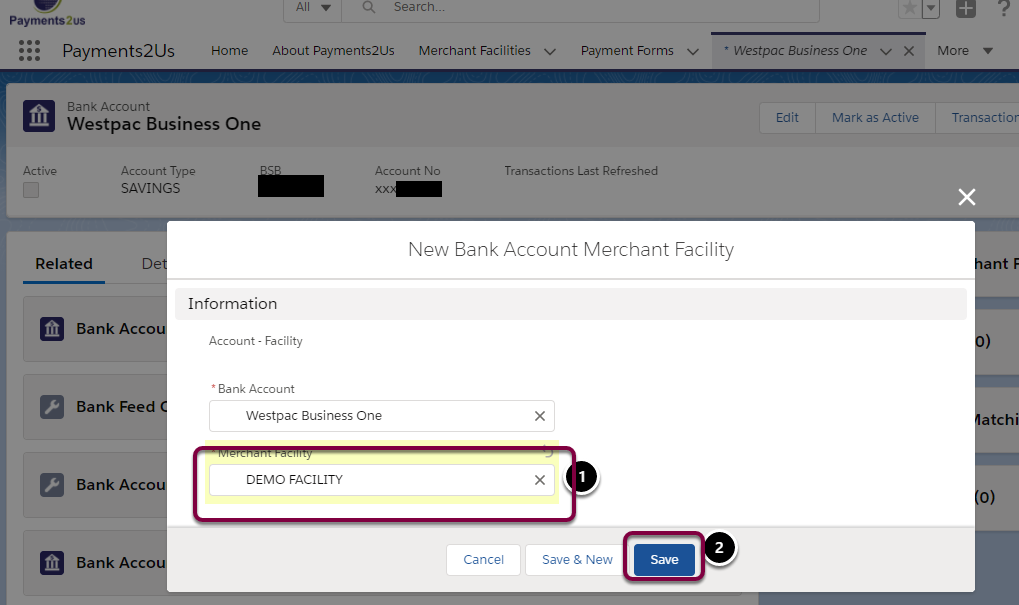
5. Link Bank Account to Merchant Facility(s)
A Merchant Facility is associated with the Bank Account. When the Bank Feed matching process runs, it will match those Payment Txns to the bank accounts where the Bank Account and the Payment Txn both belong to the same Merchant Facility.
Click into each of the Bank Accounts you wish to make Active (1)

Click on the Related Lists Tab (1), then New "Bank Account Merchant Facility" button (2)

6. Mark an Account as Active
Only those Bank Accounts with the Active checkbox set will have their statement details brought into Salesforce.
- Press "Mark As Active" button
- Save Button

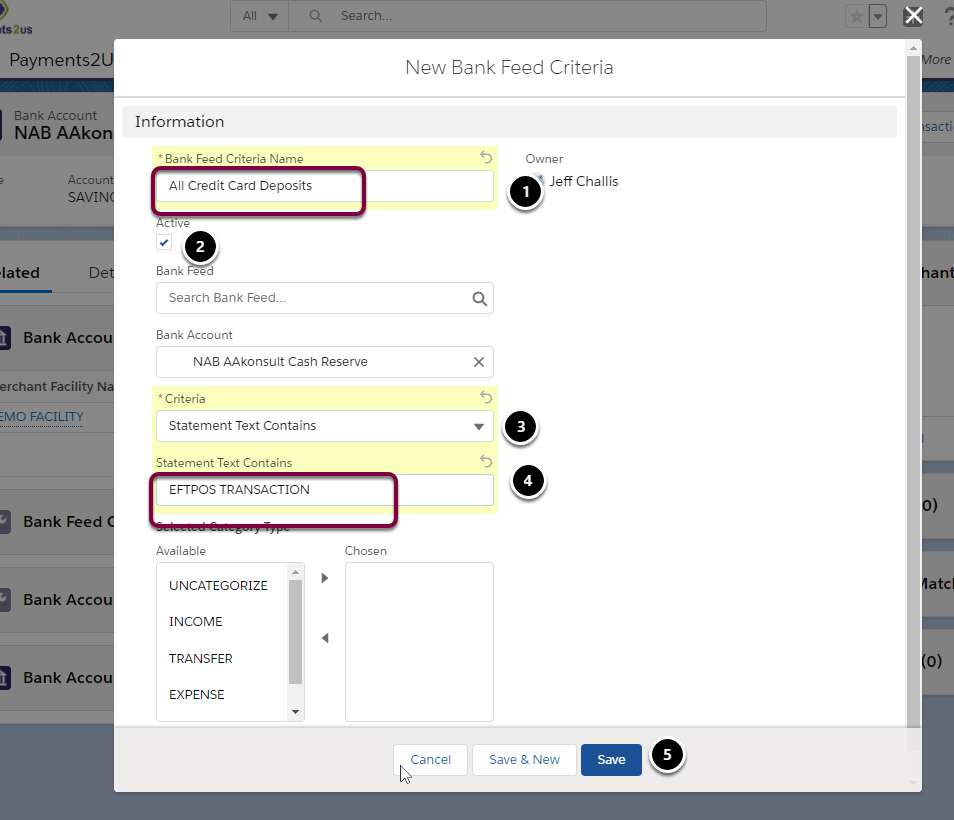
7. Setup Bank Feed Criteria
If you do not wish to bring all your transactions into Salesforce, you can filter out those transactions that you wish to bring in.
For example, if you were looking to match only those credit card transactions with the lump sum deposit from the Merchant provider, then you could look for statement text that matches those deposits. For example, "EFTPOS TRANSACTION".
Or, perhaps you know a certain customer/donor will deposit each month and you'd like to match their manual transaction. You could look for statement text with their name, e.g "ROADRUNNER AUST"
To setup Bank Feed Criteria, from the Bank Account
- From the Bank Feed Criteria related list
- Press drop down menu arrow
- Select New Button

- Give the filtering criteria a meaningful name
- Make sure it is active
- Select your filtering criteria.
Most of these options are self explanatory and some will require other fields to be completed. For example, if the Criteria is "Statement Text Contains", then you need to also key in the Statement Text Contains field (4) - Statement Text Contains is the description that appears on the statement text. In the example below, we are looking "EFTPOS TRANSACTION" anywhere in the statement text.
- Save
8. Setup Bank Account Txn to Payment Txn Matching Criteria
This section instructs the Matching Processors on how to link the Bank Statement line to the Payment Txn.
Some common use cases are:
- Linking all Credit Card deposits for a particular bank deposit date to all statements lines on the same date that contain the text "EFOPOS TRANSACTION"
- Linking all Payment Txns that are linked to an account "ROADRUNNER AUST" that have an Awaiting Payment Status to statement line items that contain text of "ROADRUNNER AUST"
- Linking all Payment Txns to statement lines that have a status of Awaiting Payment and have the same Bank Transfer reference
To setup Bank Account Matching Criteria, from the Bank Account
- From the Bank Account Matching Criteria related list
- Press drop down menu arrow
- Select New Button
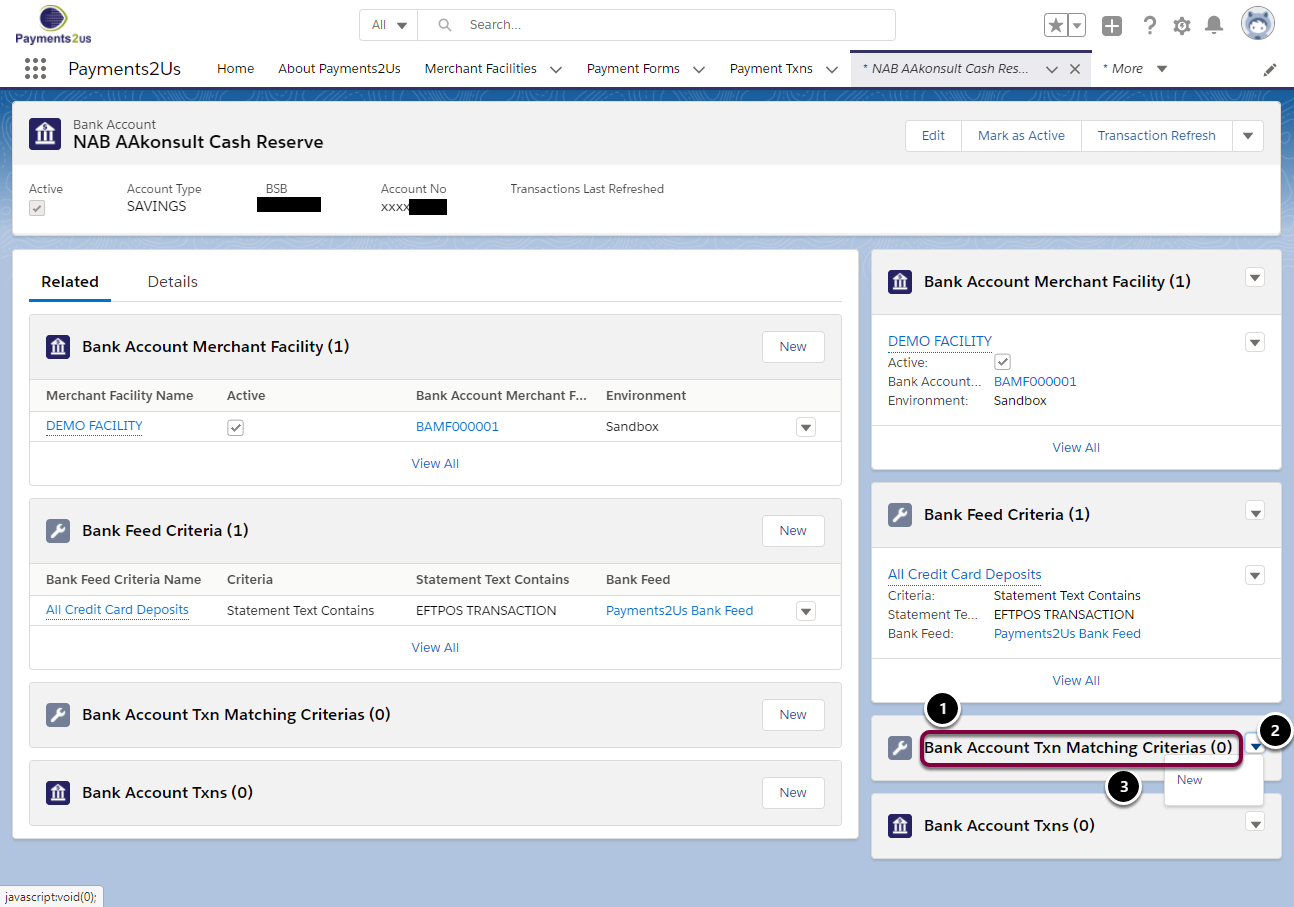
The screenshot below shows an example of matching bank statements with a text of "EFTPOS TRANSACTIONS" and the bank deposit date to all Payment Txns that were deposited on that date.
- Provide a name that describes the matching
- Mark it as active to be included for the matching
- Criteria is for transactions on the same date
- Linking this to the previously setup statement will then filter out transactions that are matching “EFTPOS TRANSACTIONS”

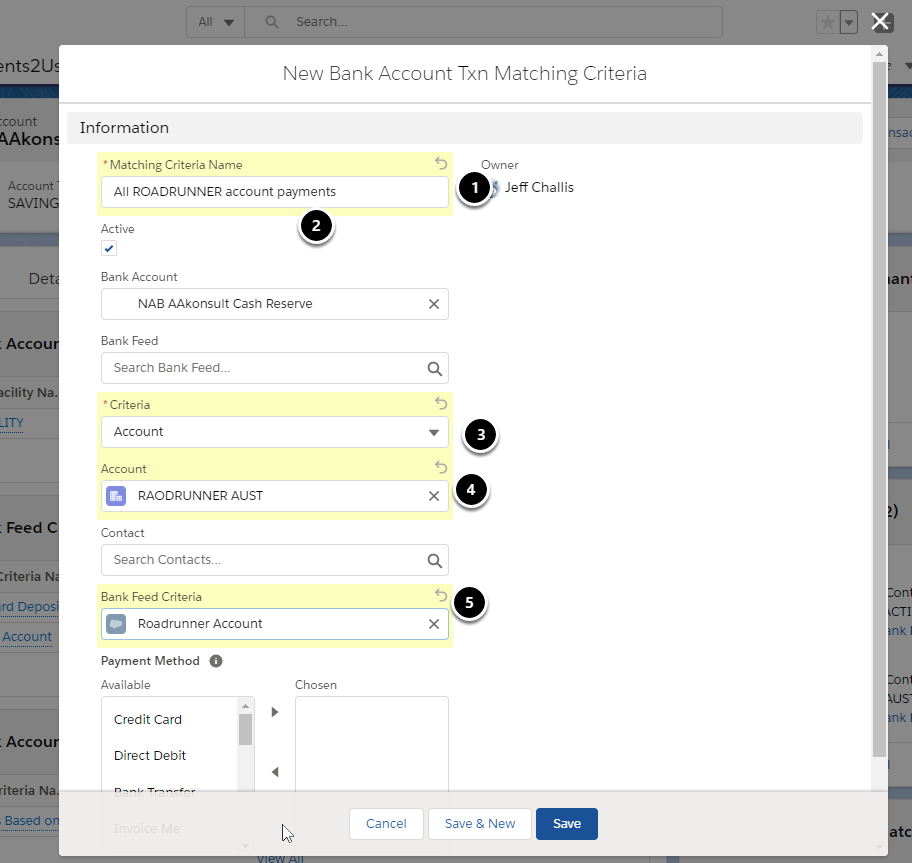
The screenshot below shows an example of matching bank statements with a text of "ROADRUNNER" with Payment Txns that are linked to the Account "ROADRUNNER AUST"
- Provide a name that describes the matching
- Mark it as active to be included for the matching
- Criteria is for transactions that are linked to the account specified (4)
- Account to link with
- Linking this to the previously setup statement will then filter out transactions that are matching "ROADRUNNER AUST"