Often organisations are required to produce a statement or summary of transactions.
- Non-profit organisations - summary of all donations given during the financial year so the donor can claim the tax deduction.
- Corporates - list of transactions that a customer’s finance has asked for so they can reconcile their books.
IMPORTANT: If you are on a version prior to 5.4, the before running statements for the first time, please make sure Remote Site URL has been setup. Go to the Installation Manual: How to setup Annual Statements
1. Create a Campaign

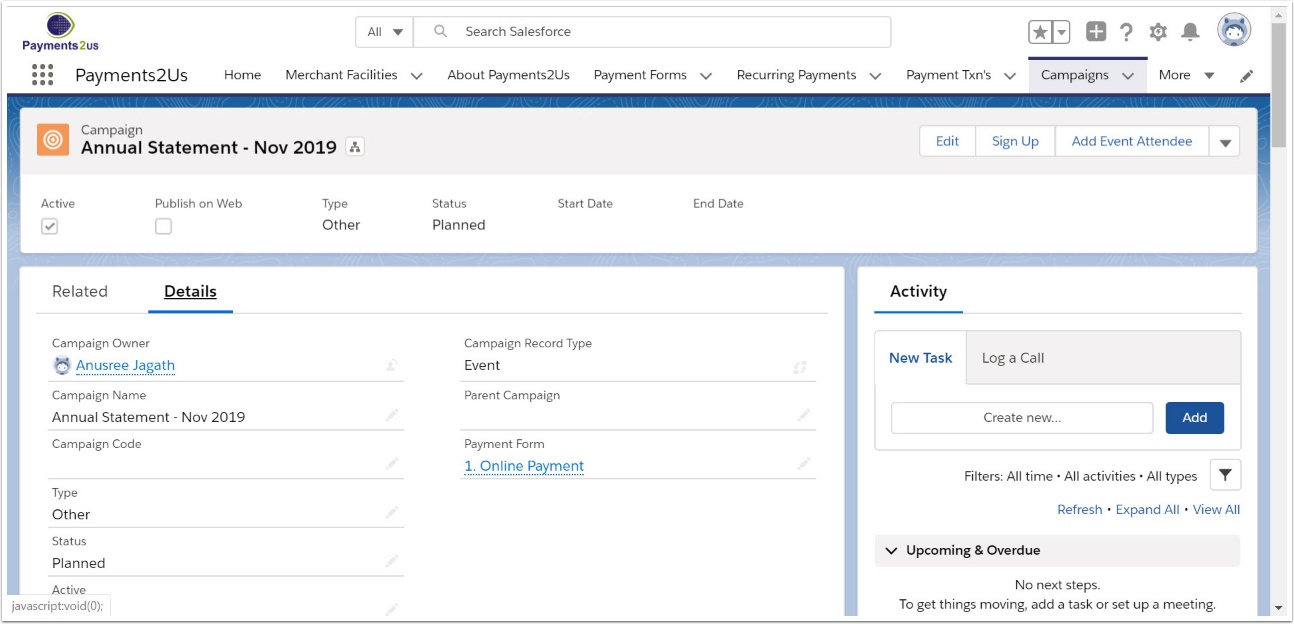
1.2. Enter details about your statement

- Create a relevant name
- Tick to make sure the campaign is Active
- Select 'Other' for Type
- Select the Payment Form
- Select 'Planned' for Status
1.3. Enter text for your Statement and SAVE
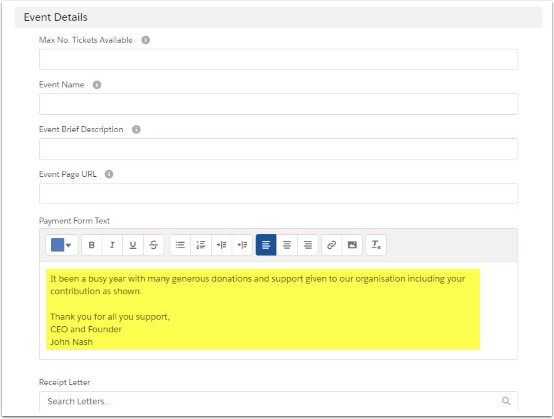
Note: Mail merge fields can be added if required
There are two special statement mail merge fields:
- {!numberOfPayments} - number of related Payment Transactions
- {!totalAmount} - the total amount of all related Payment Transactions
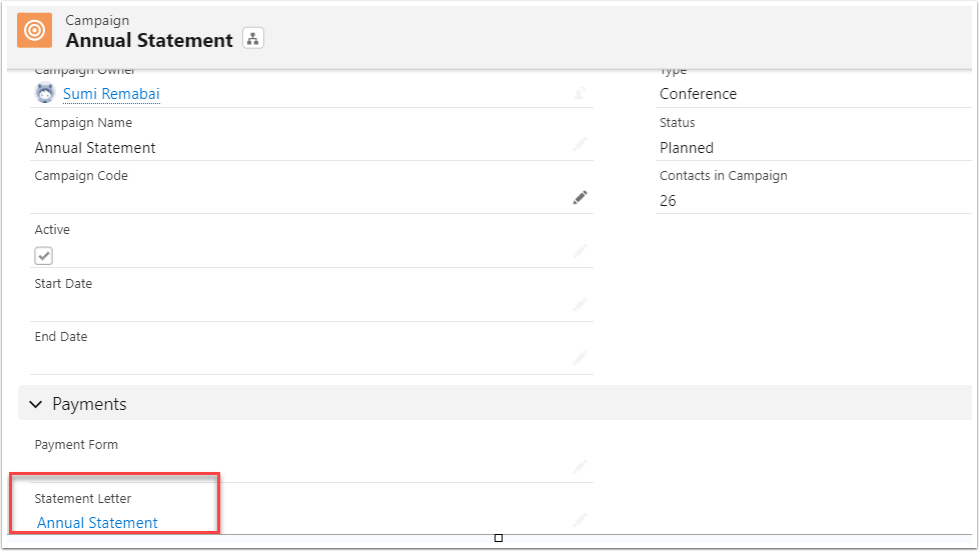
You can use either a Statement Letter lookup field (recommended) as your template or the older Statement Field. Please note if both fields have values in them, it will use the Statement Letter over the Statement Text Field.
The Statement Text field is found on the Campaign. If you do not see this field, the you will need to edit the page layout (top right link) and then drag/drop this field onto the page layout.
A sample Annual Letter Statement is available if samples have been created. Click here if you would like to generate samples. These can be used/cloned as letter templates for your organisation.
2. Add Members or Contacts
2.1. Options for adding Contacts to Campaigns
Adding Contacts to Campaigns is part of standard Salesforce. The below is a high level summary.
Options for adding Contacts to Campaigns include:
- From Campaign - related list Campaign Member. Press Add Contacts to Campaign. This is suitable for small number of Contacts
- Run a Contacts report - then press Add to Campaign button. This is suitable for as many as 50,000 Contacts at a time.
- From Contacts Tab - Create a list view field to filter out Contacts. Press Add to Campaign button.
- From a Contact. Select related list - Campaigns, then add Contact to Campaign
- Salesforce Import Files - import Contacts and link to Campaign.
If you need more information, please review Salesforce online help, Trailhead, contact Salesforce Support or other resources available on the web.

2.2.1. Refine selection based on your Annual Statement's requirements

2.3. Option: Run a Contact report and Add to Campaign
Note: A report can also be run to summarise all your contacts, and then use the Add to Campaign button, and select the Campaign Member Status as Sent.

2.4. Add members with a status of 'Sent'

2.5. Check that you have all contacts and members added

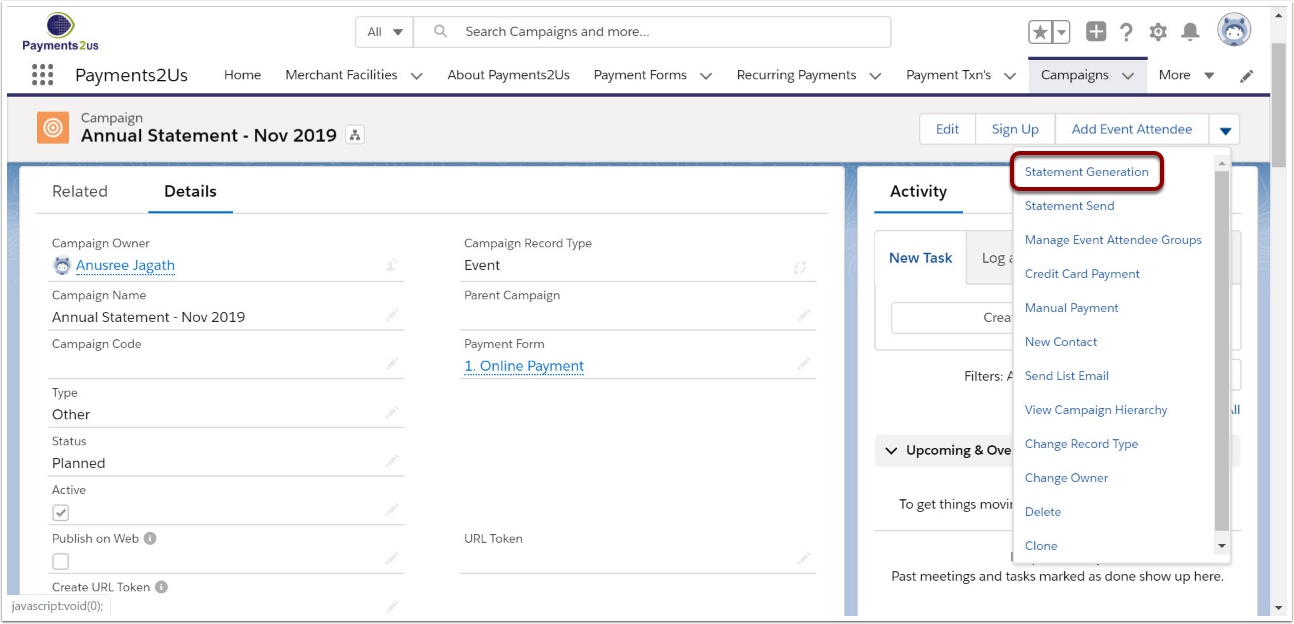
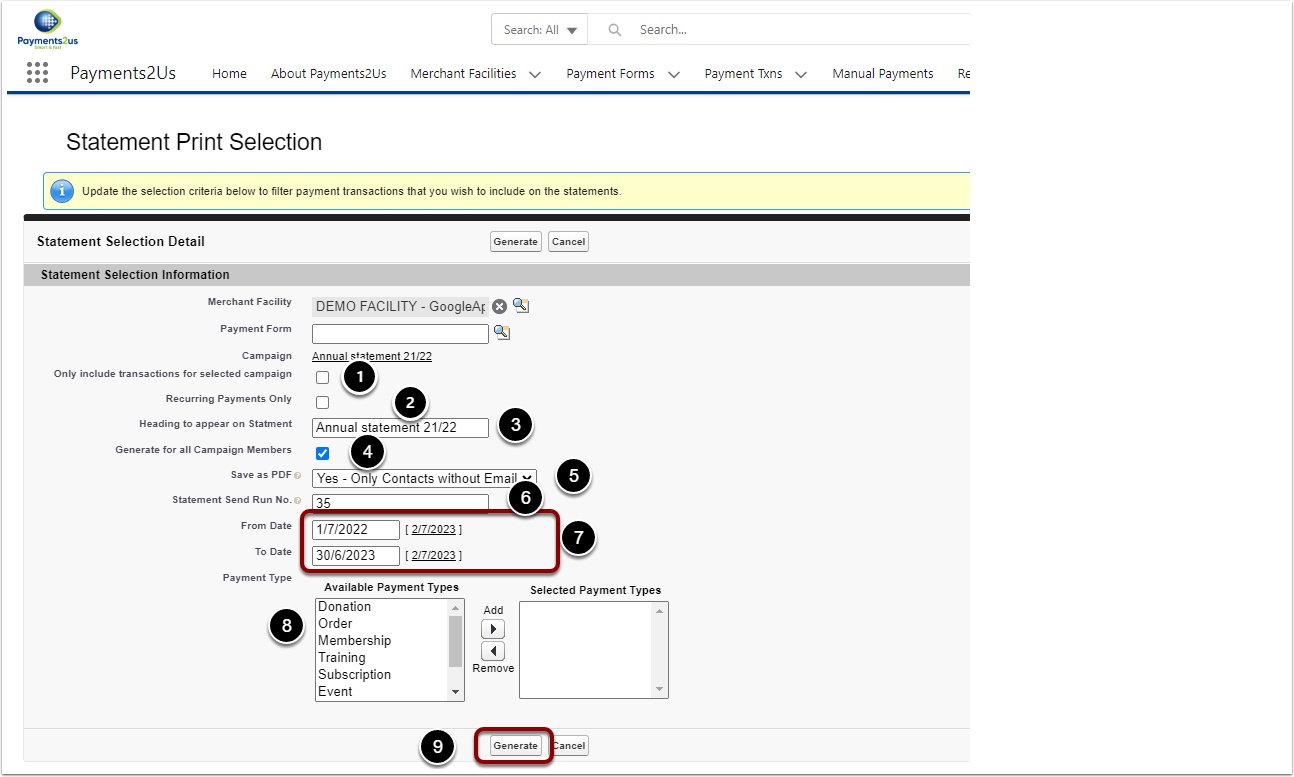
3. Generate Annual Statements
NOTES
- Statement Generation is generated for Contacts.
The "Print Email Receipt" field on the Contact is recipient of the Statement. This will normally have the "Email" value, but if that is missing, this defaults to the "Print Email Receipt" field on the Merchant Facility.
The Workflow "Send Annual Statement (Managed)" is what is used to actually send the statements. - ONLY Payment Txn's related to the Contact that have "Banked Payment" of "YES" will be included.
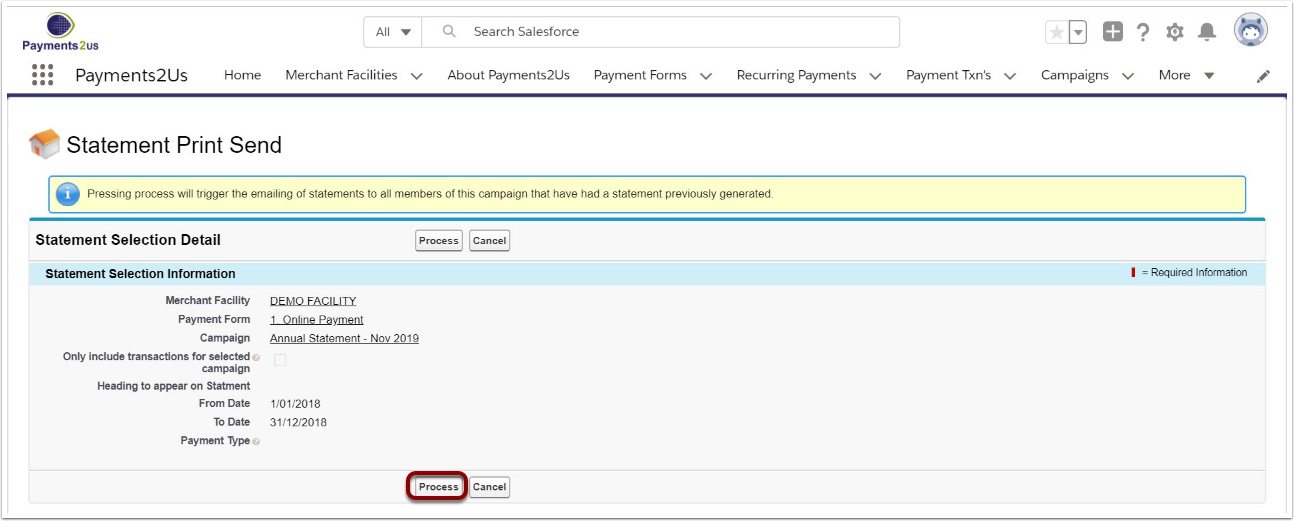
- If selected, only Payment Txns that are linked to this Campaign will be included in the statements. This is useful if your organisation has a Campaign specifically setup for Recurring Donations and you are generating statements from that Campaign.
- If selected, only Payment Txns are are linked/generated from the Recurring Payment will be included on the statements
- This is the Subject line that will appear on the PDF statements
- If selected, the generation process will be generated for ALL Campaign members. This is only required if you have made a change and need to regenerate those that were previously generated
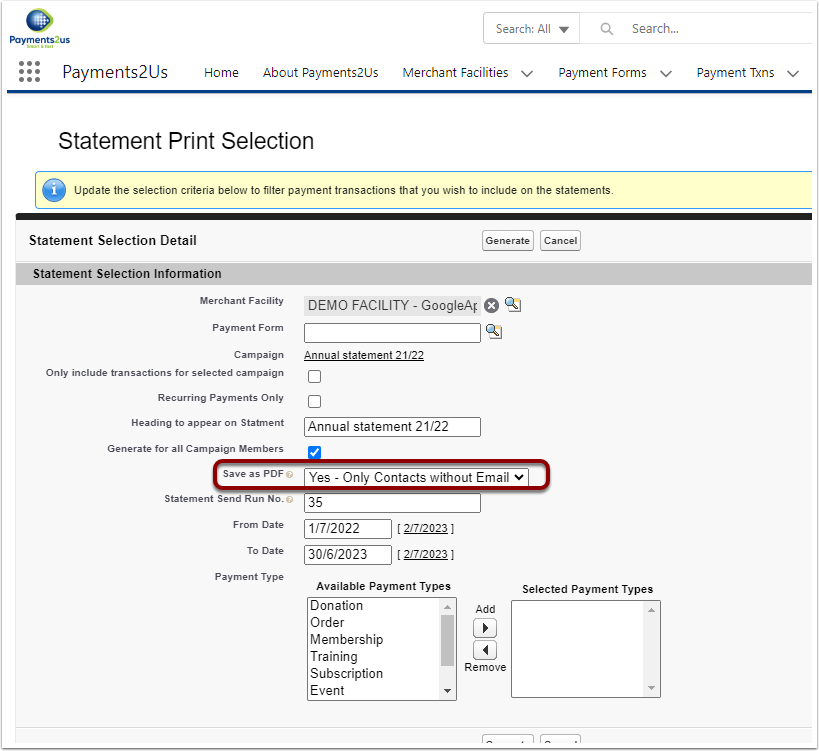
- Save As PDF. If this is one of the YES Options, then the PDF Statements will be saved in the Attachments area against the campaign. This option is useful if you want to save all the PDFs and later on download print them all at once. This option would mainly be used for those contacts that do NOT have an email address.
NOTE, the PDFs are only generated and saved AFTER the "Statement Send" process is run.
For more information on this, see Download PDFs section below. - Statement Run is incremented each time automatically. This is used in conjunction with the Save as PDF option above in the file name. It allows for multiple runs to show the latest run of generated PDFs.
- Enter the from/to date of the Payment Txs to include in the statements. This date range is defaulted based on your company's Fiscal Year settings in Salesforce.
- Leave blank if all transactions are included. Alternatively, if you need to excluded Membership and Order type payments, but only have Donation related Payments then just Select Donation.
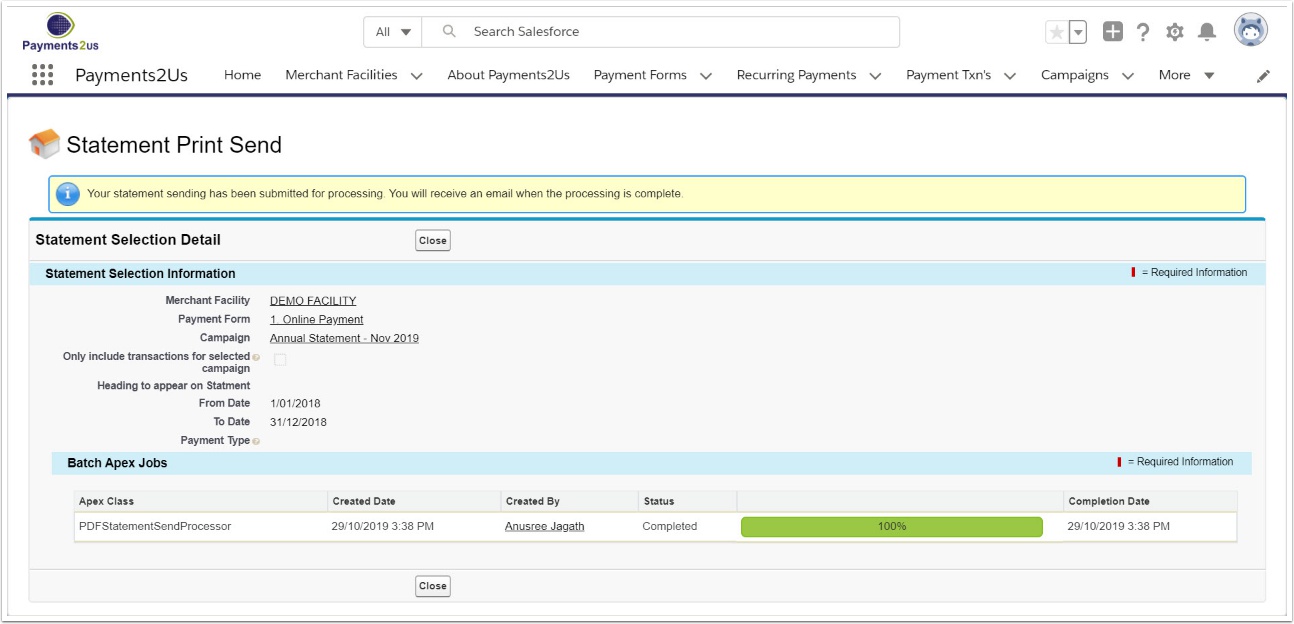
3.3. Wait for Statement generation
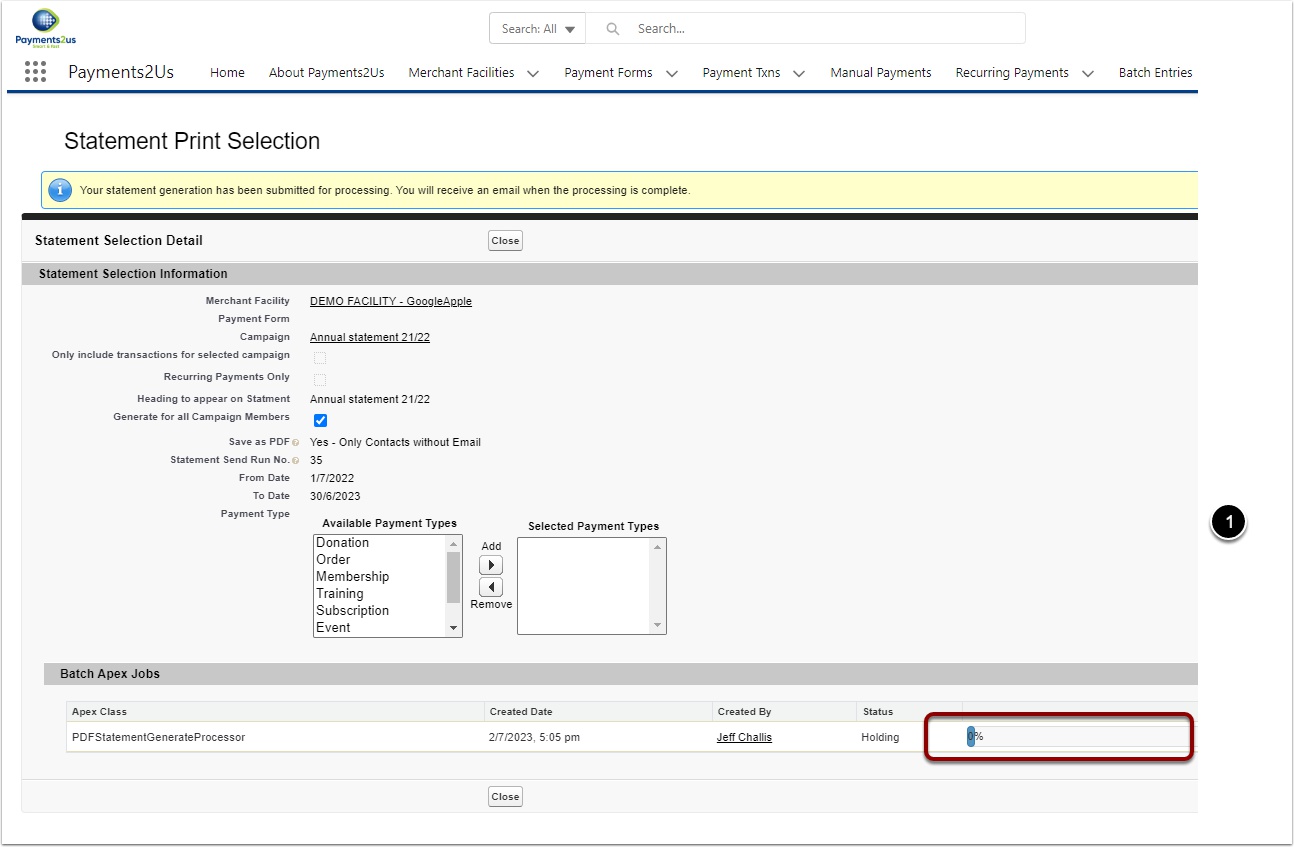
An email will be sent when the batch processing is complete
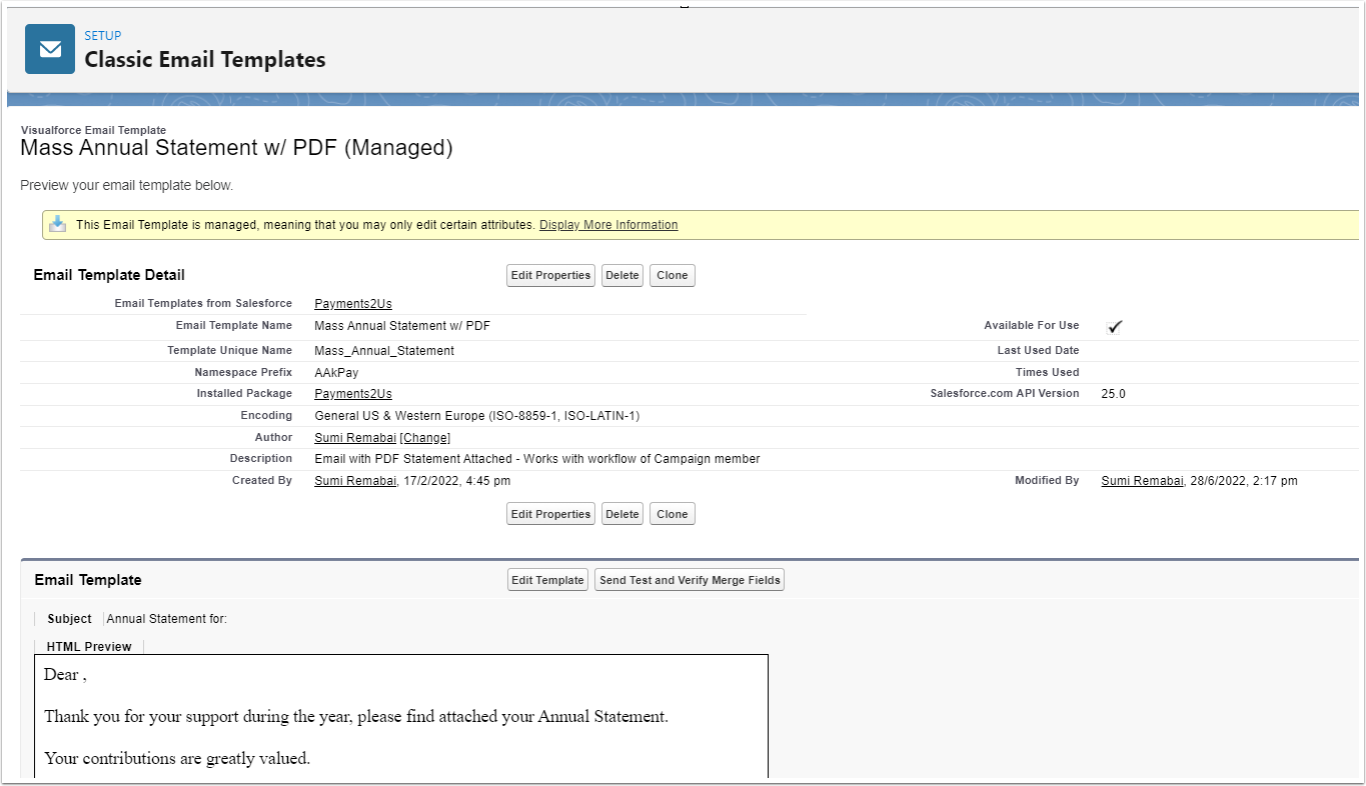
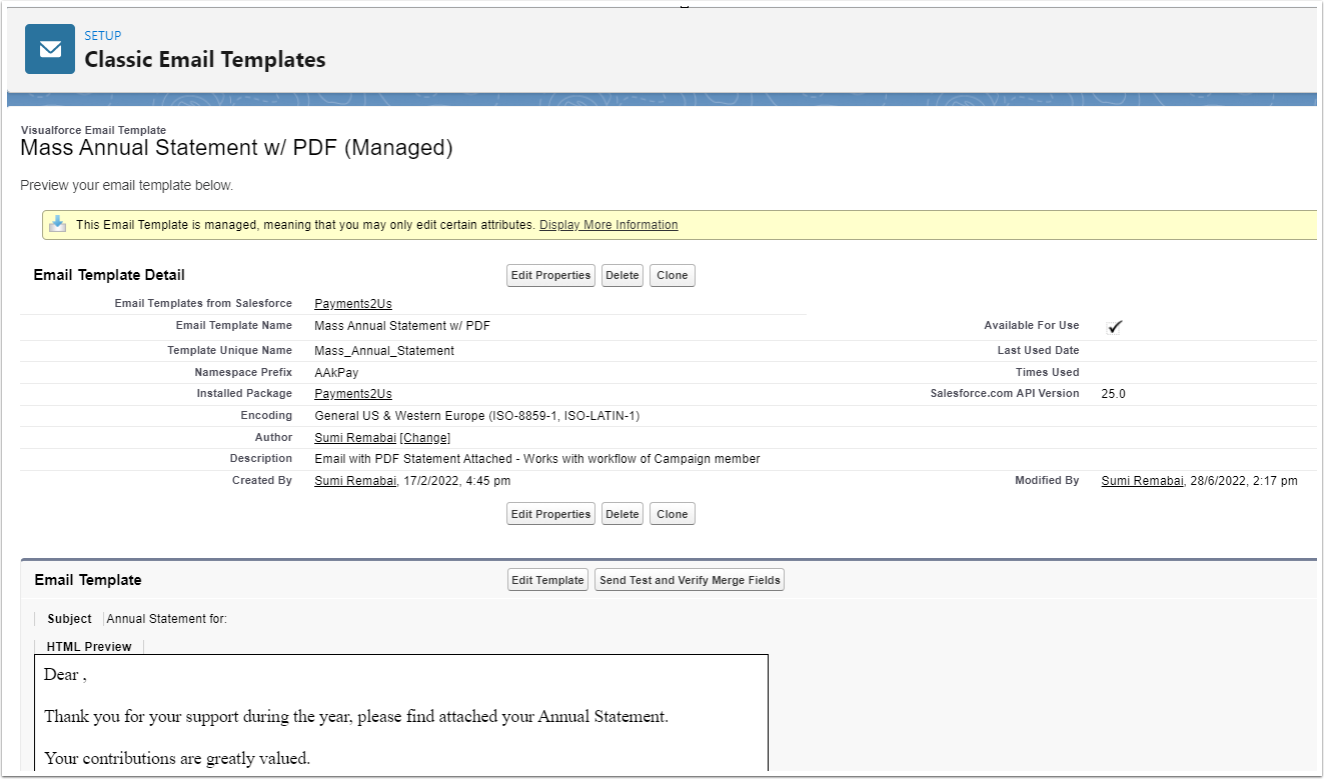
3.4. The Email Template used to send the Receipt is called "Mass Annual Statement w/ PDF "
4. Check Format
4.1. Scroll down to the Campaign Members heading and Select a Contact
4.2. Scroll down the Contact to the Notes and Attachment heading and select the PDF created
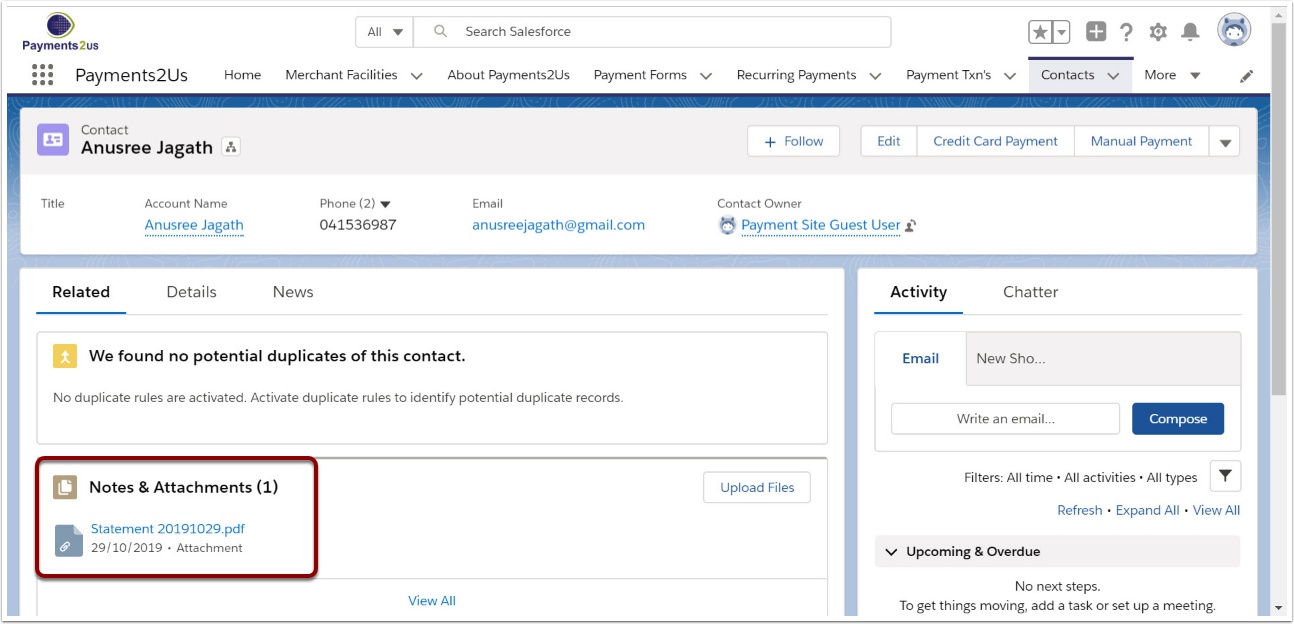
4.3. Check details are correct
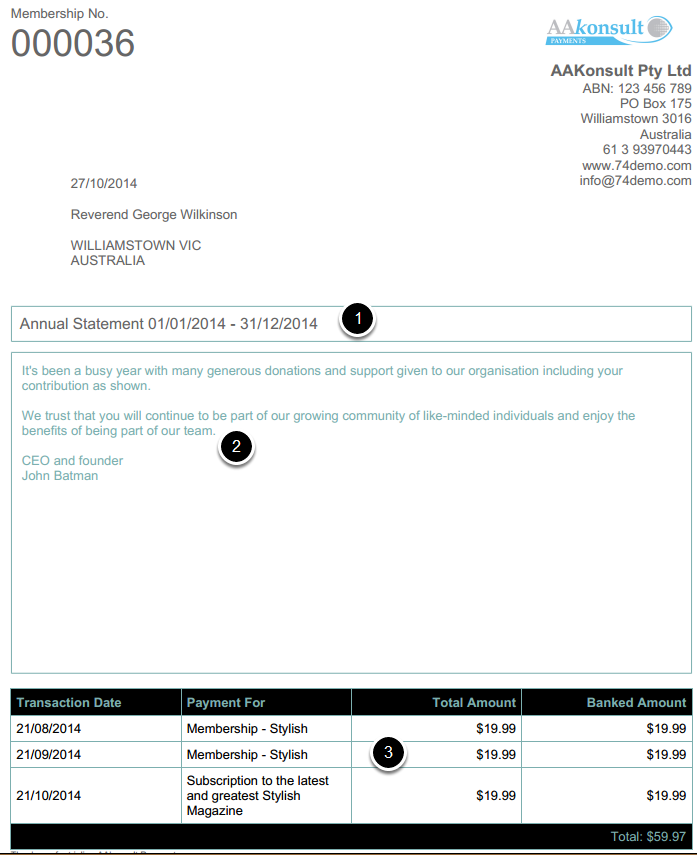
- The title defaults to Annual Statement dates set up in the Campaign. This can be customised when generating the statements.
- The text can be mail merged. It uses information from the Contact and Campaign objects. Special fields from the Payment Txns include {!numberOfPayments} and {!totalAmount}
- Item in the columns are from the Payment Txn and relate to the Contact or Account. These are configurable through a fieldset called “statementTable”. The statementTable fieldset can be maintained in setup > Create > Objects then click into Payment Txn and scroll down the to the fieldsets section.
5. Send Annual Statements

5.4. Wait for sending process to finish
An email will notify you when this is complete
5.5. The Emails are send via a Workflow called - "Send Annual Statement "
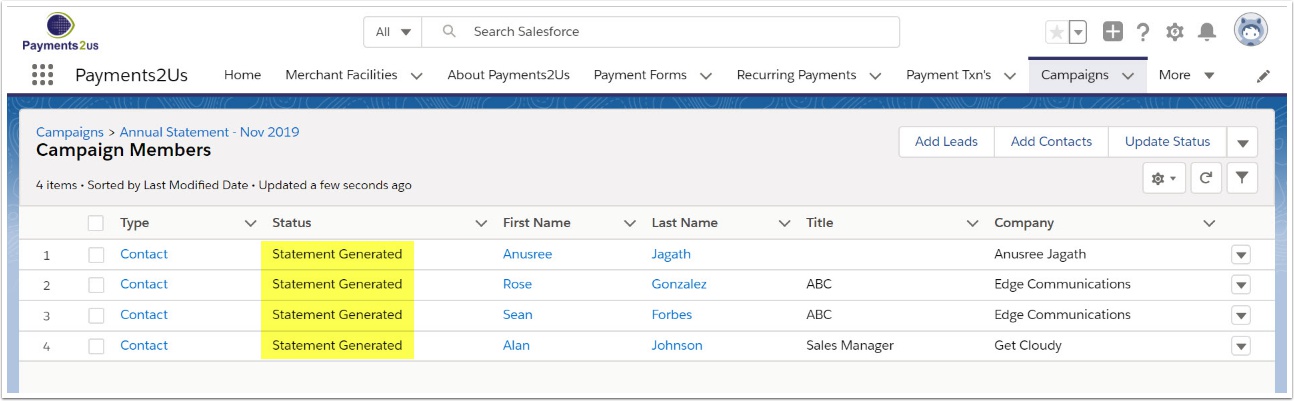
6. Follow-up

6.2. Scroll down to Campaign Members heading and check the Status
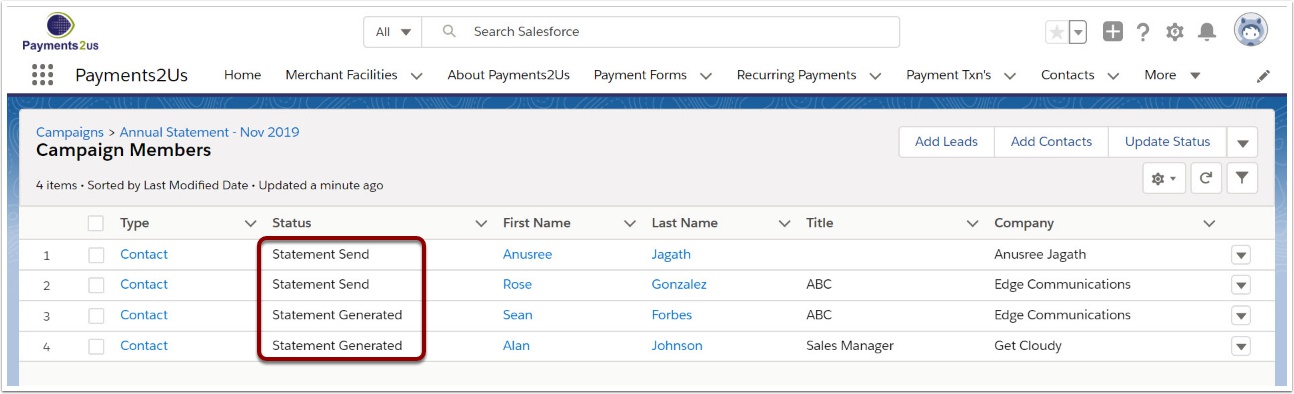
Follow up on any Statement Generated status for the correct email address
7. Download PDFs
7.1. Saving PDFs against the Campaign Object
In the Statement Generate Process you can select to Save PDFs. The options available are:
- No - Email PDF Statements - If blank or this option selected, then PDFs are NOT saved against the Campaign. The generate process will still save them against the Contact
- Yes - Only Contacts without Email - If this option is selected, then statements for Contacts that have a blank Email address, or their email matches the Print Email Receipt field on the Merchant Facility.
- Yes - All Contacts - Statements generated for all Contacts will be saved against the Campaign
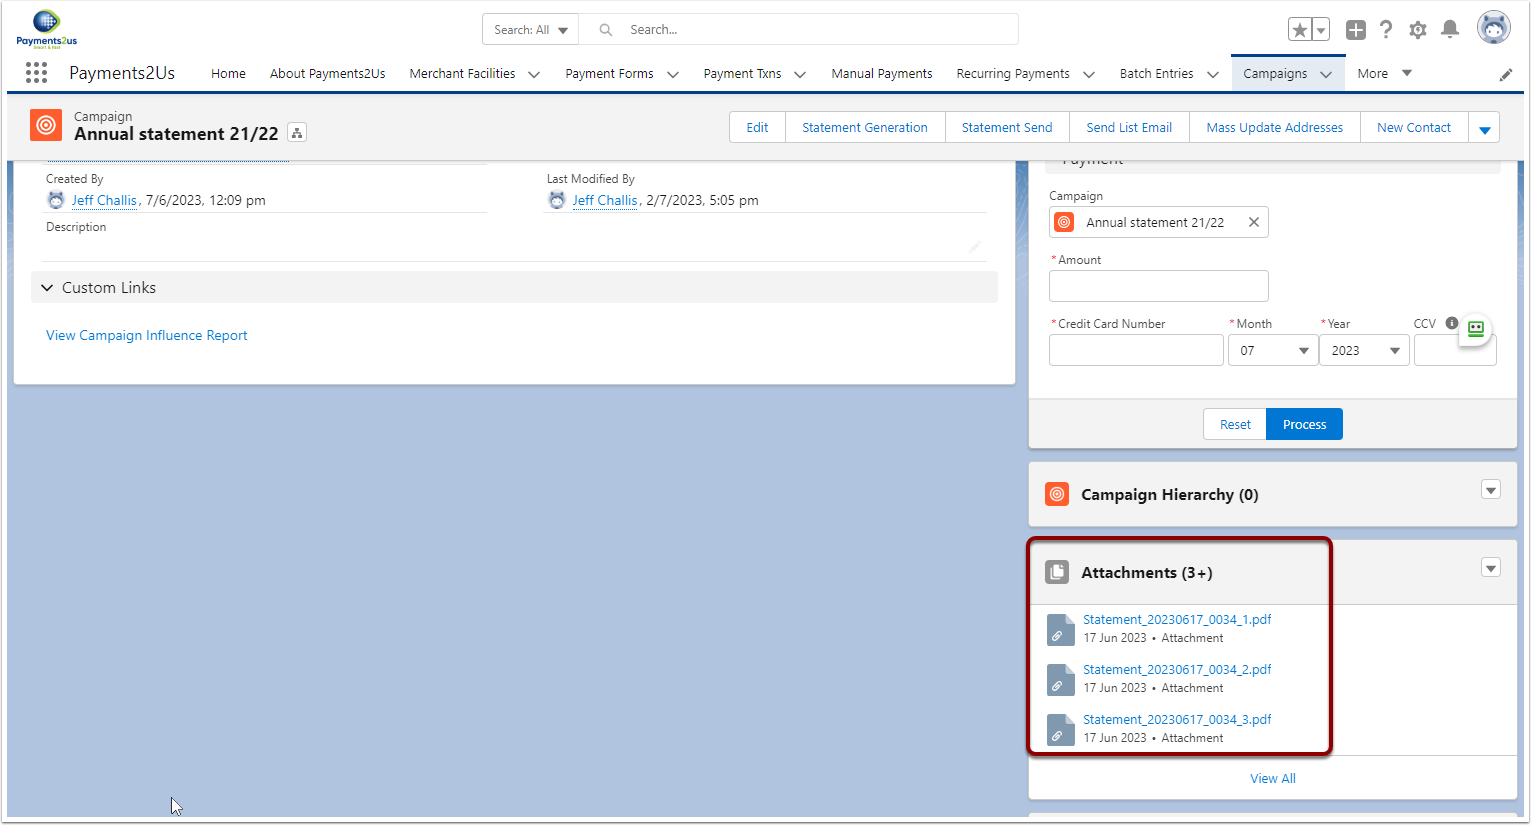
7.2. Saved PDFs against Campaigns
After the "Statement Send" (NOT Statement Generate) process has been run, the Statements are saved against the Campaign in the Attachments related list
7.3. Merge PDFs and Download
The below process included with Payments2Us allows you to merge and download 10 PDFs at a time (Please note that it will only merge first page of each statement, if you have all the pages from individual statement, then you can use other tool like File Zipo mentioned below ).
If you need to merge a larger number, there are Apps on the AppExchange, such as File Zipo that can assist.
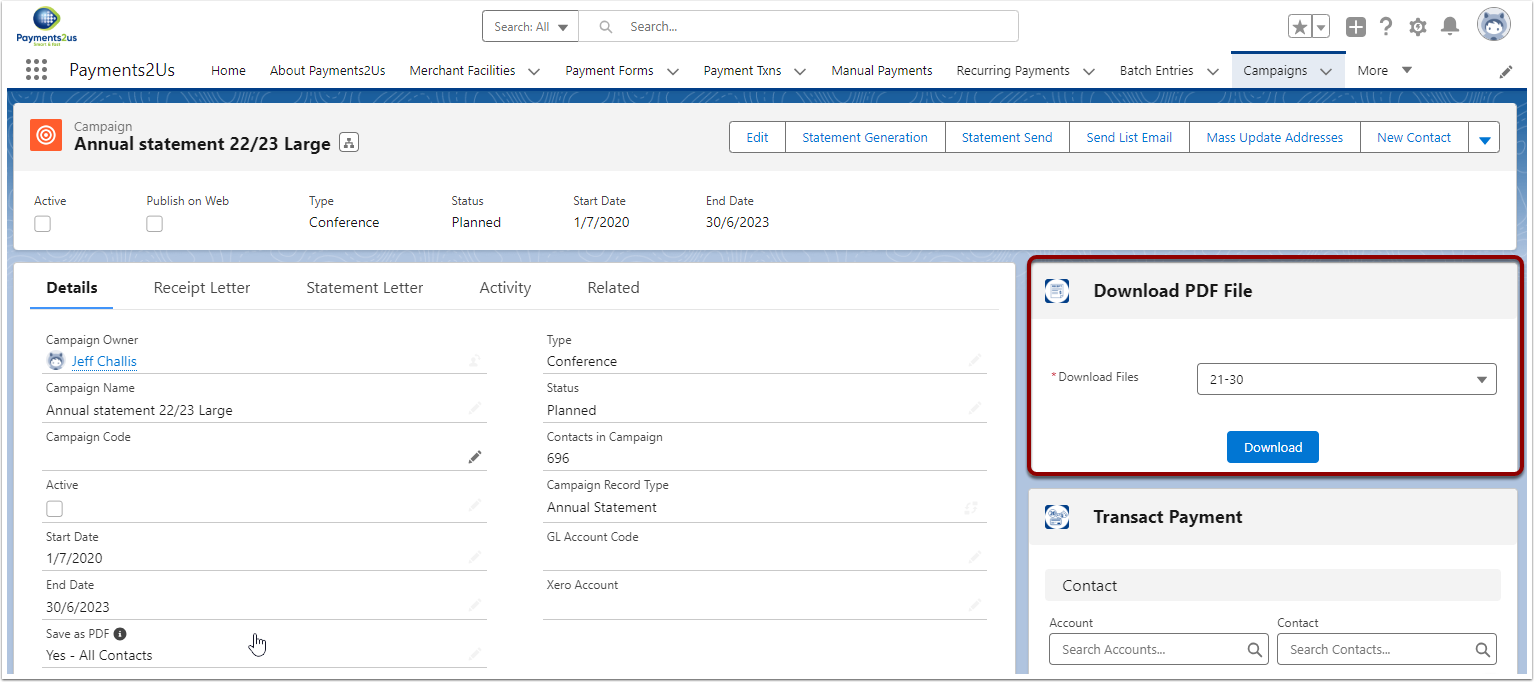
The below screenshot is with the included Payments2US PDF Merger and download.
If for some reason this widget does not appear on your page layout, ask your Salesforce Admin to edit the page and add the component to the Page.
Select the file sequence to merge. Each related file is given a number and you can download the range 1..10, 11..20, 21..30 etc.
After selecting the range you wish to merge and download, press the "Download" button.