Entering and synchronising Xero Credit Notes feature is available from Version 9.9 and onwards.
1. Enter Xero Credit Note Header
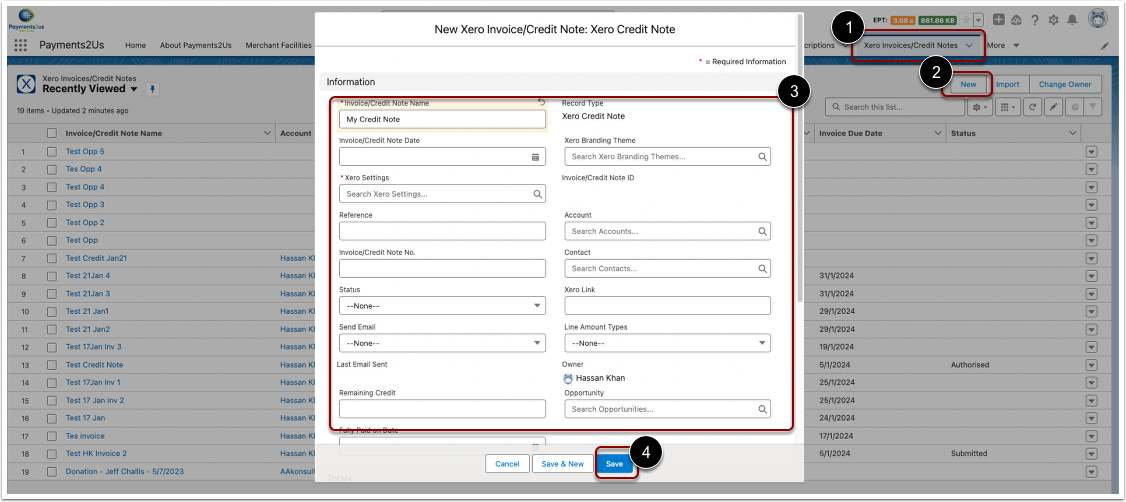
- Click on the "Xero Invoices/Credit Notes" Tab
- Press "New" button
Select "Xero Credit Note" as the record type. - Enter credit note header details.
- For the Invoice/Credit Note Name, enter a short description.
- Enter a Account and/or Contact. Note, the Account, or Contacts related Account must have previously been Synchronised with Xero.
- Invoice/Credit Note ID, Invoice/Credit Note No. are returned from Xero and should be read only for most orgs.
- Press "SAVE" button.
For advanced admins, you may wish to use Salesforce Flows to automatically create the Credit Note header and line items. If you need help in setting this up, then we can do with our Support Options
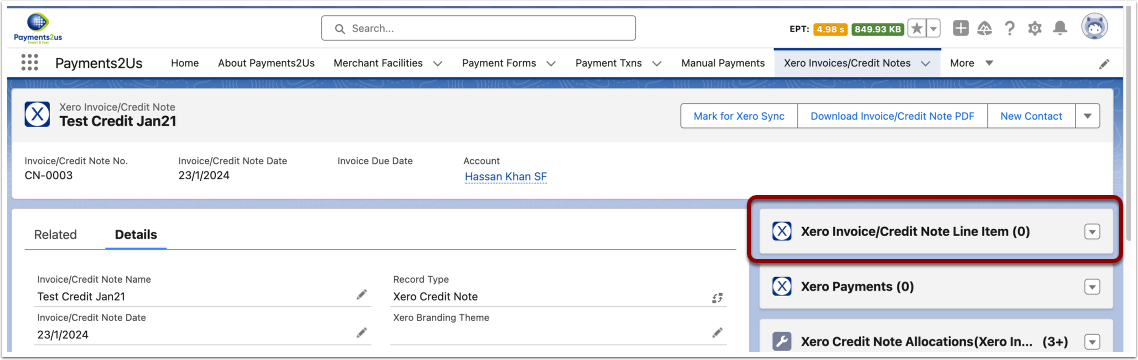
2. Enter Xero Invoice/Credit Note Line Items
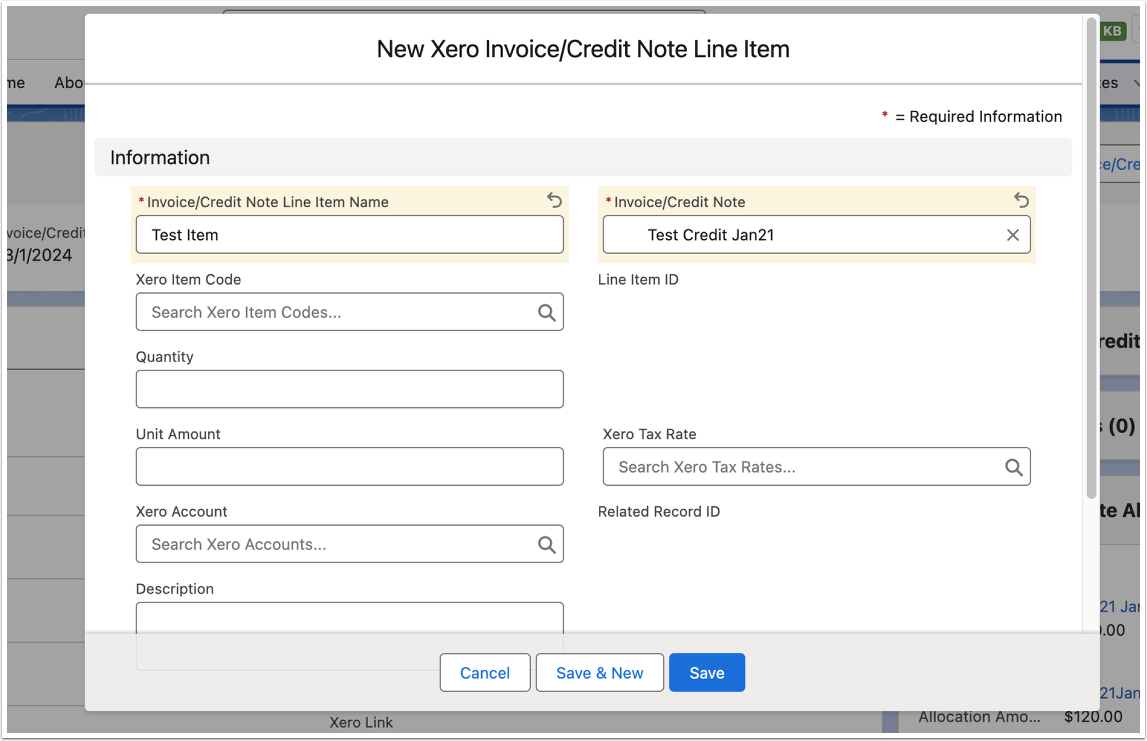
From the Invoice Header created above, click on the "New" menu option for the "Xero Invoice/Credit Note Line Item" related list
Enter line item details and then press "Save" button.
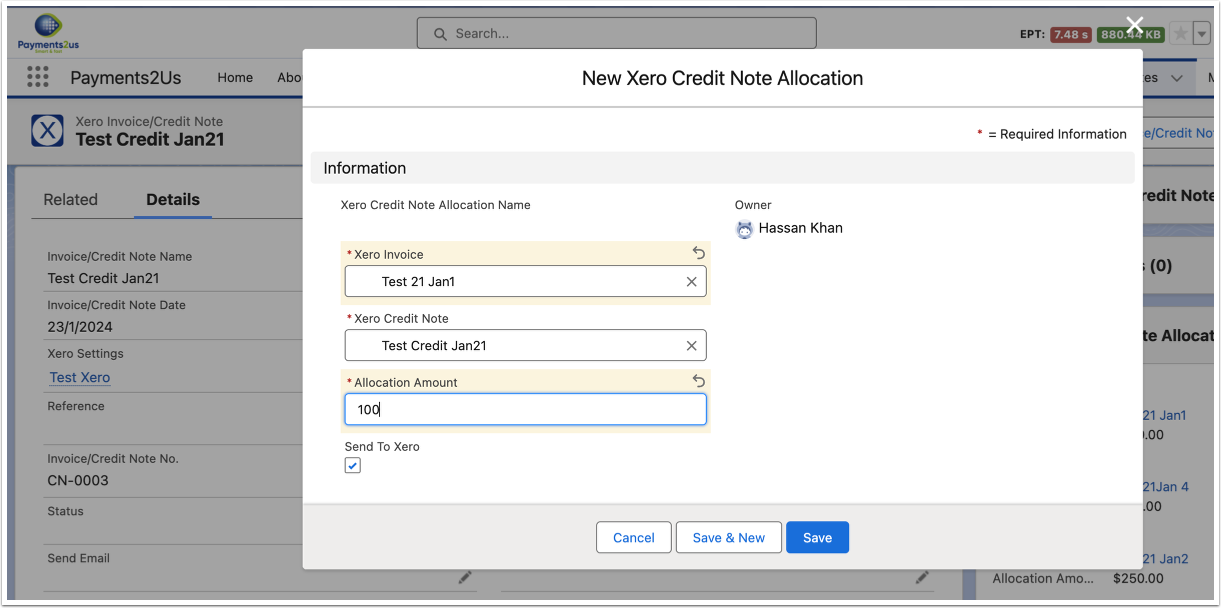
3. Enter Xero Credit Notes Allocation
Credit notes must have a Status of AUTHORISED in Xero in order to be allocated to Invoice.
From the Invoice Header created above, click on the "New" menu option for the "Xero Credit Note Allocations(Xero Invoice) Item" related list
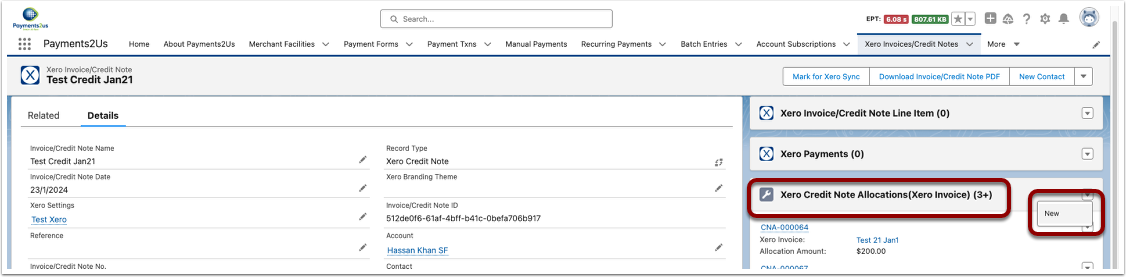
Enter allocation details (Xero Invoice and Allocation Amount) and then press "Save" button.
Make sure "Send to Xero" button is checked before saving.
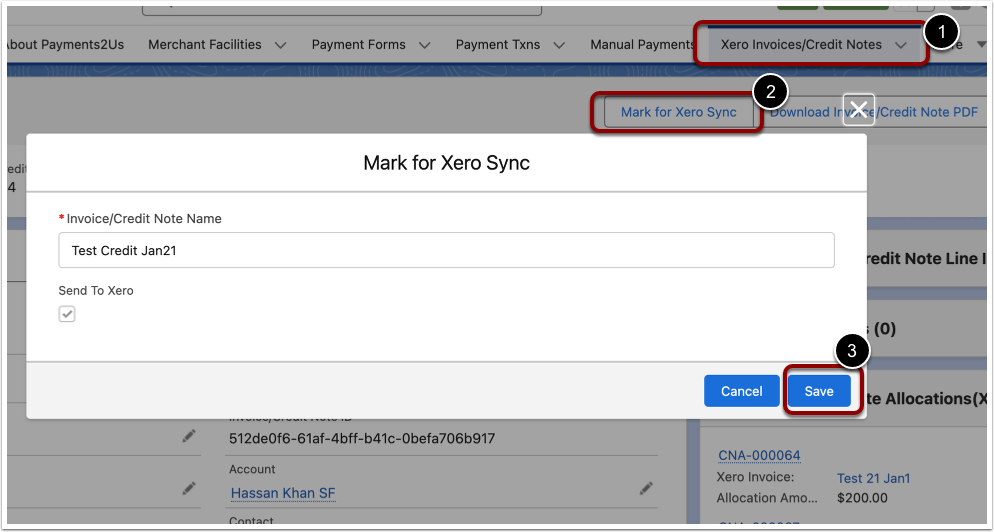
4. Marking Credit Notes for Xero Sync
When ready to send to Xero:
- From the Invoice/Credit Note Header
- Press the "Mark for Xero Sync" button
- Confirm your action by pressing the "Save" button.
Note, this does NOT immediately send to Xero, you need to do the next step of "Send selected Salesforce Credit Notes to Xero Credit Notes"
5. Send selected Salesforce Credit Notes to Xero Credit Notes
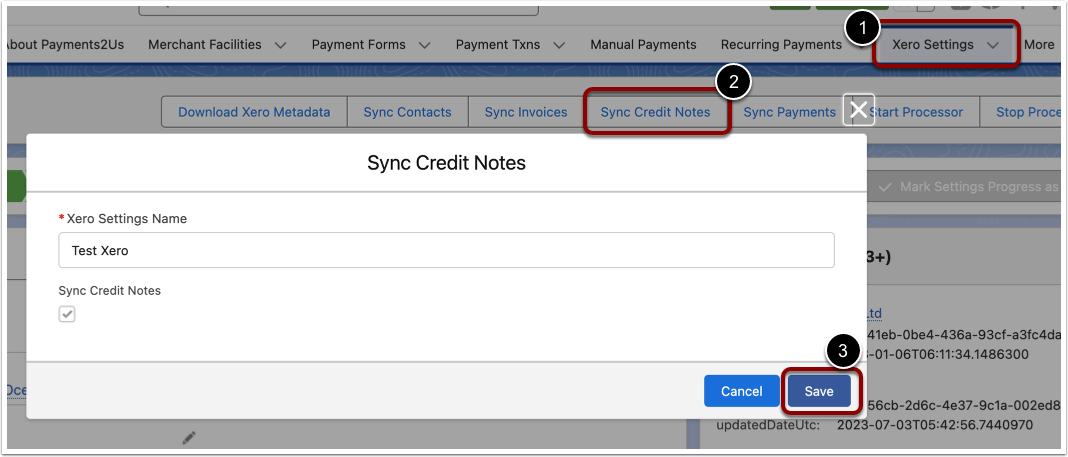
- Navigate to the Xero Settings Tab
- Click the "Sync Credit Notes" button
- Press Save to confirm Credit Notes sync.
This process will look for all Credit Notes that have been selected for Credit Notes Sync (field "Send to Xero" is selected) and will send those details to Xero.
The Sync process will update the Xero Invoice fields:
- "Invoice/Credit Note ID" with the Xero CreditNote GUid
- "Invoice/Credit Note No." with the Xero CreditNote No. This starts with "CN-"
- "Last Sync Status" with Ok or Error
- "Last Sync" with the date/time the last Sync was run.
- "Sync Validation Errors" with any errors returned.
- "Send to Xero" is reset.
The process will run in the background and may take a few minutes to complete.
If there are any major errors, then will appear in the Payments2Us Errors Log. If there are Xero Credit Note level specific errors, they will be recorded against the Xero Invoice/Credit Note - field "Sync Validation Errors".