Xero Journal Summarisation requires a Xero or Split Payments License key. Please contact support @ payments2us.com for a License Key
Xero Journal Summarisation is available with Payments2Us 9.4 and higher.
1. Xero Journal Summarisation Overview
Xero Journal Sumarisation is of value to Not-for-profits (NFPs). Many NFPs do not want to include every single Donation or Payment into their Finance system.
They would just like to have a summary of payments by a criteria such:
- bank deposit date
- GL Code/Campaign Code
- Method of Payment (Credit Card, Cash, Cheque etc.)
The summarisation would not be applicable to Grants or Major donations. For these, every contact/invoice/payment would be sent to the Finance system.
At a high level, you:
- Setup the criteria for which you wish to summarise Payment Txns by
- Schedule a Xero Journal Processor that performs the summarisation by creating a Journal Summary, Journal , and Journal Transaction files
- You either key these details into your finance system, or create your own customisation to copy these details to your Finance system.
After copying, you'll then lock the Journal for this time period so it will not be changed.
To use Journal Summarisation, you'll need to have a Xero or Split Payments License Option key. Contact support @ payments2us.com for the key.
2. Setting up Xero Journal Summarisation rules
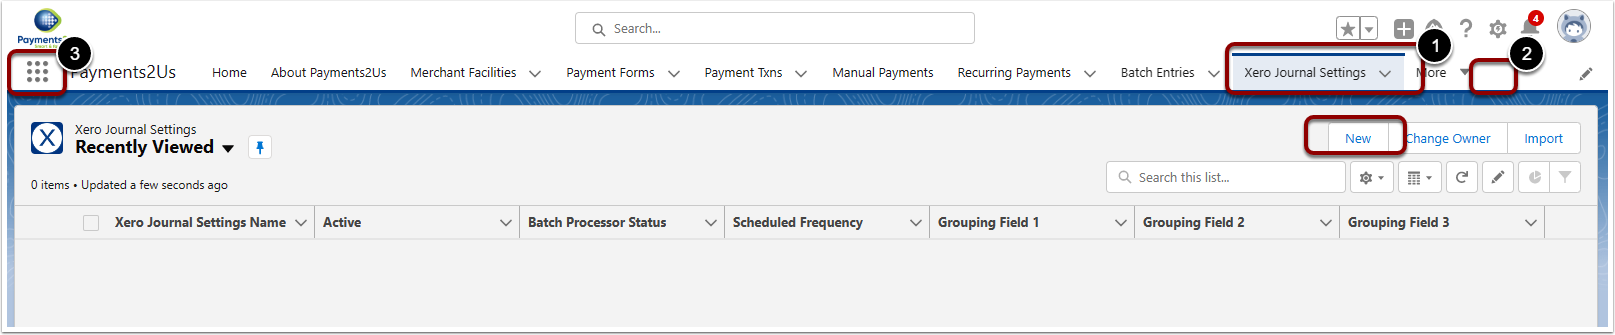
Navigate to one of the following:
- Xero Journal Summaries Tab. If this does not appear due to screen size, use the next option under the More tab
- Click on the down arrow next to the More Tab, then select "Xero Journal Settings"
- Click on the 9 dots, then search "Xero Journal Settings" and select "Xero Journal Settings"
After locating the Xero Journal Settings screen, click on the New button (4)
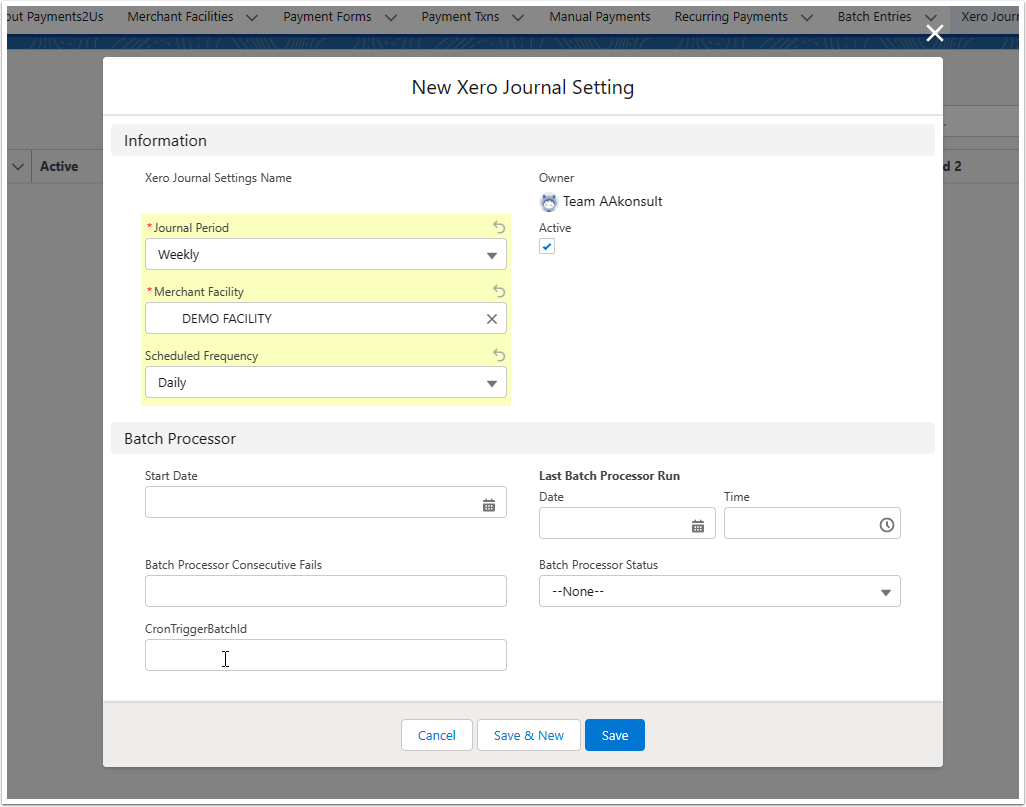
2.2. Enter Xero Journal Settings details
Enter the required details as a minimum.
The Merchant Facility is required so as to link License options with these settings.
Make sure the settings are Active before first use.
NOTE: Most of the criteria entry are only seen after you press SAVE button
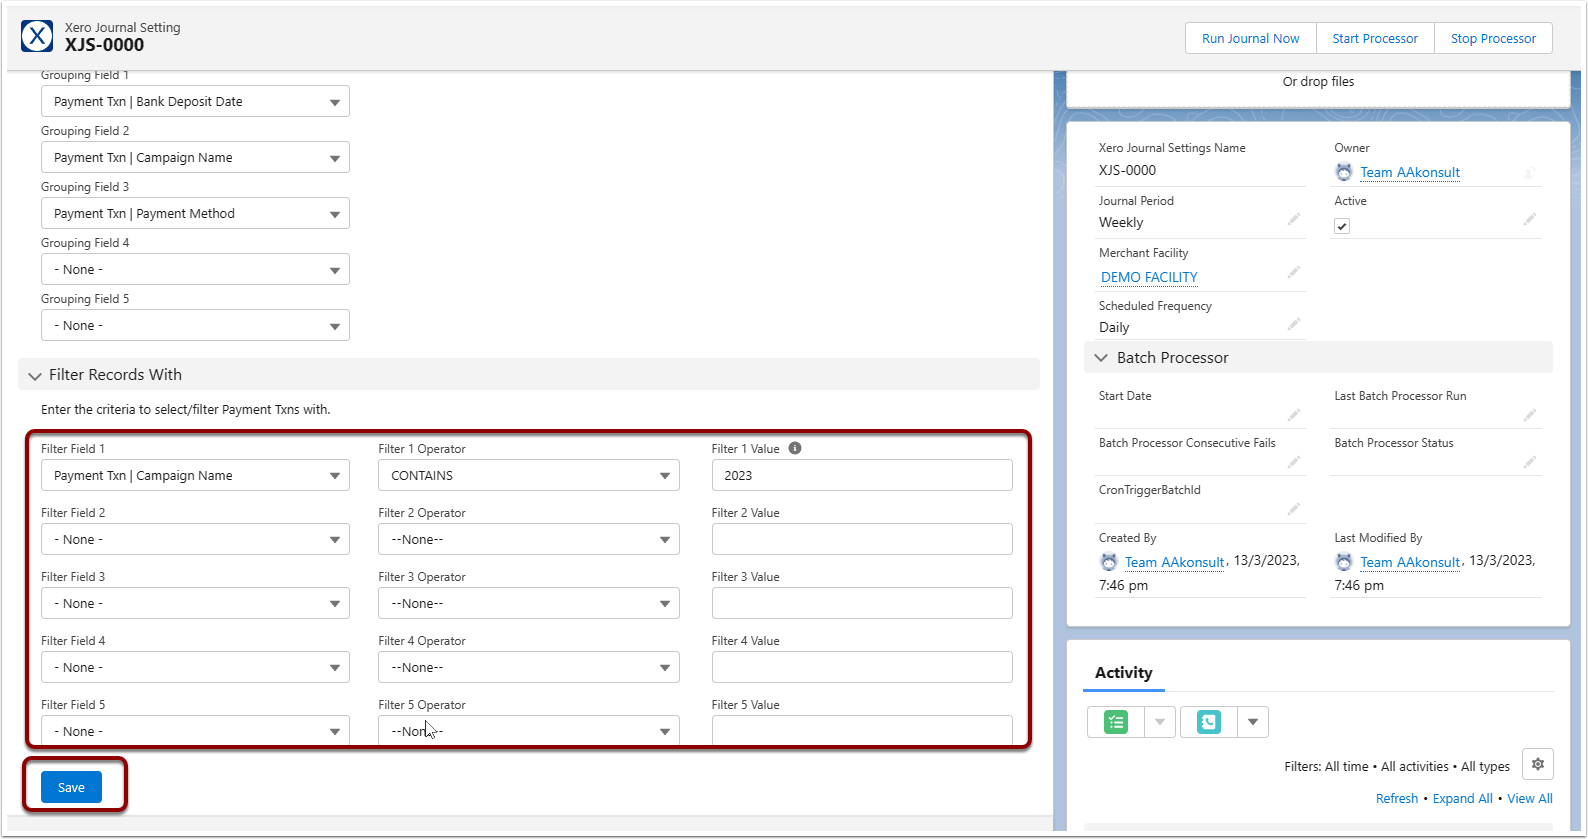
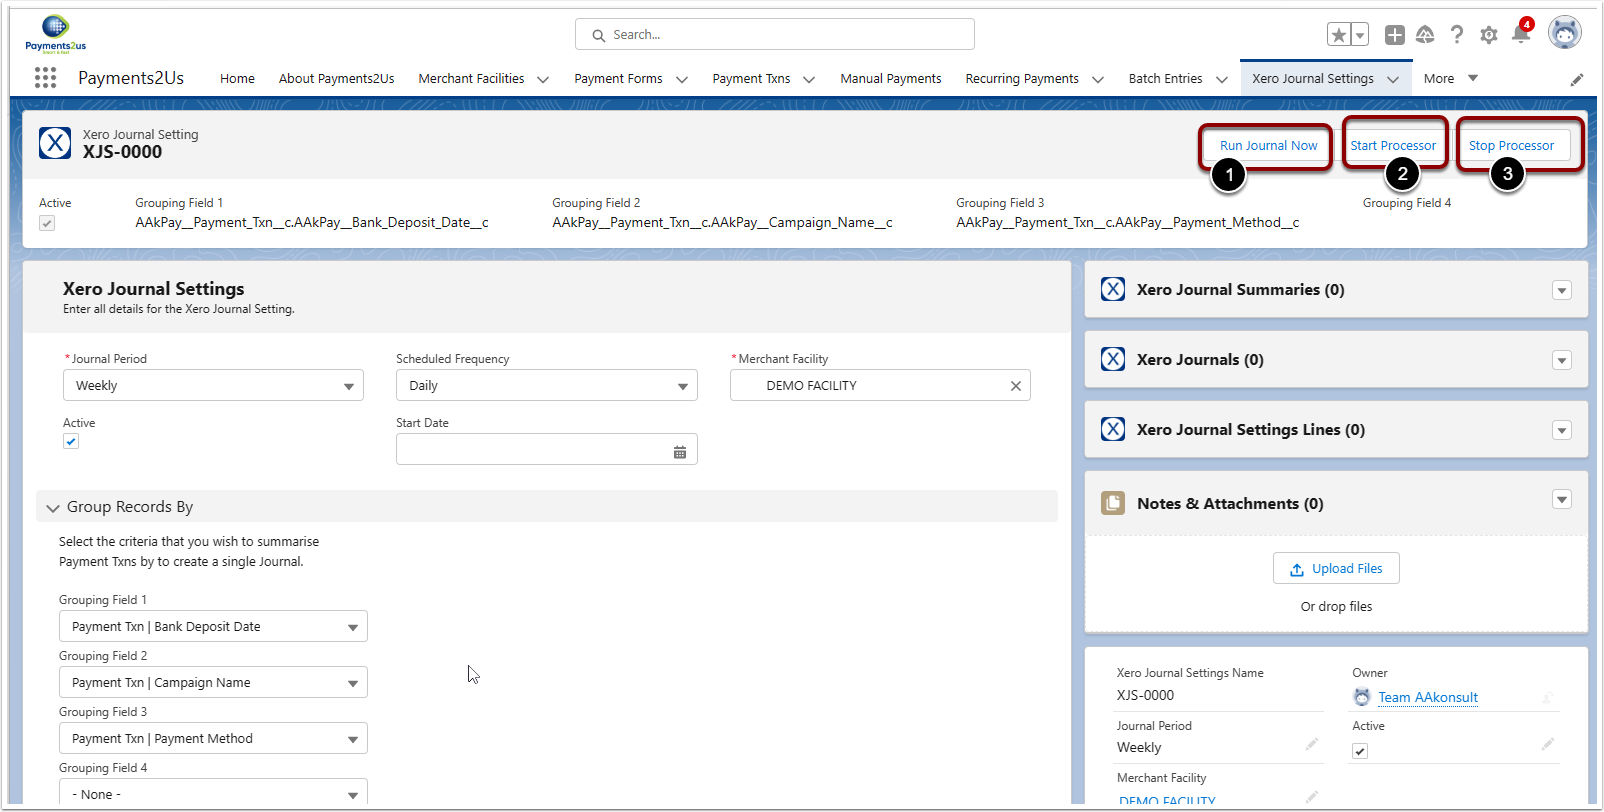
2.3. Select how the Journals will be grouped
You can select upto 5 criteria to group records. In the below example, one Journal will be created for each unique combination of Payment Txns where:
- Bank Deposit Date
- Campaign Name
- Payment Method
If you are using Split Payments, then you will most likely want to summarise by details on the Payment Item records. This is the individual split allocation.

2.4. Select Filters for Journal Summarisation
For the Journal Summaristion, specify Payment Txn records that you wish to include in this summarisation. The below example is only including Payment Txns where the Campaign Name contacts "2023"
Press "Save" button after all details have been entered.
3. Running the Journal Processors
The Journal Processor will loop through all Payment Txns where the Banked Payment is YES and the Bank Deposit Date is in the schedule of dates to include in this run.
This will create a Journal Summary for all Journals created. It will create a unique Journal for each of the Grouped by Criteria and will link these to the source Payment Txn.
- Press "Run Journal Now" to run the processor just once.
- Press "Start Processor" to schedule the Processor at the "Scheduled Frequency" specified on the "Xero Journal Settings" record
- Press "Stop Processor" to stop a previously scheduled processor.
4. Adding or updating fields used for "Payment Txn" level Group By or Filter By fields
4.1. Payment Txn Group By or Filter By fields overview
The fields available in the picklist options for Group By or Filter By are configurable through field sets on the Payment Txn Object or Payment Item Objects.
- Click on the setup cog, then select "Setup Menu"
- Click on Object Manager Tab
- Search "Payment Txn"
- Click into Payment Txn

4.3. Locate Fieldset to edit
- Select "Field Sets" tab
- Search "Journal"
- From the menu drop down, select edit for the Filter or Group by fieldset

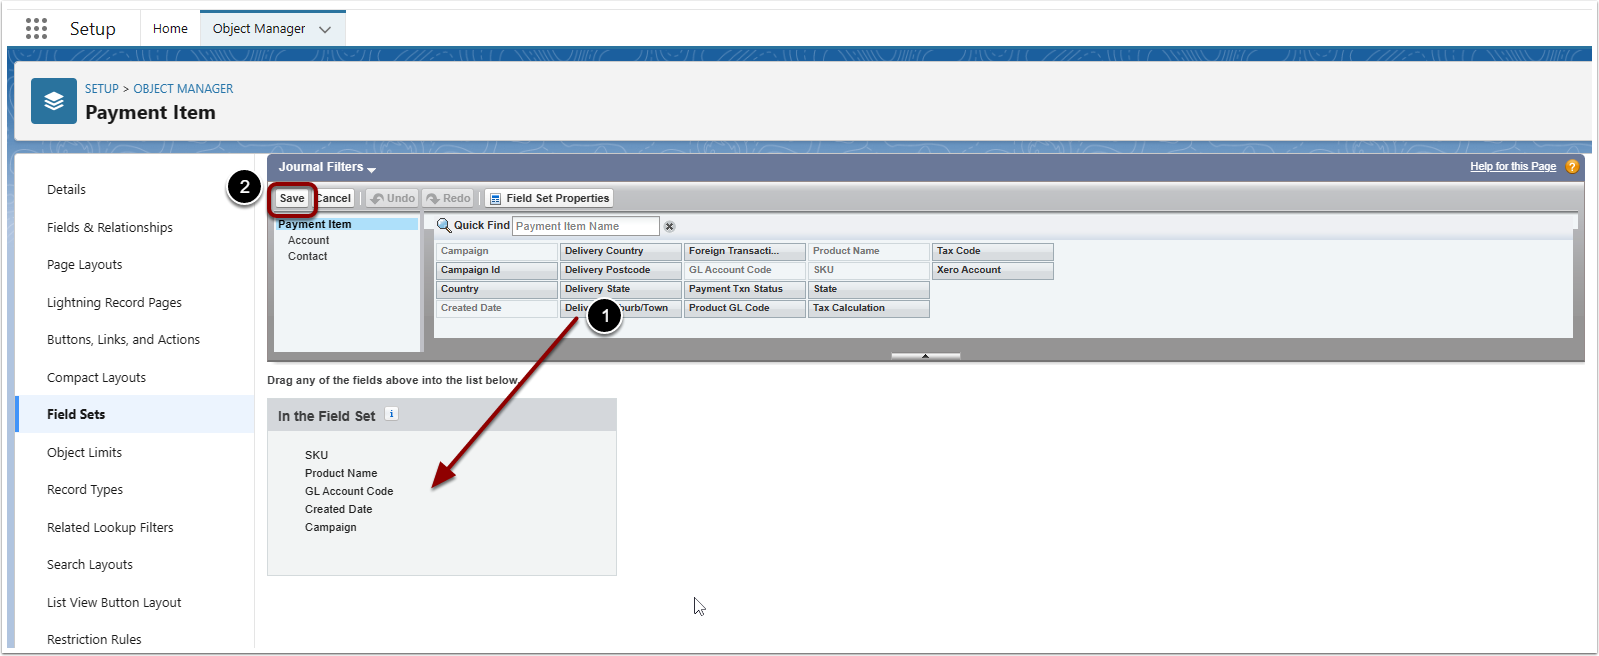
4.4. Select Fields to include
- Drag the field you want from the available fields onto the selected fields canvas
You can also drag fields off if you so wish too. - Press Save

5. Adding or updating fields used for "Payment Item" level Group By or Filter By fields
5.1. Payment Item Group By or Filter By fields overview
The fields available in the picklist options for Group By or Filter By are configurable through field sets on the Payment Txn Object or Payment Item Objects.
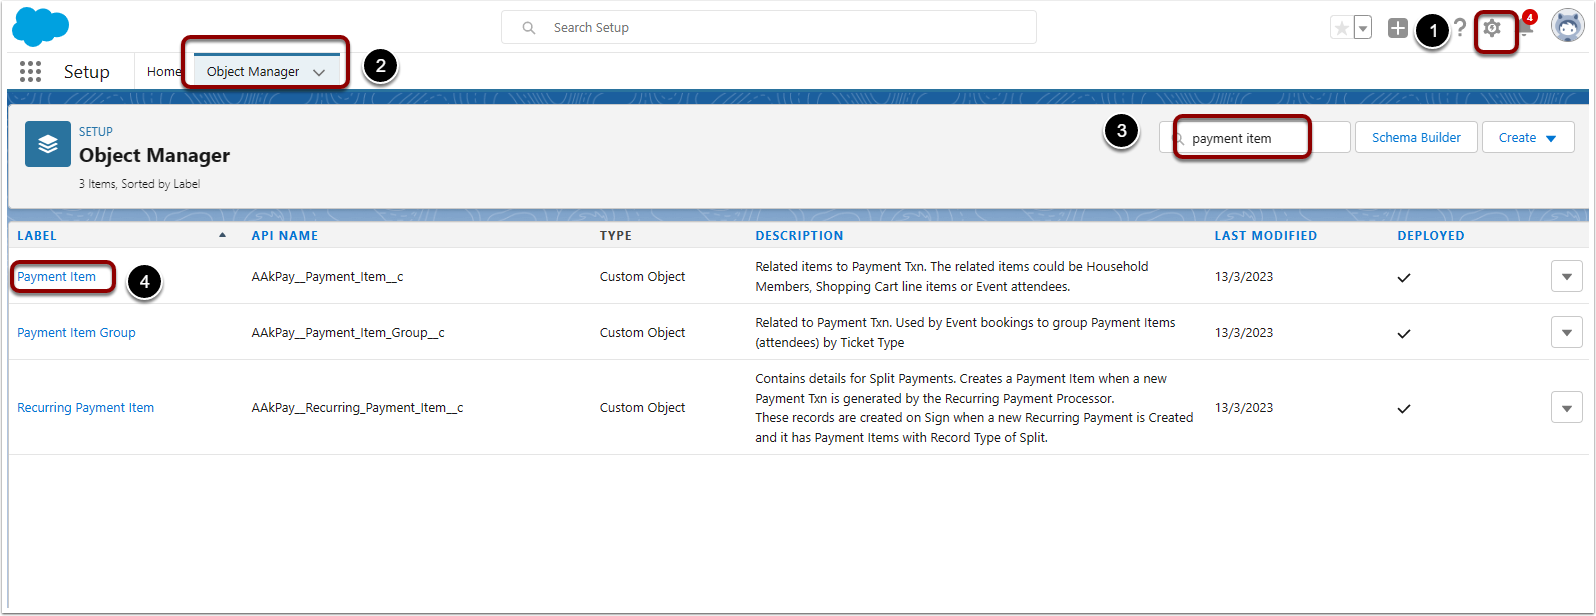
- Click on the setup cog, then select "Setup Menu"
- Click on Object Manager Tab
- Search "Payment Item"
- Click into Payment Item
5.3. Locate Fieldset to edit
- Select "Field Sets" tab
- Search "Journal"
- From the menu drop down, select edit for the Filter or Group by fieldset

5.4. Select Fields to include
- Drag the field you want from the available fields onto the selected fields canvas
You can also drag fields off if you so wish too. - Press Save