The buttons and links for address validation provides one option for using the address validation. This option places a button and/or a link that when press pops up a screen for entering the address information.
The alternative option for links and buttons is to override the new/edit page layouts for Leads, Accounts or Contacts. The option overrides the standard Salesforce input screen for these objects and includes the address auto-complete/validation.
Address buttons and links auto-complete and validation is available for the following objects in Salesforce CRM:
- Leads
- Contacts
- Accounts
You must first have setup data validation with the Data Validation Provider:
Quick Steps for installation:
- On the objects you wish to add validation, do the following:
- Edit the Page Layout
- Make standard address fields read only
- optionally add the Address Update Button
- optionally at the Address Update link below address fields
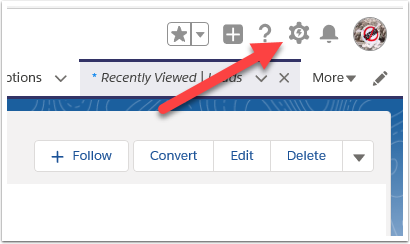
1.1. Go to a Lead Record and then go to the Setup Cog in the top right hand, and select Edit Page.
1.2. Select the Details Tab, then select Lead Layout

Locate a lead, click into the lead and press Edit Layout link.
Alternatively, click on setup cog at the top right to the screen and select Setup, navigate to Customize > Leads > Page Layouts. Click edit next to the page layout you wish to update
1.3. Make address fields read only

- Double click on the address field, or alternatively click on the spanner icon that appears when you hover over the address
- Select Read Only
- Click OK to exit
1.4. Add address update link
NOTE, the address update names change slightly for each Object (Account, Contact, Lead).
Account
- Billing Address Update
- Shipping Address Update
Contact
- Mailing Address Update
- Other Address Update
Lead
- Address Update

Click on the Address Update field and drag this below the address details.
This will provide a link where users can edit the address. You can use this with or without the Address Update button option
NOTE, the address update Button names change slightly for each Object (Account, Contact, Lead).
Account
- Billing Address Update
- Shipping Address Update
Contact
- Mailing Address Update
- Other Address Update
Lead
- Address Update
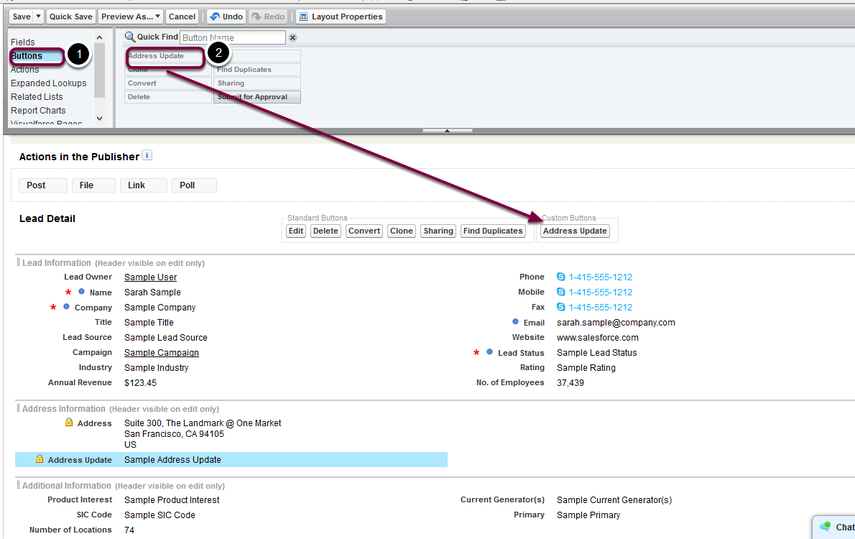
- Click on the Buttons selection object
- Drag Address Update button from the available buttons to the Custom Buttons Section
You can use this with or without the Address Update link option
1.6. Save the Page Layout
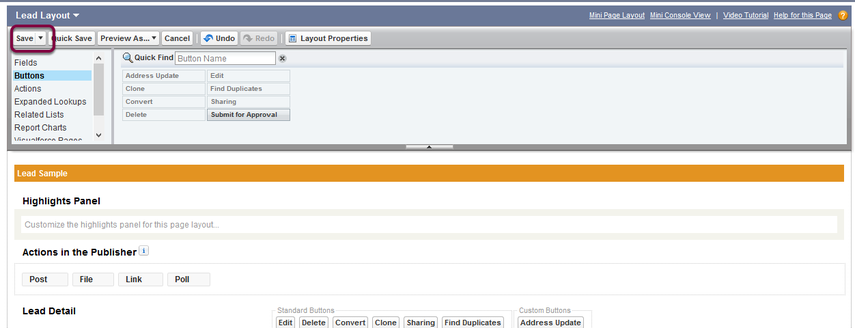
Make sure you press the Save button for closing the screen
You'll need to repeat this process for other layouts should they exist